AutoVehicle is an automatic car rigging plugin that rigs cars in just few clicks. This is a great plugin for beginners and modelers to quickly and easily rig their cars to test them out or even place them into game without any scripting knowledge, it also saves a lot of time.
How To Use
Step By Step Instructions
Create a new Cylinder and resize it to any size you want, it’s recommended that the size of the wheel on x-axis is 1 stud.
You can add more stuff to your car as long as you don’t rename important instances. You don’t have to weld stuff as it’s done automatically for you. You can find more information on how this plugin works by checking out the “Documentation” section.
Documentation
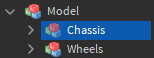
Wheels model contains your custom wheels.
Indicator tells the plugin on how to rig your car.
Chassis model contains the rig generated by the plugin and it also contains settings that can be modified in real-time.
More info will come out soon.
Download
Feel free to share your feedback on this plugin, as I am looking to improve!
I think its my browser, my laptop doesn’t work with chrome so I have to use edge (by “doesn’t work with chrome” I mean it bluescreens when I try to use it)
This is an update 1.0.1. In this update you will find the following changes:
Plugin now adds the attachments to the wheels automatically, so that means you no longer need to manually add attachments to the wheels.
New reserved name has been added HEADLIGHTS. This name is only reserved under the FAKE model, so you can name any Basepart as HEADLIGHTS in the FAKE model in order to give it functionality, in this case player can press L on the keyboard in order to activate and disactivate the head lights of the car.
New reserved name has been added TAILLIGHTS. This name is only reserved under the FAKE model, so you can name any Basepart as TAILLIGHTS in the FAKE model in order to give it functionality, in this case if the vehicle’s engine speed is being increased the tail lights will not be activated, however if it’s opposite then it will active itself.
Some changes were done to the default vehicle’s controller.
GUI has been made for the plugin.
There is one more functionality added to the plugin, in which plugin will automatically remove the old rig and create new one when you try to rig the vehicle using the plugin. This functionality is useful when you want to update the rig after an plugin update. This also creates an folder called RigData which should not be removed at any point as it stores information about the rig that can be used by the plugin to remove the proper instances out of your vehicle.
You can also see selected objects on the GUI and important change logs will appear there too.
In this release, you need to the following things:
Once you’ve downloaded the update for this plugin, update each rig by rigging it again with this plugin. But BEFORE you do this, please remove the rig files manually by yourself because the previous version of the plugin did not create RigData folder which stores the rig objects so the plugin could use them to remove the proper instances out of the vehicle. You won’t need to this manually after this update.
That’s all for this release!
Preview
If you are experiencing any issues with this new update, please let me know!
Amazing plugin, but i couldnt figure it out, so i got the example. Now, the problem is, if you press “D”, you’re going left, and if you press “A” you’re going right… Shouldnt this be swapped?
Go into the controls, search for something in the script: «Enum.KeyCode» and it will probably find a line where the input is, just change whatever the input is.
So. Enum.KeyCode.D —> Enum.KeyCode.A, or something like that.
This is an update 1.0.2. In this update you will find the following changes:
Bug Fixes
Added “Remove Rig” button, so you can remove the rig if you no longer want to use it
This should fix the “incorrect-direction” attachment bug. However I am not sure, so let me know if it fixed any problem that you experienced before.
That’s all for this release!
Update
The issue still occurs, It will be fixed once I will have time, for now you can play around with attachment rotations until the wheels are correctly rotated.
First the question: Why are all my wheels disappearing? I attached the base vehicle to a custom model. It drives amazingly and everything works, but all the wheels are missing. I followed the tutorial exactly and quad-checked everything. Has anyone else had this issue? Any possible fixes?
Now suggestion: Add an optional ‘CameraBlock’ - a block or model named ‘CameraBlock’ that will automatically teleport the player camera to this position/orientation. Perhaps one for each seat? If there is a simple way to add this currently, please lemme know.
Is there any trouble with the rigging part of the tires? I know that this approach of making cars can sometimes cause the tires to pop out/glitch on mobile/low memory devices.