I thought about that, the only issue is that if two target positions were close enough for the effects to intersect it would cause some issues with the UIGradients, I’m honestly not sure how I would go about it. Another option would be just layering distancefade objects with separate target positions, which would work if the effect was opaque but would overlap if it was transparent… only so much you can do without shaders lol
This is probably the coolest resource I have ever seen on this platform.
This is something I’ve seen in games and was definitely interested in, due to how it identifies where the player is and what part of for example a barrier wall should be visible.
I don’t have time to look into it more, so if you will, how does it take a single part but have different transparencies across it? If I’m seeing right, the showcase with the stairs and floating parts does just that–a single part (seemingly) but a portion of it can be fully visible while another portion is invisible.
thanks that means a lot ![]() I have some other cool effects I’ve been working on that I’m excited to share with the community
I have some other cool effects I’ve been working on that I’m excited to share with the community
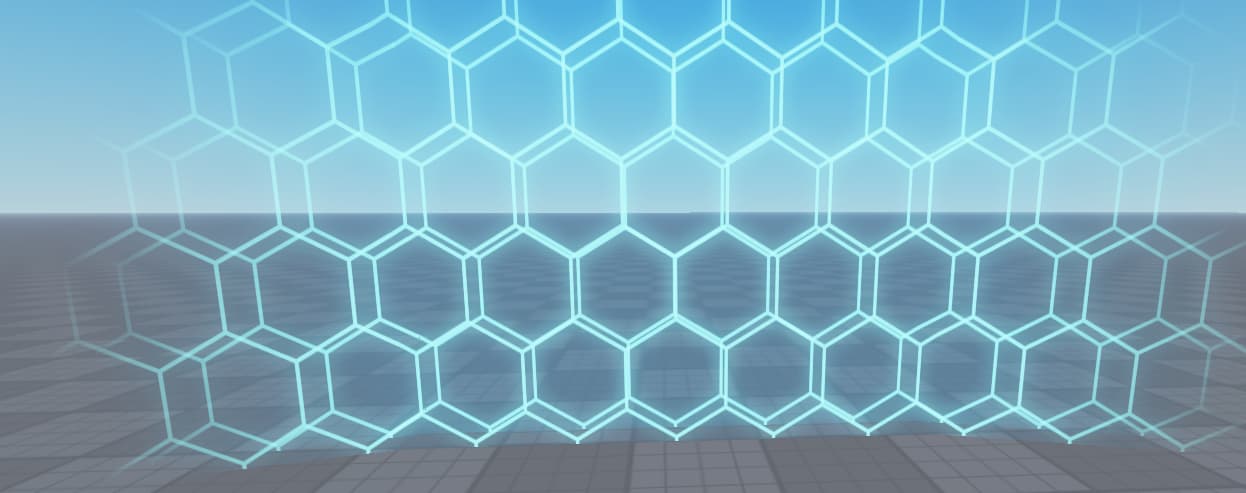
The trick is the module doesn’t actually modify the target part, but projects a new ‘SurfacePart’ onto the face(s) of the target part, that then follows the player’s position. Each SurfacePart has a grid of ImageLabels with UIGradients, and with some math it offsets each ImageLabel to endlessly scroll the texture while also modifying its UIGradient transparency curve to create the fade effect that you’ve pointed out. That’s basically the idea behind the effect, sorry if the explanation isn’t that good
Amazing resource, I’ll definitely be using it! Also here are some ideas I had, I know you probably won’t be updating it but I wanted to put these here incase anyone’s interested.
An option to add a second texture with a distance offset to create a 3D illusion effect
An option to make the texture to fade when near the edge of the part

“TextureColorFade” to add a color that the more transparent textures get. (I did it with some really hacky code on line 613 by changing the color of the ui gradient)
This is kind of what I imagined the forcefield material would be like when it was first added. Also, this is insanely cool.
Now that I think about it… Someone could use this to make a Domain Expansion effect for a jujutsu kaisen game… ![]()
![]()
![]()
Great ideas, that 3D illusion effect is actually so cool I never thought of that! also is it ok if I link your reply in the post as one of the showcases?
This is such an amazing module, I’ll definetly be using this for one of my upcoming projects. How long did it take you to create this?
Thx a lot, i was working on it on the side and it took about 3 weeks. The original effect was done with ViewportFrames but they were way too laggy so I basically had to start from scratch a week in
of course!
words words words words words
Looks pretty good man, i’ve been looking for something like this ![]()
Really cool effect - is there a way to go about getting all children in the folder without manually listing each one and naming them? attempting to just use GetChildren() throws the error “DistanceFade:173: attempt to index nil with ‘Z’”
I’ve got a sample of code that calculates the correct position of surface UI elements to make them look 3d like what you suggested.
I’d be happy to provide the code to you. But a fair warning the code is pretty bad ![]()
It’s a very nice module.
(my english is bad sorry. used translate)
It would be nice if you share the module in Roblox store.
And it would be nice to be able to enter cframe directly in the addface section instead of part and normal.
And I’m not sure if it’s possible, but when your part is a ball shape, it reflects it directly as a block. Maybe this can be done by using decal and editableimage.
I really like this! Thank you so much for making this and publishing it. It works great with a sci Fi type game!
is there a way to have multiple Step Parameters?
I want it to work for the players and any part/model as well.

unfortunately it’s not set up to work with multiple positions. what you could do is have multiple overlayed distancefade objects each with a different target position, though it might not have the intended effect
Thank you! You’re right, a much better version could be done with editableimages (I didn’t know about them when I made the module lol). Unfortunately I’m really busy with other projects and don’t really have the time to update it right now, but maybe down the line?

