Hey there, I am @madzxla_tycoon and I will show you how to highlight objects! At this time, highlights can be applied to models, players, meshes, and parts.
Keep in mind: As of today the maximum amount of highlights that can be rendered on the screen is 31 instances, if you disable a highlight it will still count towards the count, so deleting them would be best. Thanks to @IcyMonstrosity for the info!
I highly recommend reading the official Roblox developer documentation Highlight | Documentation - Roblox Creator Hub for further info, this post is a quick explanation of how to use Highlights!

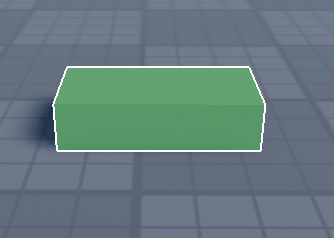
Highlighted part vs Non-highlighted part

Highlighted part’s couture appears behind walls (parts, objects, etc)

You can apply highlights to models, meshes, players and parts
📜 Summary
In this tutorial, we will go over:- How to highlight parts & models
- Highlight colors and transparencies
✏ (Possible) Use Cases
- In a tutorial, highlight something to draw attention
- In PVP or multiplayer games, you can highlight teammates
- Have a task system? Highlight a part or model or pretty much anything to let the player know where the task can be completed
- Red highlights can also be used as a damage indicator
❗ Highlighting Basics
Instructions with photos can be found by clicking on the steps.1. Create a part (skip if already done)
![]()
select workspace…

add the part…

and we have a part!
2. Insert the Highlight object
![]()
select my inserted part…

click the small plus…

search for “Highlight”…

and we have a part with a highlight!
✨ Customization
1. Colors
-
Open the Properties Tab (skip if you have it open)

head over to the view tab…
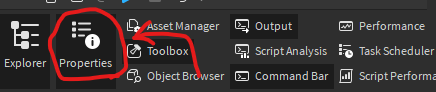
make it open…
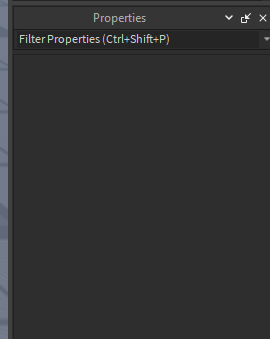
and we have it open! -
Select the Highlight inside the part

okay… whats next? -
Edit the colors!

Which one do we choose for all these options?

fill color… alright…

click on the current color (aka the red square) and pick a color… that wasn’t so hard!
amazing!!


2. Outlines
Outlines? You must like to customize things! Let’s get into it!
-
Open the Properties Tab (skip if you have it open)
head over to the view tab…
make it open…
and we have it open! -
Select the Highlight inside the part
okay… what next? -
Change the outline color! (or disable the outline)
Outline Colors

all these options again… we need to search for OutlineColor…

click on the color property…

great job! (as always)
Disabling Outline
when will they remove these useless options? we need to search for OutlineTransparency…
![]()
finally! a slider… now set the transparency to 1 (or if you don’t want it that noticeable set it to .5 or anything you want

and we have it disabled! now it looks like a normal colored part…
I hope this helped you understand highlights. If you have any additional questions, don’t be afraid to ask below! I would appreciate it if you would like this post to help it be seen by others who may need it.
Thanks for reading!
@madzxla_tycoon
- Yes
- No
0 voters