As in the video, given in the post, how do you make the wheel, which moves?
For the wheel, you can create a function to follow the mouse and rotate:
local function pointToMouse(frame)
	local frameCenter = frame.AbsolutePosition + (frame.AbsoluteSize/2) --Get the center of the frame
	local x = math.atan2(mouse.Y - frameCenter.Y, mouse.X - frameCenter.X) --Get the angle relatively to the mouse (this is a real formula)
	local r = math.deg(x) + 90 --Turn the x variable to degress and add a padding
	frame.Rotation = r --Set rotation to frame
end
Then just add this to a loop, here is a possible solution:
game:GetService("RunService").RenderStepped:Connect(function()
	pointToMouse(script.Parent)
end)
Note: This is just a prototype I made for testing, so there might be better approaches for this, but you can get the idea of how to do it
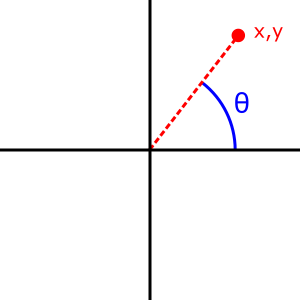
Can you explain what is atan2?
Atan2 is a mathematical function which gives you the angle represented in the Euclidean plane based on the x and y values, but the result given by this function in radians that’s why we have to convert it to degrees; here a more visual representation:

Also, look
(frame.AbsoluteSize/2) -- 61,48
Now if you type 2 numbers by 2, what u mean
Ok, why did you add
local r = math.deg(x) + 90 -- why did you add 90 here?
local frameCenter = frame.AbsolutePosition + (frame.AbsoluteSize/2) --Get the center of the frame
This will get the center of the frame, because the default anchor point of a UI frame is top-left, so we currently have the position of this pivot (top-left), to get the position of the center of the frame (x and y) we have to increment half of the pivot position to itself, this should be better to understand:

Sorry for the bad drawing, hope you understand
And the part that I add 90:
local r = math.deg(x) + 90
As I said is a padding, because the X and Y of the mouse are not very precise, and for you to understand remove this addition to see what happens
Edit: About the first one, here is another recent topic that could explain a little better: