Man, I wish I was able to see this tutorial when I started scripting for the first time. I do hope other people will be able to see this tutorial and make use of it. In other words, thanks for the tutorial!
This tutorial is made really nice! I like this tutorial a lot. Good job!
A good way to learn how to use raycasting, thanks.
Thank you for the tutorial, this will help new developers to learn how to make raycasting guns, also why couldn’t you just use the built-in workspace function that has a reference to the Workspace instead of doing local Workspace = game:GetService("Workspace")? it’s easier to just use the first one.
I also have a suggestion, could you possibly make a simple tutorial that would teach us how to create a simple gun with bullets instead of raycasting this time?
If you want an example of this then take a look at the Roblox game Arsenal which have guns with bullets, I’m sure that there are people who would like to learn how to make that too! ![]()
Thanks for the tutorial! This will really help with my Lua knowledge.
Oh hey I have a question about that, would this:
local direction = (position - origin).Unit*300
have a different result of this?
local direction = (origin - position).Unit*300
Because I dont really understand why you need to do (endVector - startVector) instead of (startVector - endVector)
Yes there is a difference.
v = (a - b).Unit gives the vector from b to a.
Likewise,
u = (b - a).Unit would give the vector from a to b .
u would equal -v.
Wait so it means that its actually meant to be like that?
I thought I had to do
(startPos - goalPos).Unit
Because it seems more logical
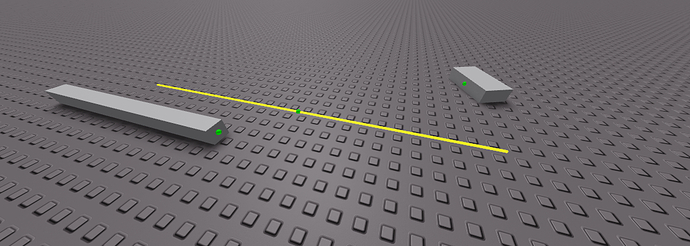
Here, let me show you an example.
The front face of the origin has the attachment.
The front face of this target also has an attachment at the front.
Once more, this visual part has an attachment as well.
If you run this code subtracting the ending position from the origin instead of vice-versa, the result is not what you want.
First, doing how I did it.
local Workspace = game:GetService("Workspace")

local origin = Workspace:WaitForChild("origin"):WaitForChild("Attachment").WorldPosition
local target = Workspace:WaitForChild("target"):WaitForChild("Attachment").WorldPosition
local visual = Workspace:WaitForChild("visual")

local result = Workspace:Raycast(origin, (target - origin).Unit*25)

local intersection = result and result.Position or origin + (target - origin).Unit*25

if result then
	print(result.Instance)
	local distance = (origin - intersection).Magnitude
	visual.Size = Vector3.new(visual.Size.X, visual.Size.Y, distance)
	visual.CFrame = CFrame.new(origin, result.Position)*CFrame.new(0, 0, -distance/2)
end
I get target in the output, cool.
Now doing it your way.
I don’t even know how to explain it but that is what happened.
Oh well thanks for your help though
Will this work for mobile devices?
Since it uses the peripheral target of the mouse, the object it is hovering over or put on, no. This only works for devices like a PC.
Could you be kind enough to guide me how to make it mobile friendly . . The cursor / tap to shot system from weapons kit game is what I hope to achieve . .
Construct a raycastparams, then set its FilterType to Enum.RaycastFilterType.Blacklist and add the character to the FilterDescendantsInstances.
local params = RaycastParams.new()
params.FilterType = Enum.RaycastFilterType.Blacklist
params.FilterDescendantsInstances = { player.Character }

...
local result = Workspace:Raycast(origin, direction, params)
My friend hired me to script a gun and I’ll be definitely using this. However, this is only single shot, is there a way to make it automatic?
tool.Activated:Connect(function()
remote:FireServer(cursor.Hit.Position)
end)
Change this to make it so that everytime the mousebutton2 button is held down fire a bullet. This can be done using RunService.Heartbeat (for constant checking) and UserInputService:IsKeyDown() to check if the key is down.
And if it is down then tell the server to fire.
I recommend something like this
local TriggerPulled = false
UserInputService.InputBegan:Connect(function(input)
if input.KeyCode == Enum.KeyCode.MouseButton1 then
TriggerPulled = true
end)
UserInputService.InputEnded:Connect(function(input)
if input.KeyCode = Enum.KeyCode.MouseButton1 then
TriggerPulled = false
end)
while TriggerPulled == true do
– insert gun shooting mechanics here
How would I make the bullet fly towards where you shot at rather than it being a beam?
Great tutorial also!
How would I get it to update and fire from the shoot part if the character is moving?
Also, is there a way I can add entire teams to this RaycastParams function?
FilterDescendantsInstances is a table so I guess you can just iterate over the team and add their characters to it.


