This tutorial will go step by step on how to make very basic Shop GUI.
Step 1: Insert a ScreenGui in StarterGui and add a frame. Name it ShopFrame.

Step 2: This is what it should look like. You can scale it however you want.

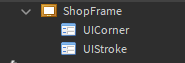
Step 3: Inside of the ShopFrame add a UICorner. This a good way of keeping your GUI clean and in good shape.

Step 4: Open the UICorner’s Properties and set its CornerRadius to 0.1,0

Step 5: Inside of the ShopFrame add a UIStroke, this setting allows you to have outlines in your GUI and it makes it look very fancy when used correctly.
Step 6: Inside of the UIStroke’s Properties, set the Thickness to 2,you can also change the color of the outline to a color of your choice ( Keep the StrokeMode on Contextual )

Step 7: Inside of the ShopFrame add a TextLabel, name it Title and copy the ShopFrame’s UICorner and UIStroke ( CTRL + D ).

Step 8: Inside of the Properties of the TextLabel, scroll down to Text and change the text to SHOP and TextScaled to True ( checked ) you can also change the Font to anything of your choice ( my personal favorite is FredokaOne ) and its color to anything that you like.

Step 9: This is how it should look like!.Move your Title in the center of your Frame and a bit upwards so it looks like a canister ( you can do whatever you want with it )

Step 10: Back to the ShopFrame! Inside of the ShopFrame add a TextButton and call it Exit

Step 11: In the Properties of the TextButton, change its BackgroundColor 3 to a nice red.
![]()
Step 12: Whilst you are inside of the Properties of the TextButton, scroll down to Text and change its Text Color3 to a nice white, its text to the letter X and its font ( you can change it ) to FredokaOne

Step 13: In the Exit button add the same UICorner and UIStroke as in the ShopFrame

Step 13.5: at the Properties of the UIStroke in the Exit button, make sure that the StrokeMode is on Border, or else it wont look like this tutorial.

Step 14: Lets add a ShopButton! Insert a TextButton in the ScreenGui and name it ShopButton, then as per usual copy the UICorner and UIStroke from the ShopFrame ( and dont forget to put the StrokeMode of the UIStroke in the ShopButton to Border, or else it wont work )

Step 14.5: Dont forget to go to its Properties and change its Text,Font and TextScaled as shown in the picture!

Step 15: This is how it should look!

Step 16: Lets start scripting!! Inside of the ShopButton add a LocalScript.

Step 17: Simple yet effective script!

Step 18: In the Exit button insert a local script.

Step 19: Here is the script!

Step 20: This is how it should finally look like!!

(Extra Steps)
Step 21: Go the Properties of the ShopFrame and uncheck Visible.

Final Step: You may experience your GUI to be out of place and weirdly shaped, so i reccomend you use this plugin: AutoScale Lite - Roblox
( AUTO SCALE STEPS: )
Step 1: Download the Plugin
Step 2: Open it on Roblox Studio
Step 3: Here is how it should look

Step 4: click on the ShopFrame and then go over at the Unit Conversion Tab and click on Position: Scale and Size: Scale
Repeat the same proccess for everything else.
And that’s about it!!
Thanks for reading this small tutorial, its my first ever tutorial so i hope you like it!!
Much love
-BiscuitDev