
Unleash Your Creativity with Substance Designer
In this mini-tutorial, we’re diving into the process of creating custom PBR (Physically Based Rendering) textures using Substance Designer.
While there are many workflows and softwares you can use to create PBR textures, this guide will focus on Substance Designer where you’ll learn how to set up Designer, use nodes, and add details to your textures. By the end, you’ll have the skills to craft procedural Textures and Materials that bring life and realism to your Roblox Games.
The Principles Behind Substance Designer
Understanding Texture Maps and Nodes
Substance Designer is a tool for making texture maps that follow specific rules. These maps use height information and black-and-white pixels to create textures.
The main way to make these maps is by using nodes, which are like building blocks. They might look sometimes like a messy spaghetti plate, but they’re essential for creating textures.
Exploring the Graph Workspace
Think of the workspace in Substance Designer as a canvas called the Graph. Here, we arrange nodes to build our textures. Each node lets us make different pixel effects.
So, in short, Substance Designer helps us make cool textures using nodes on a canvas called the Graph.
Getting Started: How To Launch and Setup Substance Designer
Getting Started with Substance Designer
After Substance Designer is downloaded and installed, you can launch the application and start immediately with a new Substance Graph.

After Launch, Click New Substance Graph
Once we click the New Substance Graph, another new window will pop up.
Setting up Initial Workspace and Resolution
From here we can choose Templates and we can also set up our initial working resolution. For this mini-guide, we select the Empty Template and we set the Parent size to 1024x1024 pixels.

Now press the OK button, and this will bring you into the development environment, like the image below.

Preferences and Settings for Roblox Studio
Configuring General Project Settings
Once we have successfully launched Substance Designer, we want to check our General Project Settings.
Ensuring Compatibility with Roblox Studio
To do so click Edit–>Preferences–>General–> and make sure that the Default Normal Map Format is set to OpenGL. This is the Normal Map Format we need for Roblox Studio.

At this point, we are good to go with our Setup. Now we can take care of the next important step.
How To Setup a PBR-Material
Creating a Base Material
Our goal is to create a material that contains four basic texture maps we can then use within our Roblox Surface Appearance.
- Color
- Roughness
- Metal
- Normal Map
Substance Designer comes with a Library, that is very useful, especially as a Beginner.
As mentioned in the short introduction. The main canvas we are using to generate nodes is called Graph. So let’s select the Graph Editor, and work from there.
First, press the space bar. A Seach box shows up. That allows you to search for any Library Assets. In our case, we want to create a Base Material. Enter “Base” into the search bar and select the Base Material.

Hit the Space Bar to open Search → For Base Material
The screenshot below shows the Base Material Node, which includes the four PBR-Texture Maps we want to create.

Base Material includes four essential texture maps for Roblox Surface Appearance
The Base Material node has like any other node, input values, and output values. Which means, what information we want to feed into our material, and what information we want to output.
Setting Up PBR Texture Maps: Color, Roughness, Metal, Normal
By default, the Base Material has no Input Nodes defined. This means we have to activate those within the Material parameters.

Select the Base Material, and set Base Color, Normal, Roughness, and Metallic to “True”
Once these nodes are activated, we can start using various nodes and plug them into the Input pins. So let’s do that next. First, we want to create a simple color node. In Substance Painter, that node is called Uniform Color.
Let’s press the space bar again, and search for Uniform Color. Select it, and connect the Output Pin from the Uniform Color to the Input Pin of the Base Material. See the screenshot below.
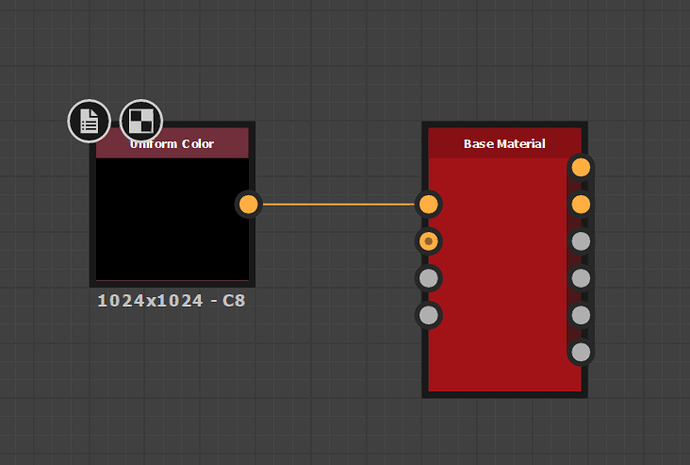
The uniform Output Pin is now connected with the Input Pin from the Base Material Color Node
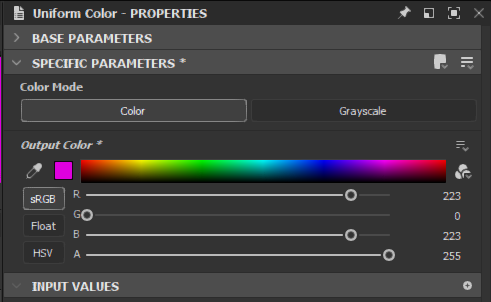
By default the color is black. But we can change this, by selecting the Uniform Color Node, and then changing the Output color parameters. Change it to any color of your choice.
You might have noticed, that some pins are orange, and some pins are grey. The orange pins indicate that this node is a color node. The grey pins indicate, that those pins are just working with grey-scale values.
Next in line is the Normal Map. That normal map will help us to give our material some extra details.
Let’s create our Normal Map
Now let’s get started with the creation process of the Normal Map. What we do need first, is a shape. We can create a shape by using the Node called “Shape”.
In our example, we create a Disc Shape and just change the scale to 0.8

Create a Shape Node → Disc
Next, I am going to tweak my shape using a Bevel Node. The Bevel Node gives me the option to give the edges a bevel that will transform the sharp edges into smooth round edges. You can adjust the bevel size with the Distance Parameter, see the screenshot below.

Bevel Node for a smooth edge
If we try to plug in the shape node to our Normal Map Pin it will not work because our Shape node has only grayscale values. What we have to do, to use that shape disc as a Normal Map is to convert it to a Normal Map.
We can do this by using the node called “Height To Normal World Units”.

Height To Normal World Units
Once we do have our Height To Normal World Units Node applied, I am adding a bit of a Blur followed by a Tile Generator. See the screenshot below which shows you the exact flow of the nodes, reading from left to right.

The Node Network
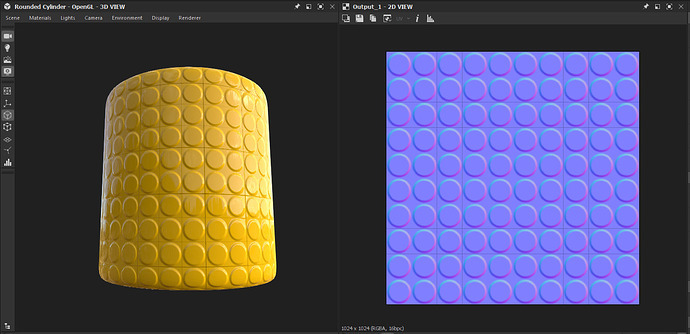
The image below shows what this Base Material looks like so far.
How To Create the Roughness Map
We have two more maps we need to create for our PBR Material - next in line we do need the Roughness Map.

Uniform Color → Grayscale Conversion
In our example, I am using again a Uniform Color node which I connect to a Grayscale Conversion node. We can change the color node to any grayscale value of our choice. And with that, we can control the grayscale value of our Roughness map.
Black means 100% smooth, super clear shiny reflective. White means the exact opposite - a completely “rough” surface. For the material, I pick a grayscale value that will give my material a reflective look similar to a non-slip mat.
Roughness Map applied
The Metallic Map
The same principles apply as well for the Metallic Map. A fully white value means it’s 100% Metallic and perfectly reflective. Black means not metal at all; a non-reflective surface.

The same material with a fully white value was applied to the metal map
Because our non-slip-mat material is plastic and doesn’t need any metallic values, we just can keep our metallic value black. And that’s it. See the screenshot below to see the final graph at this stage.

The final graph includes all the nodes for the final PBR Material
Creating and using Masks
Understanding Masks in PBR Material Creation
Masks are another important component of creating PBR materials with Substance Designer. Let’s say, we want to have our bumps appear in a different color. We can do this, by using a Mask.

Adding a Mask to use two different colors
The Graph above shows the nodes used to set up the mask.
Applying Masks for Color Variation
Blend Mode let’s you mix two different colors depending on the grayscale input intensity As you can see on the graph, the output from the Bevel node was used again for the input of the Tile Generator node. The Parameters from both tile generators are the same, so the mask matches the same pattern we use for the color input.
The main difference between those two Tile Generators Node lay in the Gray and Color difference.
The Output Pin from the Gray Tile Generator feeds into the Opacity Pin of the Blend Node, which defines the mask. Last but not least, I added another Uniform Color Node and selected a second color.

The Final Graph showing all nodes

Change Colors and Patterns on the Fly
The Graph lets you exchange Patterns, Colors, Masks, etc. on the fly. It’s a very fast way to generate your unique texture maps for your custom-made materials.
Exporting PBR Texture Maps
Finally, it’s time to export the texture maps, to upload them to our Roblox Studio application. You can export each texture map directly from the 2D View.
Finalizing and Exporting Texture Maps
For example, let’s double-click the Output Node from the Base Color to load that texture map into the 2D View. From here, we can click the Save Icon. Select the the format and directory of your choice and you’re done!


Uploading to Roblox Studio: Step-by-Step Guide
Now, that we have our four basic PBR-Textures generated, it’s time to upload them to our Roblox Studio Experience.

To do so, we can use the Asset Manager which allows us to upload all four texture maps in bulk.
View–> Asset Manager–> clicking the tiny Arrow Icon that lets you select your four texture maps in a bulk upload.

Asset Manager uploading our four texture maps
Next, we need to assign the texture maps to our mesh. To do this, we add the object called SurfaceAppearance, which allows us to assign the uploaded Texture Map IDs. See the screenshot below.

Explorer–>Assign the SurfaceAppearance and copy and paste each individual Texture Map ID into the attribute field
Questions? Let’s chat
In this guide, we learned how to craft custom PBR textures using Substance Designer. We explored setting up the software, using nodes, and creating essential texture maps like color, roughness, metallic, and normal maps.
We discovered how Substance Designer’s node-based system works, allowing us to manipulate textures with ease. By following simple steps, we can generate detailed and realistic textures for our Roblox games.
Now, it’s your turn! Dive into Substance Designer, unleash your creativity, and bring your Roblox creations to life with stunning PBR textures. Feel free to share your own implementations or ask any questions!
Resources:
[Download .zip file containing:]
How To Create PBR Textures using Substance Designer.zip (2.0 MB)
- Substance Designer File
- Roblox Place File
- PBR-Texture Maps