Roblox Moderation Bot

Table of Contents
What is this?
Roblox Moderation Bot is a Discord bot that allows you to ban, and unban players from your game straight from Discord. There are currently only two moderation commands: Ban, and Unban. There might be more commands coming soon.
The repository for this project can be found here.
How do I set it up?
Setting up API Key
-
Log into Roblox
-
Go to create.roblox.com
-
Once you’re on the website, create a new API key

- You’re now able to edit the API key. Be sure to title it to whatever fits your pleasing

- Scroll down until you see text saying: Select API System. Click on the button, then select DataStore

-
You’ll then see a button saying: Add API System. Click on the shown button
-
Upon clicking the button, you’ll be met with an option to add an experience. Type or select a name from the dropdown. The name has to be the name of the experience you want the bot to communicate with. After selecting the experience of your choosing, click Add Experience
-
Upon adding your experience, you’ll be prompted to add operations. Here are some recommended operations I recommend in order for the bot to work at it’s fullest


- After selecting your preferred operations, scroll down to security. If you’re planning to self host this bot, enter your IP address into the Accepted IP Addresses. If you’re planning to host the bot on a third party hosting service, enter in the following

-
After you enter an IP address, click on Save & Generate Key
-
You’ll then be prompted to copy your API key to your clipboard. Remember that Roblox will not store the API key, meaning if you exit out of the API key settings or refresh the page, you’ll no longer be able to access it

-
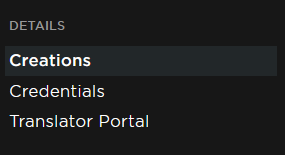
Since this will be important later, to get the UniverseID (the experience you want the bot to communicate with) go to creations in the details tab
-
In the experiences tab, search for the game you want the bot to communicate with, right click, and click Copy Universe ID


Setting up Discord bot
-
First, go to Discord Developer Portal
-
Click on New Application

-
You’ll see a prompt to name the bot. Name it to your pleasing
-
You’ll then be greeted with the application page. In the settings tab, click on Bot

- Then, click on the Add Bot button

- If you get this prompt, click on Yes, do it!

- Once you create your bot, scroll down and turn on these two options

- If you don’t get the option to copy your bot token, click on Reset Token

-
You’ll then get a prompt. Click on Yes, do it!
-
You’ll then be greeted with your bot token. Click on the Copy button

-
Assuming you downloaded the repository code and extracted it, open up your preferred code editor. I’m going to be using VS code
-
To open up the code folder, go to the top bar in VS code, click on File, then click on Open Folder

- Then, locate the folder with the code in it, then click on Select Folder

- Upon opening the folder, create a new file, and name it .env

- Open up the newly created .env file, and add these variables. It doesn’t need to be formatted the way I formatted it

-
Before running your bot, go back to the Discord Developer Portal
-
In the settings tab, go to OAuth2, then click on URL Generator

- Check the following boxes

- After selecting the boxes, scroll down and copy the URL into your address bar
- You’ll then be greeted with this page. Select the server you want to add the bot to

-
Click on Continue, and then click on Authorize
-
To run your bot, go to the header of the VS code app, click on Terminal, then click on New Terminal

- One more time, before you can run the bot, you need to install a few node files. Run the following commands in the terminal
npm install discord.js
npm install rblx
npm install @discordjs/builders
npm install dotenv
npm install @discordjs/rest
- Once your terminal is opened, type in the following into the terminal

How do I get the Client ID and Guild ID?
Client ID
- Open up Discord, and then go to User Settings

- Once in your User Settings, locate the Advance Tab, then turn on Developer Mode

- Exit out of your user settings, then navigate your way over to your bot, right click on the bot, then click Copy ID

- Paste the ID into the clientID variable in your .env file
Guild ID
Since this bot uses Discord’s slash commands API, there are two different options. Guild Commands, and Global Commands.
Guild Commands are slash commands that can only be used in a selected server.
Global Commands are slash commands that can be used in every server.
Guild Commands
- If you want the bot to only be active in one server, go to the server the bot is in, right click on the server, then click on Copy ID (This is assuming you have Developer Mode enabled)

- Paste the ID into the guildID variable in the .env file
Global Commands
-
If you want this bot to be active on multiple servers, in your code editor, open up the functions folder, then go into the handleCommands.js file.
-
Scroll down to line 36 and change Routes.applicationGuildCommands(clientId, guildId), to Routes.applicationCommands(clientId),
Conclusion
I hope this tutorial helped! If you have any questions or concerns, please contact me via my Developer Forum DMs.