Arm C0 Rotation relative to camera and compensating torso rotation

Context:
I’ve been stuck on this issue for multiple hours now trying random different options to reach my goal without success despite looking for other posts on this website. This happens as i’m trying to add an arm rotation to my combat system (which is very similar to the one on “Mount & Blade”), and it is necessary to the system because the player has to be able to adjust the hits to any part of the opponent’s body he wants to be able to hit because there is an armor system based on the armor level on a specific body part.

The issue:
With a bit of research I’ve managed to do a simple arm rotation script which works partially as expected. The arms go up and down as they should based on the camera’s orientation. Here is an example:

In that example, it works as it should. However, the moment I hold left click (which basically “prepares” my attack until I release my LMB), when the torso is rotated due to the animation, the arms still go up and down but relative to the torso (which isn’t exactly what I want). The problem it causes is that whenever the player looks up or down, now it does something like this:

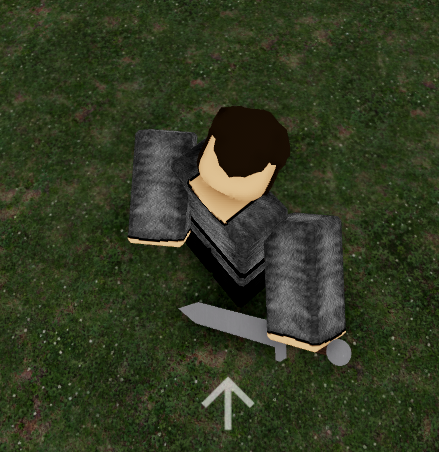
As you can see, it’s not very useful in order to be able to accurately adjust your hit (and this will especially be an issue with pikes/spears). Here is the expected behavior that I’ve manually reproduced:

The code:

rs.RenderStepped:Connect(function()
	local camDir = char.Torso.CFrame:ToObjectSpace(camera.CFrame).LookVector
	local headDir = char.Torso.CFrame:ToObjectSpace(char.Head.CFrame).LookVector
	local rArmDir = char.Torso.CFrame:ToObjectSpace(char["Right Arm"].CFrame).LookVector

	neck.C0 = neckOrigin * CFrame.Angles(0,0, -math.asin(headDir.X)) * CFrame.Angles(-math.asin(camDir.Y), 0, 0) * CFrame.Angles(0,0,math.asin(headDir.X))

	rShoulder.C0 = rShoulderOrigin * CFrame.Angles(0,0,math.asin(camDir.Y))
	lShoulder.C0 = lShoulderOrigin * CFrame.Angles(0,0,-math.asin(camDir.Y))
end)

Note:
Please, when formulating a response, start under the assumption that I cannot understand half of what you are saying when it’s math related (because it is likely going to be the case).

Does anyone have a solution to this problem?

Thanks for the help.

Interesting problem, quite tricky as well as with all CFrame problems

Since the problem is caused by animations changing the torso rotation.

A CFrame calculation should be done to counteract this rotation:

local rootJoint = char.HumanoidRootPart.RootJoint
game:GetService("RunService").Stepped:Connect(function(dt)
	local camDir = char.Torso.CFrame:ToObjectSpace(camera.CFrame).LookVector
	local headDir = char.Torso.CFrame:ToObjectSpace(char.Head.CFrame).LookVector
	local rArmDir = char.Torso.CFrame:ToObjectSpace(char["Right Arm"].CFrame).LookVector
	
	rootJoint.Transform = CFrame.Angles(0,0,-math.pi/4) --Effects of animation rotation, since I dont have access to your animations
	
	neck.C0 = neckOrigin * CFrame.Angles(0,0, -math.asin(headDir.X)) * CFrame.Angles(-math.asin(camDir.Y), 0, 0) * CFrame.Angles(0,0,math.asin(headDir.X))
	
	local _, _, z = rootJoint.Transform:ToOrientation()	 --Get the Z axis rotation, which is the animation angle rotating the torso left or right (ex. clockwise/anticlockwise when viewing character from above)
	rShoulder.C0 = rShoulderOrigin * CFrame.Angles(0,-z,0)* CFrame.Angles(0,0,math.asin(camDir.Y))


	lShoulder.C0 = lShoulderOrigin * CFrame.Angles(0,-z,0) * CFrame.Angles(0,0,-math.asin(camDir.Y))
end)

Thanks for the response, however that doesn’t solve the problem. Now the arms are stuck in that position by default:
screen1

and the problem itself remains
screen2

I still couldn’t find a solution either

Try Removing the root joint part, its only there for debuggimg purposes.

ahh alright it makes sense

now it works perfectly from the sides, BUT i think it tries to compensate in the wrong direction when doing the attack from below, how would you fix that?

here’s the behavior on a side attack (works properly)

here’s the behavior on an attack to the bottom (it seems like it rotates it further counter-clockwise)

edit: it doesn’t compensate in the wrong direction as i said (at least i think), it just compensates much further than it should (i really can’t tell if it’s exactly this, but that’s approximately what i can see)

My method only compensates the extra rotation on the torso.

	local _, _, z = rootJoint.Transform:ToOrientation()	 --Get the Z axis rotation, which is the animation angle rotating the torso left or right (ex. clockwise/anticlockwise when viewing character from above)
	rShoulder.C0 = rShoulderOrigin * CFrame.Angles(0,-z,0)* CFrame.Angles(0,0,math.asin(camDir.Y))

If there is extra rotation, that means an extra CFrame probably due to .Transform. Did you animate the right arm for the scenario you had issues with?

Therefore I would look at disabling .Transform, or setting it to CFrame.new() to see if it decreases the amount of rotation.

rShoulder.Transform = CFrame.new()

or setting the Z angle which the extra compensation angle due to torso animations to 0 for that specific scenario only.

You’re right the animation already rotates the arm towards that side actually that’s why it goes further than it should, the script itself works fine. Which fix would work for solving that?

You should set Z angle to 0 for the right shoulder.

Thinking ahead now I do not recommend setting Transform to zero as it disables all arm animations.

How do i set transform to 0? I’m not familiar with transform

or do you mean just making Z = 0?

I’ve just done z = 0 and now the problem that happens is the fact that that there is no compensation at all. I think the only real solution here would be for me to remove the rotation in the animation itself, unless you also have another solution for that? I really am not sure

That is probably the answer,

By 0 I meant setting the rotation and position to 0.

Transform is the additional rotation CFrame a Motor6D uses to apply animations usually by the animation controller.

The equation is

Part0.CFrame*C0 *Transform = Part1.CFrame*C1

You can override it in .Stepped by setting it to CFrame.new() an empty CFrame with no rotation or position.

But this might remove your sword swinging animations as well.

Alright, thanks a lot for the help

also if I may ask, where did you learn/how did you get familiar with CFrames, C0s and all that? When looking for answers before posting I’ve seen a few other answers (on other posts) that were from you specifically

Thanks for asking.

It started back in 2020 when I asked for help with a turret problem.

Then I kept on researching CFrame formulas throughout the dev forum and even done some reverse engineering.

For example an arm point at script.

    -- get the rotation offset (so the arm points correctly depending on your rotation)
    local rootCFrame = HumanoidRootPart.CFrame;
    local rotationOffset = (rootCFrame - rootCFrame.p):inverse();
    
    -- since CFrames are relative, put the rotationOffset first, and then multiple by the point CFrame, and then multiple by the CFrame.Angles so the arm points in the right direction
    RightShoulder.Transform = rotationOffset * CFrame.new(Vector3.new(0, 0, 0), direction) * CFrame.Angles(math.pi / 2, 0, 0);

That and the weld equation provided by Roblox in an old CFrame article, seems to be not available anymore due to the new documentation allowed me to deduce this:

Thank you for all the answers! CFrames are one of the few things I cannot wrap my brain around for some reasons, I’ll definetly try to look at some formulas I can find on the forum to get a better understanding of it

No problem.

Another good technique is visualization.

You can visualize a weld or motor6D C0 and C1 using the formula.

local rShoulder = char.Torso['Right Shoulder']
local rShoulderOrigin = rShoulder.C0

local attach0 = Instance.new("Attachment")
attach0.CFrame = rShoulderOrigin
attach0.Name = "RshoulderC0"
attach0.Parent = rShoulder.Part0

local attach0 = Instance.new("Attachment")
attach0.CFrame = rShoulder.C1
attach0.Name = "RshoulderC1"
attach0.Parent = rShoulder.Part1

--Formula from
part1.CFrame * C1 == Part0.CFrame * C0
Part0.CFrame * C0 = JointWorldCFrame -- CFrame of where the joint is in world space or relative to the origin

This will visualize the axises and joint positions of a Motor6D/Weld joint and explain why you need to rotate in a certain axis, Z axis for R6 in this case.

You can also double confirm this with rig edit which is a great tool I used at the start when learning Motor6Ds/CFrames.

2 Likes

UPDATE (in case anyone needs this in the future):

After a few hours of persisting with the hope of finding the best possible solution, I have finally managed to find it.

rs.RenderStepped:Connect(function()
	local camDir = char.Torso.CFrame:ToObjectSpace(camera.CFrame).LookVector
	local headDir = char.Torso.CFrame:ToObjectSpace(char.Head.CFrame).LookVector

	local _, _, z = rootJoint.Transform:ToOrientation()	 --Get the Z axis rotation, which is the animation angle rotating the torso left or right (ex. clockwise/anticlockwise when viewing character from above)

	neck.C0 = CFrame.new(neckOrigin.Position, camDir*40) * CFrame.Angles(math.rad(90),math.rad(180),z)

	rShoulder.C0 = CFrame.new(rShoulderOrigin.Position, camDir*40) * CFrame.Angles(0, math.rad(90)+z, 0)
	lShoulder.C0 = CFrame.new(lShoulderOrigin.Position, camDir*40) * CFrame.Angles(0, -math.rad(90)+z, 0)
end)

Explanation:
The answer was actually easier than I thought. What I did is simply face C0 towards where the camera was looking at (multiplied by 40, otherwise the direction values are too small and it ends up with a slightly off alignment). The CFrame.Angles() are simply used in order to make the right face of the limb/head face towards the camera’s orientation, and the “z” value (which I got from @dthecoolest 's help on this post), helps match the torso rotation in case of an animation, otherwise it would be completely misaligned when using animations.

I assume that, if your animations also rotate on other axes, you can also add those values for the X and Y axis to compensate. But in my case, the Z axis is sufficient.

Little note:
This turns the limbs/head 360° in all directions. In my case it doesn’t cause any problem due to the scenarios in which I use it, but if you want to “clamp” the max orientations, I assume you’d need to get the relative orientation from the Torso’s orientation and clamp it if it’s too high or too low in the negatives.

The result:


and it even works with my horses too! (altough i’m going to have to rotate the torso too for a better result here)

2 Likes

This topic was automatically closed 14 days after the last reply. New replies are no longer allowed.