Introduction:
- Hey there! I’ve been working as a UI designer for a while now, and let me tell you, adjusting anchor points for each UI element can be quite a pain. I’m not a fan of the plugins either, where you have to select all the UIs and then press the plugin button. But guess what? After doing some intense research, I stumbled upon a plugin that does all this work automatically for all the UIs under the focused screenGUI. It’s a total game-changer, saving me loads of time and effort.
Resources:
Tutorial on how to use it:
To get started, let’s create a screenGUI. But before we proceed any further, we need to enable a plugin. Don’t worry, I’ve got you covered! Just follow these simple steps and we’ll be up and running in no time:
- Let’s get started by creating a cool screenGUI. You can name it anything you want, but for now let’s call it “Test Screen”. Sound good? Let’s dive in!
NOTE: “the plugin does not work if there are two screenGUI with the same name. so I suggest you to have different names for the ScreenGUI itself”

- NOW! we enable the plugin.

- Now You will get this screen in front of you
time to explain this:
We have two things to consider. First, we have the name of the Screen GUI. Second, we need to decide how long the plugin should take to check the Screen GUI. Enabling this option is a good idea if your device is laggy. However, I suggest leaving it blank as it adjusts the UI instantly. - Let’s select our ScreenGUI now

- next we will have a pop up that the plugin is now enabled.
- Let’s add a frame to test the plugin if it works.
- Now you should get your screen like this
as when you add your frame, it will be spawned right on the needed anchor point, no worries if you find it like this, just drag it to the middle and work on it as usual.
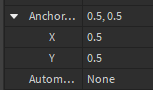
- Lastly if we check the anchor point of any just added item under the focused screenGUI would have them set to (0.5, 0.5)


Conclusion
- I wanted to share my experience with a plugin that I recently used to create UIs. I must say, it made my life so much easier! However, I did encounter a small issue with Texts getting broken (Only when you have a selected text size, e.g: 12). But don’t worry, I found a solution - just add a UIAspectRatioConstraint and your Texts will be good to go!
Thanks for taking the time to read through my tutorial. I’m not sure if many people will find it helpful, but I hope it can assist at least a few of you. Keep an eye out for my next tutorial!
