Warning: This tutorial has a ton of text. Instead of you punching me because of that, you can skip through a large amount of the introduction, and the paragraph under Time For The Actual Tutorial explains what type of ad we will be making. Some of it is unnecessary and just a bit of humor. You also might need a sense of humor before you read otherwise reading the tutorial will not be fun. I just tricked you into reading an extra paragraph, have fun now!
Introduction
Hey there! My name is Whimzer and at this very moment I am going to be your tutor or whatever you wanna call me. Call me dad if you want to. Either way, today I am teaching you or whatever the heck you want to be addressed by how to make an eye-catching advertisement. Before you read on just a quick disclaimer… the advertisement doesn’t literally catch eyes. You already knew that? Oh ok, just thought maybe you lacked the intelligence to understand a simple adjective.
Basics
In this tutorial we will be covering a skyscraper ad. A skyscraper ad is 160 pixels wide and 600 pixels tall. (160x600) You will require a rendering program, for example blender, and you will also require a photo editing program, for example photoshop or paint.
Time For The Actual Tutorial
First thing is first. Clickbait. YES! CLICKBAIT! You may be wondering what type of clickbait you need, correct? Well have you ever seen those ads that really make you question the sanity of other developers, such as the before they clicked after they clicked ads? Yes, that type of clickbait. One thing to understand about clickbait is that clickbait is not just centered on before and after ads, but can also be ads like use this code to earn this. Today I am teaching you the question a developer’s sanity ad.
Creating your clickbait ad:
- Create a render of two seperate roblox characters, one for the before and one for the after. Below is an example of two renders you could use. Make sure they are in simple positions.
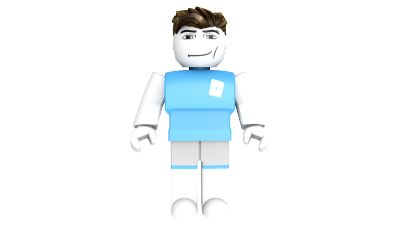
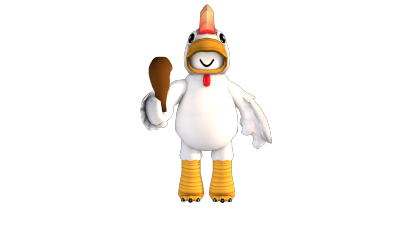
In this case, the ad will be focused around a group related around chicken. - Now you need to create a background for the ad. Using your editing software seperate the ad into two equal or close to equal sections, one section for one render, one section for the other. Two compelling colors when making an ad are red and blue.
- After you make the two sections, you want to tilt the two sections to your desired point. Another thing to add is a white line that acts as a barrier between the two sections.


- Now that you have finished creating two equal sections with a barrier between them to seperate the two renders, it is finally time to insert the renders. Insert the renders into your desired position.

- After you place the two renders into the desired position, you then want to add the text on the advertisement. The font I use for these types of ads is luckiest guy. When creating the text use a compelling font, it will end up bringing even more attention to the advertisement.

- Now it may seem like you are done, but don’t stop just yet, as there is one more step left. In this step we are going to add in special effects to the ad in order to make it stick out as much as possible. I use radial bursts on simple ads in order to bring even more attention to the main focus of the advertisement (the renders.) You also can use this time to make any final adjustments before finally completing your ad. I didn’t make any adjustments since I was pleased with the product I had before this final step. Below is the complete advertisement!

Thanks for using this tutorial! Be sure to leave a reply if you have any questions, or if you need extra elaboration.


