Transparency maps are important for textures, especially PBR textures. By default Substance Sampler can’t export transparency information directly, so this guide will show you how to utilize software such as Photoshop or Substance Designer to properly combine your opacity map that controls transparency, with your base color - a technique commonly called channel packing.
PNG File including the Transparency Channel
Method 1: Using Photoshop (External Tool)
- Open both your BaseColor and Opacity maps in Photoshop.
- Copy the Opacity map and paste it into a new channel in the BaseColor image.
- Alternatively, create a mask layer in the BaseColor and paste the Opacity there.
Method 2: Using an Export Preset
You can create your own export preset for 3D Sampler using 3D Designer. This creates a custom setting within Substance Sampler for future use.
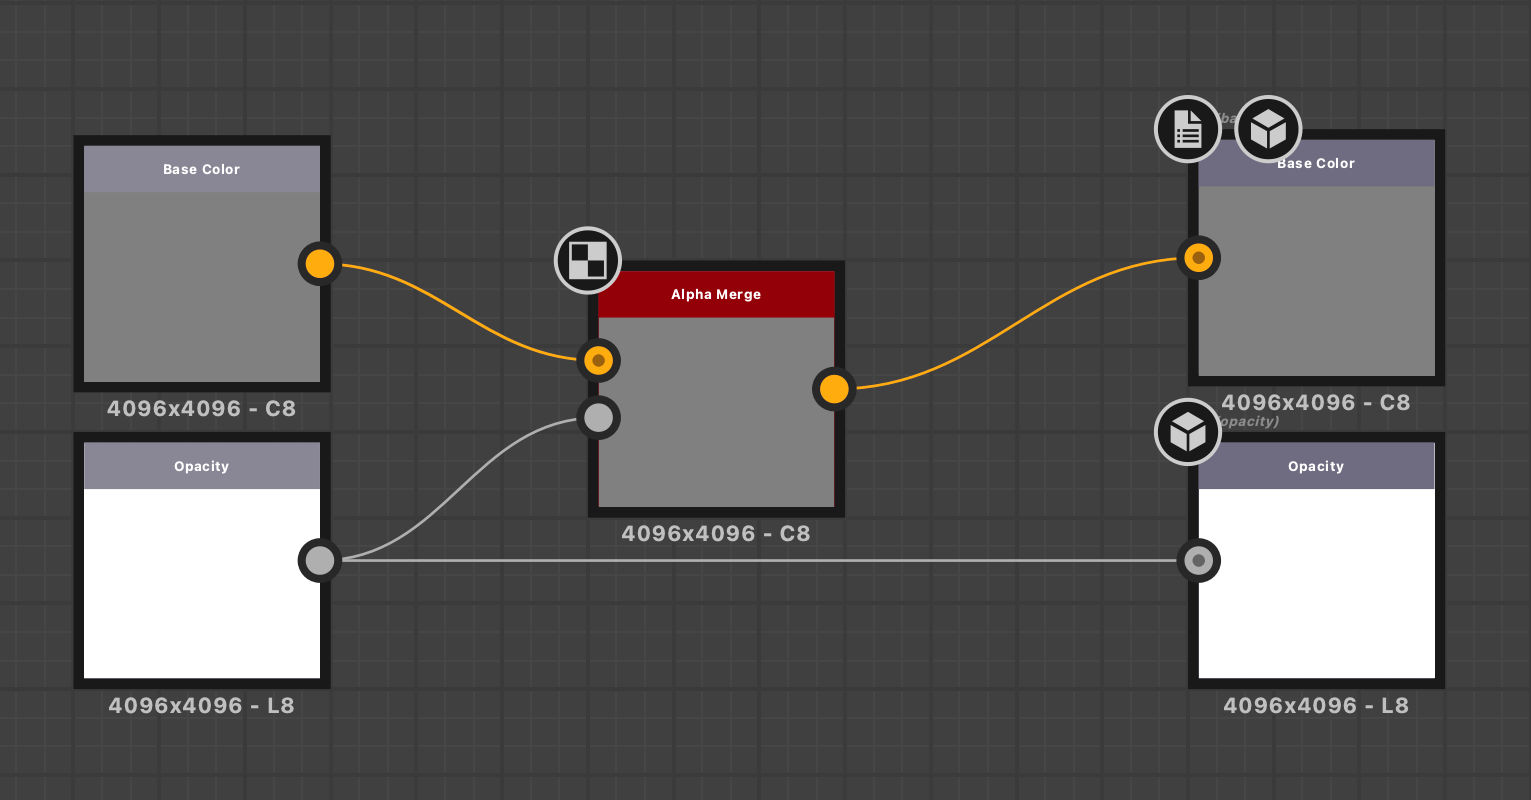
- In Substance Designer (separate software), create a new graph.
- Add an “Alpha Merge” node between the input and output of your graph.
- Keep the Opacity output of the Merge node in case you need it later.
- Save this graph as an Export Preset.
The screenshot below shows the Substance Designer Nodes.
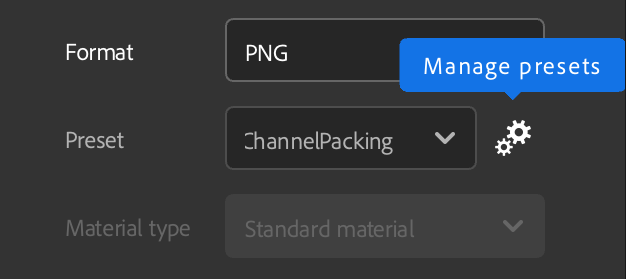
How To Setup the Export Preset in Substance Sampler
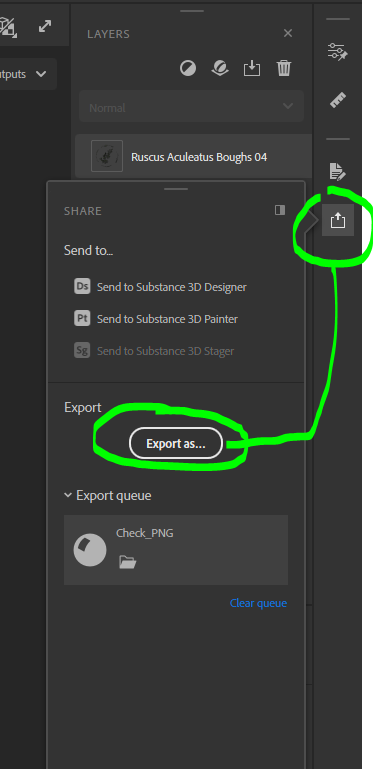
To add your Export Preset in Substance Sampler, click Export As… as shown in the screenshot below.
The following window will pop up.
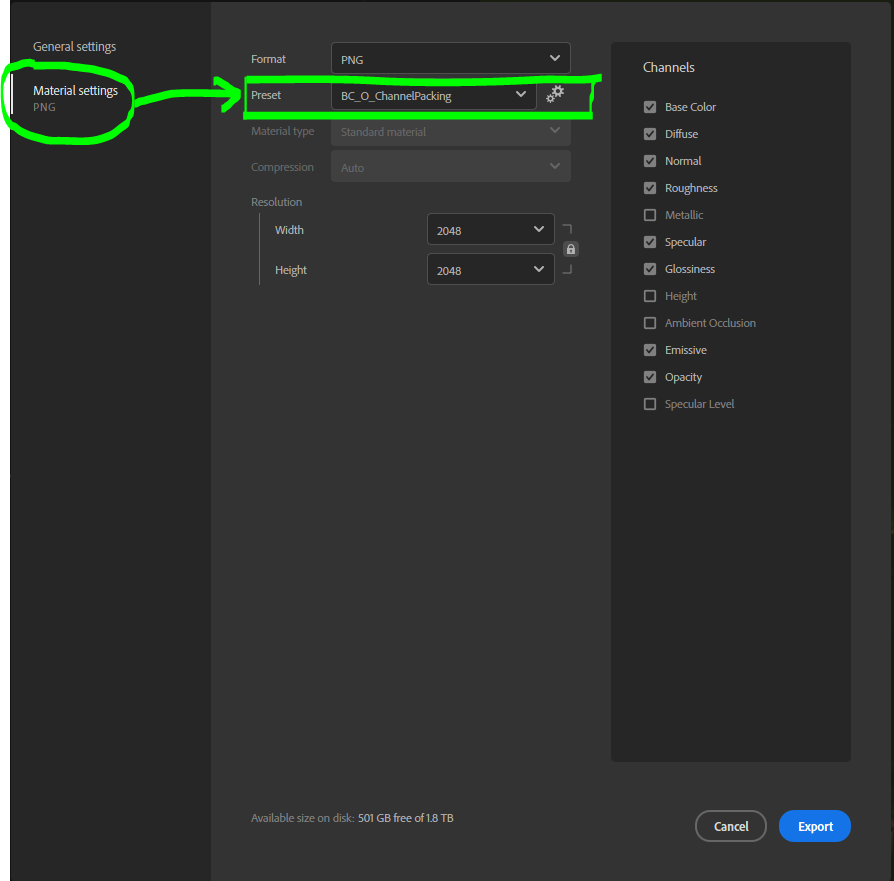
Click the Gear Icon and add the Export Preset in the 3D Sampler.
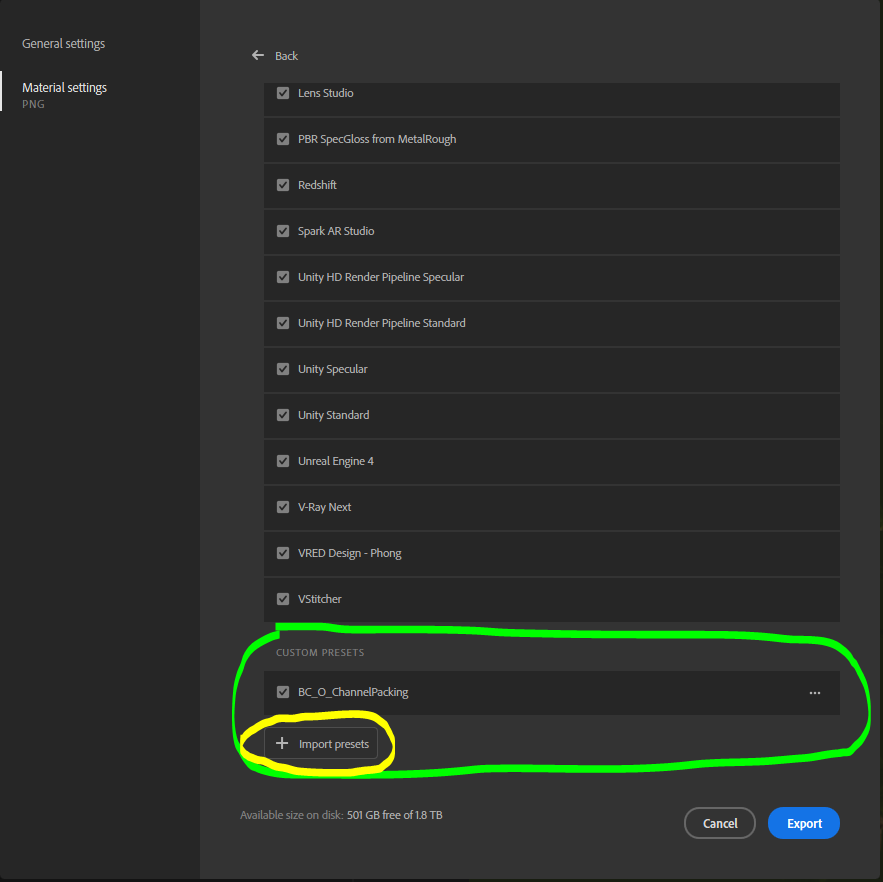
Import Presets for Substance Sampler
After that, just select your Preset and Export your Maps.
Now, whenever you export your textures, you can select this preset to include the transparency information!
Resources:
DOWNLOAD.zip file containing:
- PRESET → PNG OPACITY EXPORT for 3D Substance Sampler
- Substance Designer File
- Substance Sampler Example File
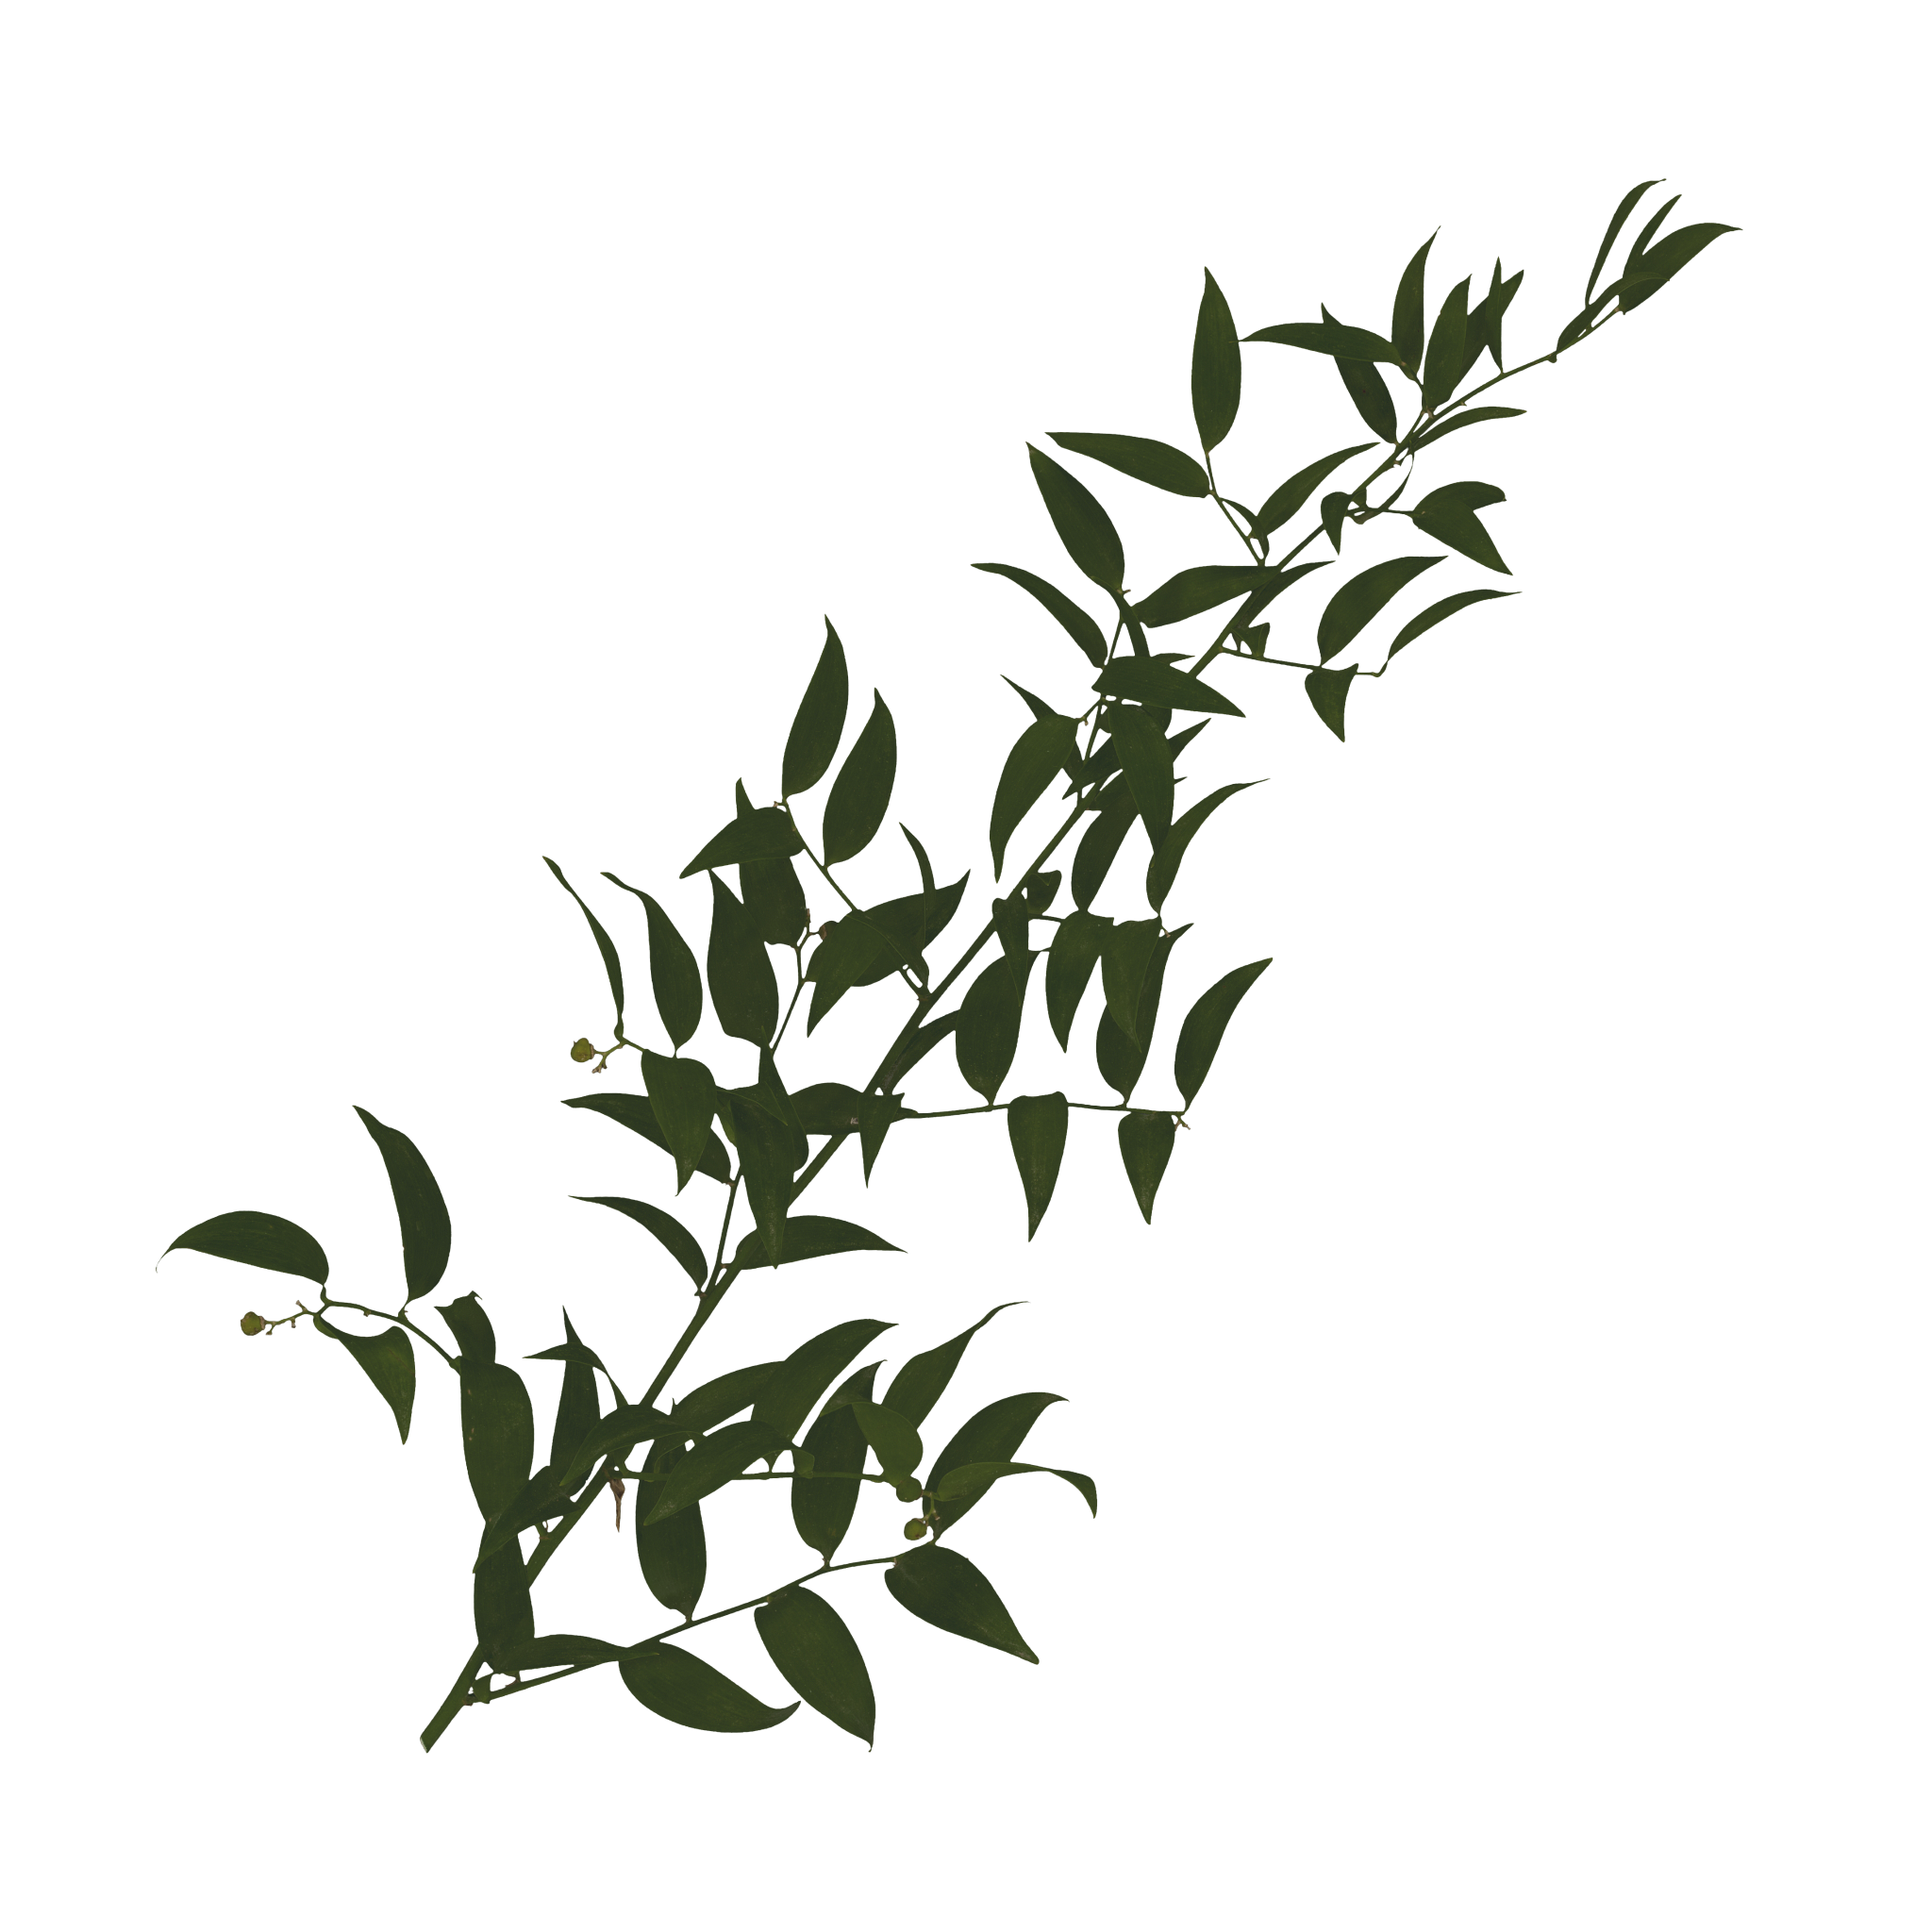
- Base Color PNG file
- RBXL Place File