Hello Developers,
You have often seen mining, where you dig blocks, and they have seperate health for each block too
Something lke this:
Now, we will learn how to do it
Required knowledge:
 This is a very easy tutorial, but you need to know the basic mentioned above
Step 1: Making block
You need to keep in mind, all blocks should be same size, or it will be hard to make a basic system, it will be more like irl where random blocks are there

Now after making your block, add two values in the block
- Int Value
- Int Value
You need to add 2 values, 1 for current health of block, 2 is maximum health of block

Re-name your block with a name, all your blocks which can be mined should have the same name
And make sure your HP and max hp of your block have same health, later the HP will changed
but the max hp will remain unchanged
Step 2: Making Health of block gui
You can make it however you like to, but I am making the UI like this:

Note that your block should have something like this:

Now we don’t want to show the health of block, place the billboard gui in ReplicatedStorage, do this for block too

Now we are 50% done, we need to make a shovel, and a script which spawns these mining blocks
If you don’t want to spawn blocks, and you want to keep them yourself at random positions, don’t do the script part
Step 3: Spawning blocks
Here is how it works
Now to make that, you need to know Position and Loops
Script:
local sand = game.ReplicatedStorage.MineBlock -- your block

for x = 1,100,5 do -- first value is starting position of x, second is last position of x
    for z = 1,100,5 do -- same thing but position of z instead of x
        task.wait(0.02)
        local clone = sand:Clone() -- clone brick and keep it in workspace
        clone.Parent = workspace
        clone.Position = Vector3.new(x,2.5,z)
    end
end
This is just incase if you don’t know starting pos of x
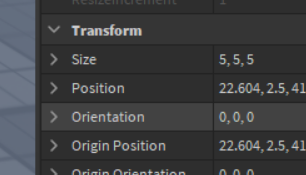
Read this image carefully, if you need to generate blocks from a particular block/position to another position/block, every position have x,y,z

Starting block

Ending block
You have 2 positions 10,22, now the script generates blocks between 10 and 22
For that you need to do this in the script I mentioned:
for x = 10,22,2
you need to however take the L.C.M as third number
If you keep 5, then you get error, as if you add 5 to 10, then you get 15,then you get 20,then you get 25
But maximum is 22, so you should choose L.C.M
Step 4: Making shovel
As mentioned, this tutorial is not for telling how to make a tool, its about how to make a tool which can dig the blocks
So make your custom tool, like a shovel

Add a local script in your tool
Script:
local player = game.Players.LocalPlayer
local mouse = player:GetMouse()

mouse.Button1Down:Connect(function()
    if script.Parent.Parent == player.Character then
        if mouse.Target.Name == "MineBlock" then
            local target = mouse.Target
            if target.HP.Value == 1 then -- if the block have 1 hp, then it gets deleted
                target:Destroy()
            else -- if block have more than 1 hp, then its hp goes down by 1
                target.HP.Value -= 1
                local guiclone = game.ReplicatedStorage.BillboardGui:Clone()
                guiclone.Parent = target -- the health gui
                guiclone.Frame.StatusFrame.Size = UDim2.new(target.HP.Value/target.MaxHP.Value,0,1,0) -- this line makes the health bar of the block the player is mining
            end
        end
    end
end)
However, you cannot understand any of the above scripts, if you don’t know basics, and you also need to understand how this script works
Tutorial is Done
Enjoy!
Note: This is client-based system, if you mine a block, it only dissappears for you, not for others
Check this DevHub article on Remote Events to make it server-based
