Physically Based Rendering (PBR) textures are advanced realistic textures that use multiple image maps to ensure a surface reacts realistically to various lighting and environment conditions. Many modern custom models today include PBR textures, and these textures can elevate the visual fidelity of your creations.
PBR textures are often created in third-party software, such as Zbrush or Substance Painter, and connected to a 3D model in a modeling software such as Blender or Maya.

If you have a model with PBR textures in your third-party modeling software, the following content can help you successfully import the model and associated PBR textures into Studio. To get started, ensure you have Studio installed and some model that includes PBR textures. You can follow along with a Roblox provided asset as well.
Configuring and Exporting
It’s important to correctly configure and export your PBR textures in your modeling software to ensure they meet Roblox’s texture requirements.
In Blender, ensure that your Shader Node tree uses the following structure:

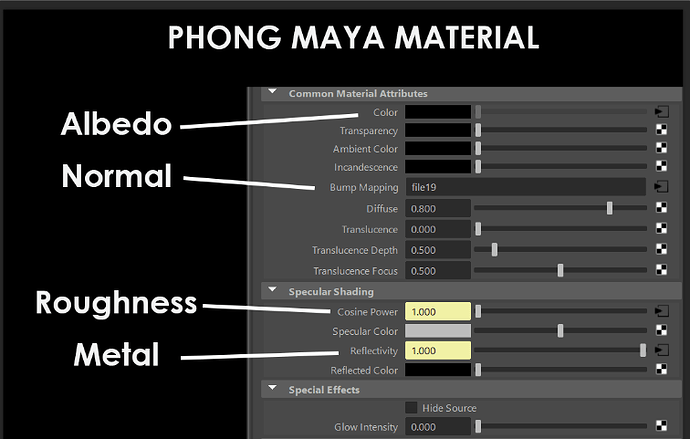
In Maya, a Phong shader with Color, Bump, Cosine Power, and Reflectivity works as well.
Use Blender and Maya Export settings for instructions on generating a .fbx to import into Studio. If you’d like to read more about how advanced textures work, see PBR Textures.
Importing with Studio’s 3D Importer
Studio’s 3D Importer is a powerful tool that brings in custom meshes and models into Studio. The importer automatically checks for textures, whether PBR or otherwise and automatically applies them to the model as well.
To quickly import your assets:
-
Navigate to Home > Import 3D.
-
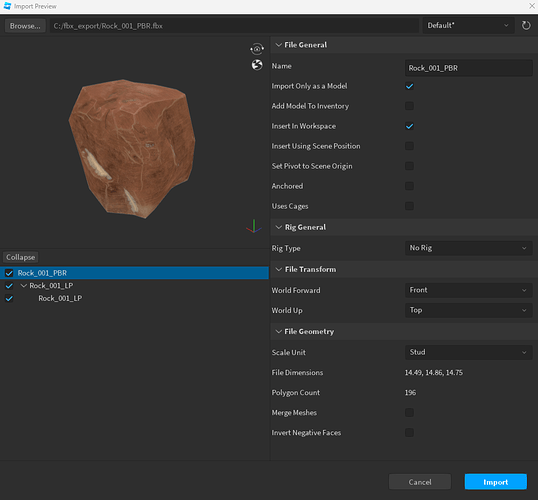
In the File Browser, select your 3D .fbx/.gltf model with PBR textures.

-
The 3D Importer should load a preview of your asset including textures. Verify any unexpected behavior or warnings that may display.
-
Select Import to add the model to your workspace.
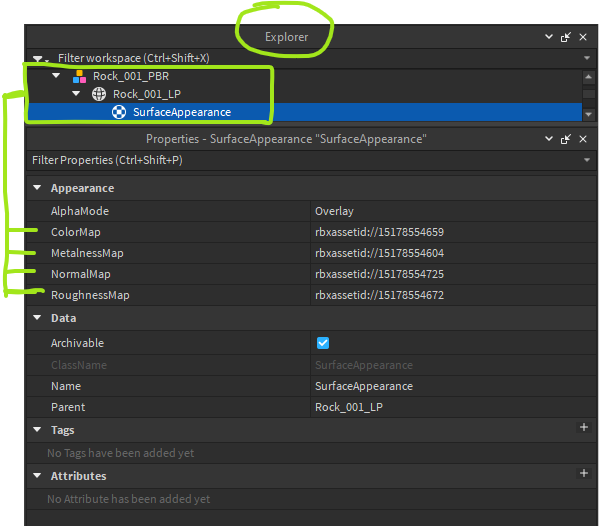
You can verify that your PBR textures have been correctly configured by navigating to the object hierarchy in the Explorer and verifying that a SurfaceAppearance object has been created within your model object. Each of the image maps should automatically be set to an assetID of the various PBR texture maps you imported.
We would love to hear your thoughts! Let us know below if you have additional tips, alternative workflows, or specific steps that turbocharge your PBR texture import process.