
Have you ever wanted to create something like this:
https://gyazo.com/cfd661205088264c09c77806c86b81e5
Or something around those lines. Before I always wanted to learn how to do simple things like that but I could never find anything that was helpful and straight forward so this tutorial is exactly for that. In this tutorial, we will go through a step by step process on how to do this!
Step 1:
You will first need to model or construct a chain loop like this(You can do this in blender and or studio whatever your preference is):

Step 2:
Create a chain link, simply move the chains within each other through the loops once you have you created a chain loop you like. It’s important to note that you need to scale your chain loop to a larger size or make the chain loop thicker. If you don’t this will cause problems later on which I will address later.
But your chain link should look something like this:

Step 3:
Notice on how the picture above the two end chain loops is moved closer in together, that is to help reduce the amount of force the chains will create when they drop. Now, make sure to anchor ONE chain loop on the end, it can doesn’t matter which one you are anchoring, everything else should be UNANCHORED.
https://gyazo.com/828e68c99394010cbc8baf64561bd0b2
https://gyazo.com/8c05c04c2d37dc08e81ff989432cab32
(Side note: You can stop here if you want for this more simple effect, it doesn’t use any weld constraints but you can apply it to anything as a prop simply anchor both end Chain Loops):
https://gyazo.com/4a528fd03d0c0e7b003be89f9cd7ecbc
Step 4:
Once you have done that you will need to have the model of a platform or anything you want really that we can weld to the chain link. In my example, I am using a platform with 4 hooks on the edges.
Step 5:
Do you have that? Great, now let’s learn how to use weldcontraints and make this model come to life. It might get kind of confusing but stay with me its pretty simple after you do it the first time! Now that you have your chainlink and your platform, leave the platform be for right now on your chain link you have that UNANCHORED chain loop on the other end, add a “WeldConstraint” into that Mesh.
https://gyazo.com/950f3d81b7d31324f26df446606ee171
Step 6:
Now that you have done that copy and past 3 more chain links and connect them to your hooks or wherever you want them on your platform like this with the chain loop with the weldcontraint going inside of the hook on your platform:

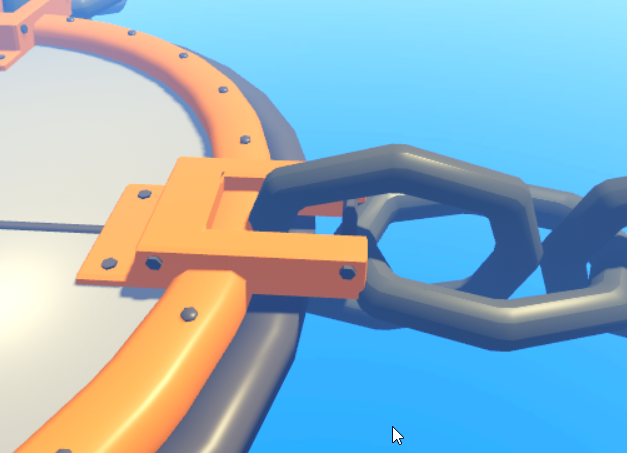
I put islands on the end for aesthetic purposes they don’t serve any real purpose! And as you can see I decided to use hooks on the ends of my platforms to make it easier I recommend you do the same!
Step 7:
This step is if you have multiple meshes for your platform. For this you need to choose the main part that you will weld everything to, to hold the platform together. For me, it is the orange border around the platform. So you will need to weld everything using weldcontraints to your main part that you have chosen. It would be a lot of pictures to show you how to do the first weld then you should be able to do the rest yourself:
https://gyazo.com/b2e6422fbd307e6463b8f25e61d8c628
https://gyazo.com/3e4ee8160547542f74dd4313a7325bbc
So what we did here is we added a weld constraint to the part we wanted to weld to our main part, and in the properties tab, we then selected what we were welding. So “Part0” will always be the main part that you should never have WeldContraint in so that should always stay the same. “Part1” is the thing you are welding the part to, so that property should be what you are changing every time when going through this process.
(Side note: The bottom line is the more meshes/parts you use for the platform for more things you are gonna end up welding so I recommend using the least amount of meshes as you can.)
Step 8:
After you have Welded every part of the platform to your main part following the steps above you are not ready to weld your chain to the platform. For this its the same process and luckily we already have the WeldContraint in the chain loop and in the position we want so now it’s easy. “Part0” is going to be the hook and “Part1” the chain loop since we want to weld the chain loop to the platform. And it should be like this:
https://gyazo.com/a32f5d64f9f8731955b6c08a28fb64ac
Step 9:
Once you have done that for the other 3 chain loops welding it to there respecting hooks you are all set! Go into your test tab and hit run and it should work!
If you run into any issues please let me know! It is pretty hard to explain this! If the chain breaks for any reason or you are having trouble welding leave a comment down below and I can go over how to customize the properties of the object’s mass etc.
If you want to see another tutorial about how to do these cool things leave like and comment on this post, if you want to see my other tutorial on Angular Velocity and making a cool wind turbine the link is below:
Thanks for tuning it!