I’m not an expert on 3D modeling and there’s probably an easier way to do this, but I believe you could do this through editing UVs in Blender. It may be a little time-consuming though.
I’m assuming you’re using the block rig. I would recommend using R6 over R15 as both are about the same and R15 has much more parts and faces which would make editing the UVs more difficult.
I’d also recommend separating the rig parts to make it easier to select and paint its faces in Blender. You can always put the parts back together in Blender if you need to see how your clothing looks.
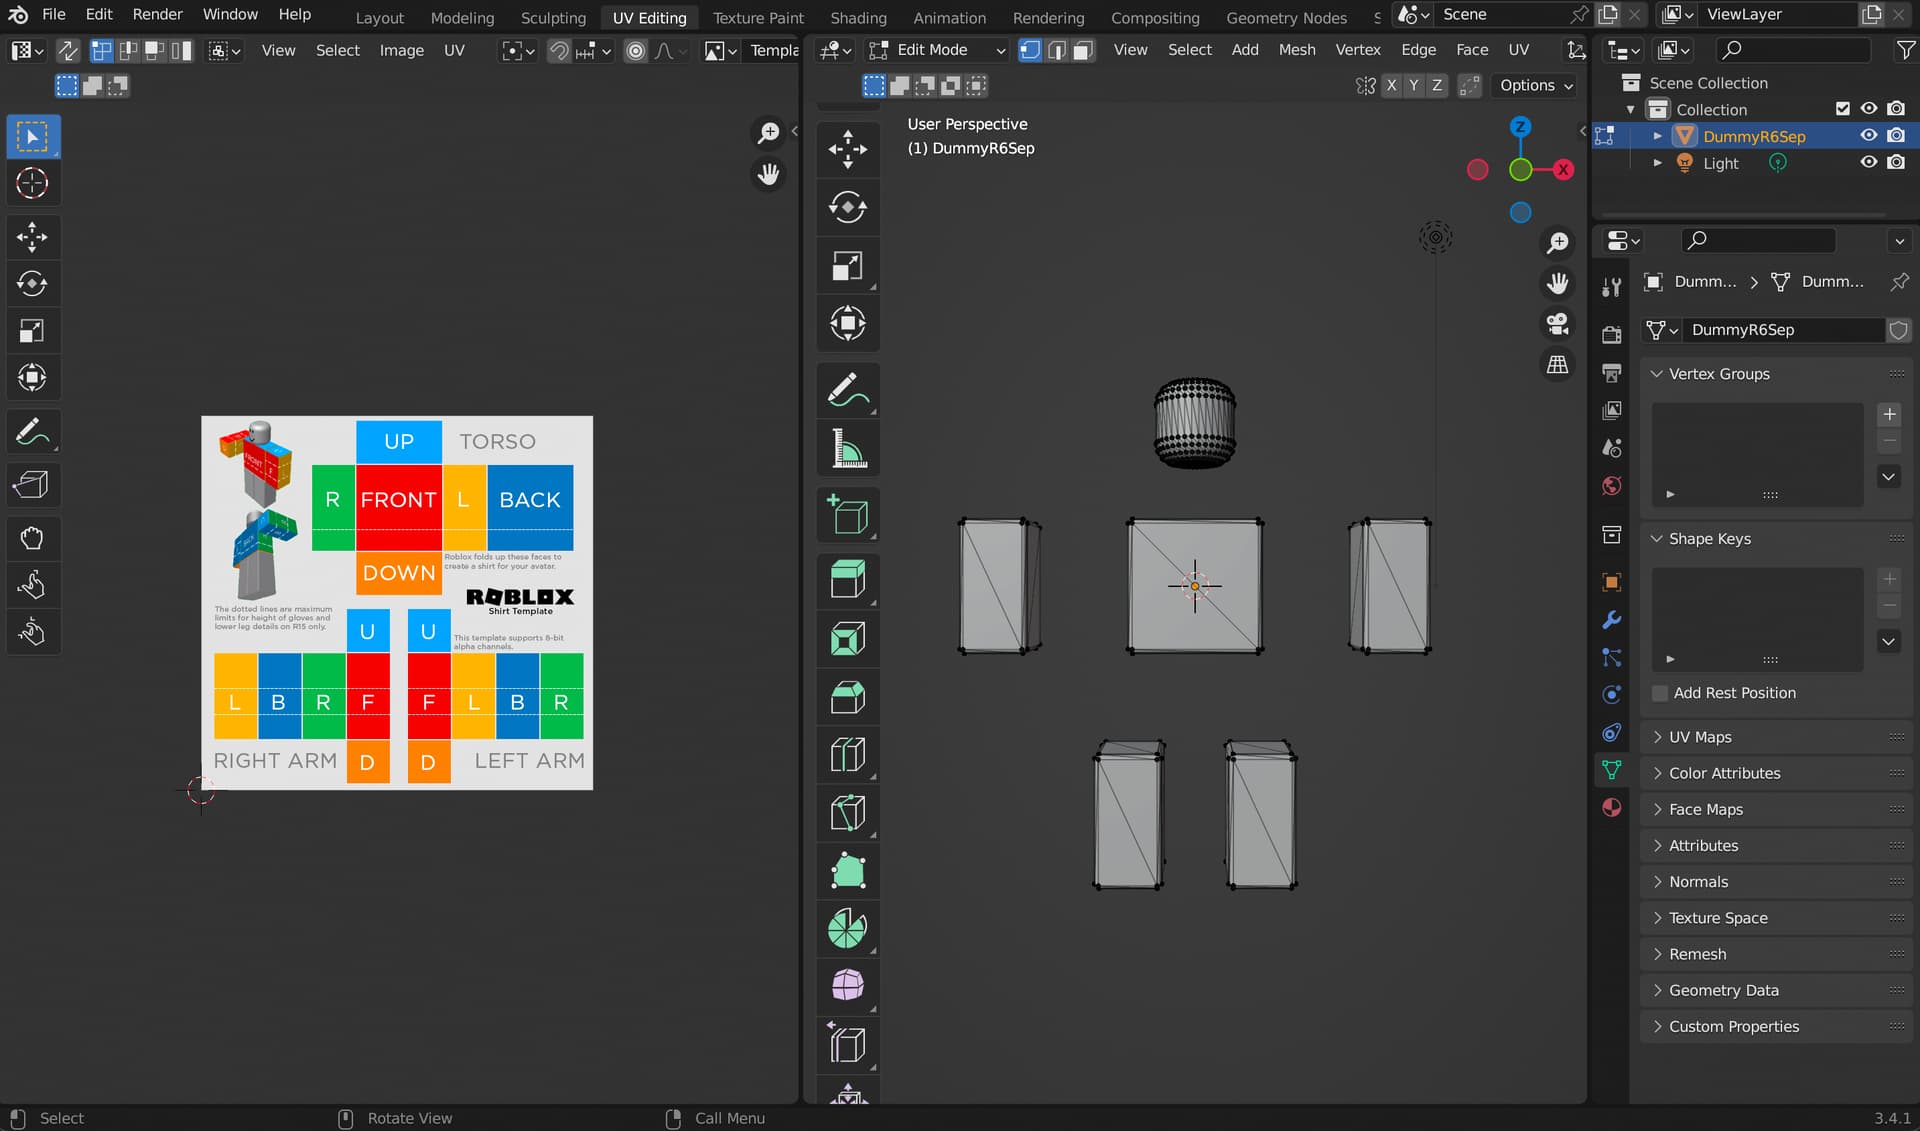
Here’s what your rig should look like:
Then you can export the rig as an OBJ through right-clicking the rig in the Explorer and selecting “Export Selection…”.
After that, go to Blender and import your rig. You can remove any existing textures on the rig unless you need them.
Then go to UV Editing and on the image window, open the Roblox clothing template or a similar template. Blender should look something like this:
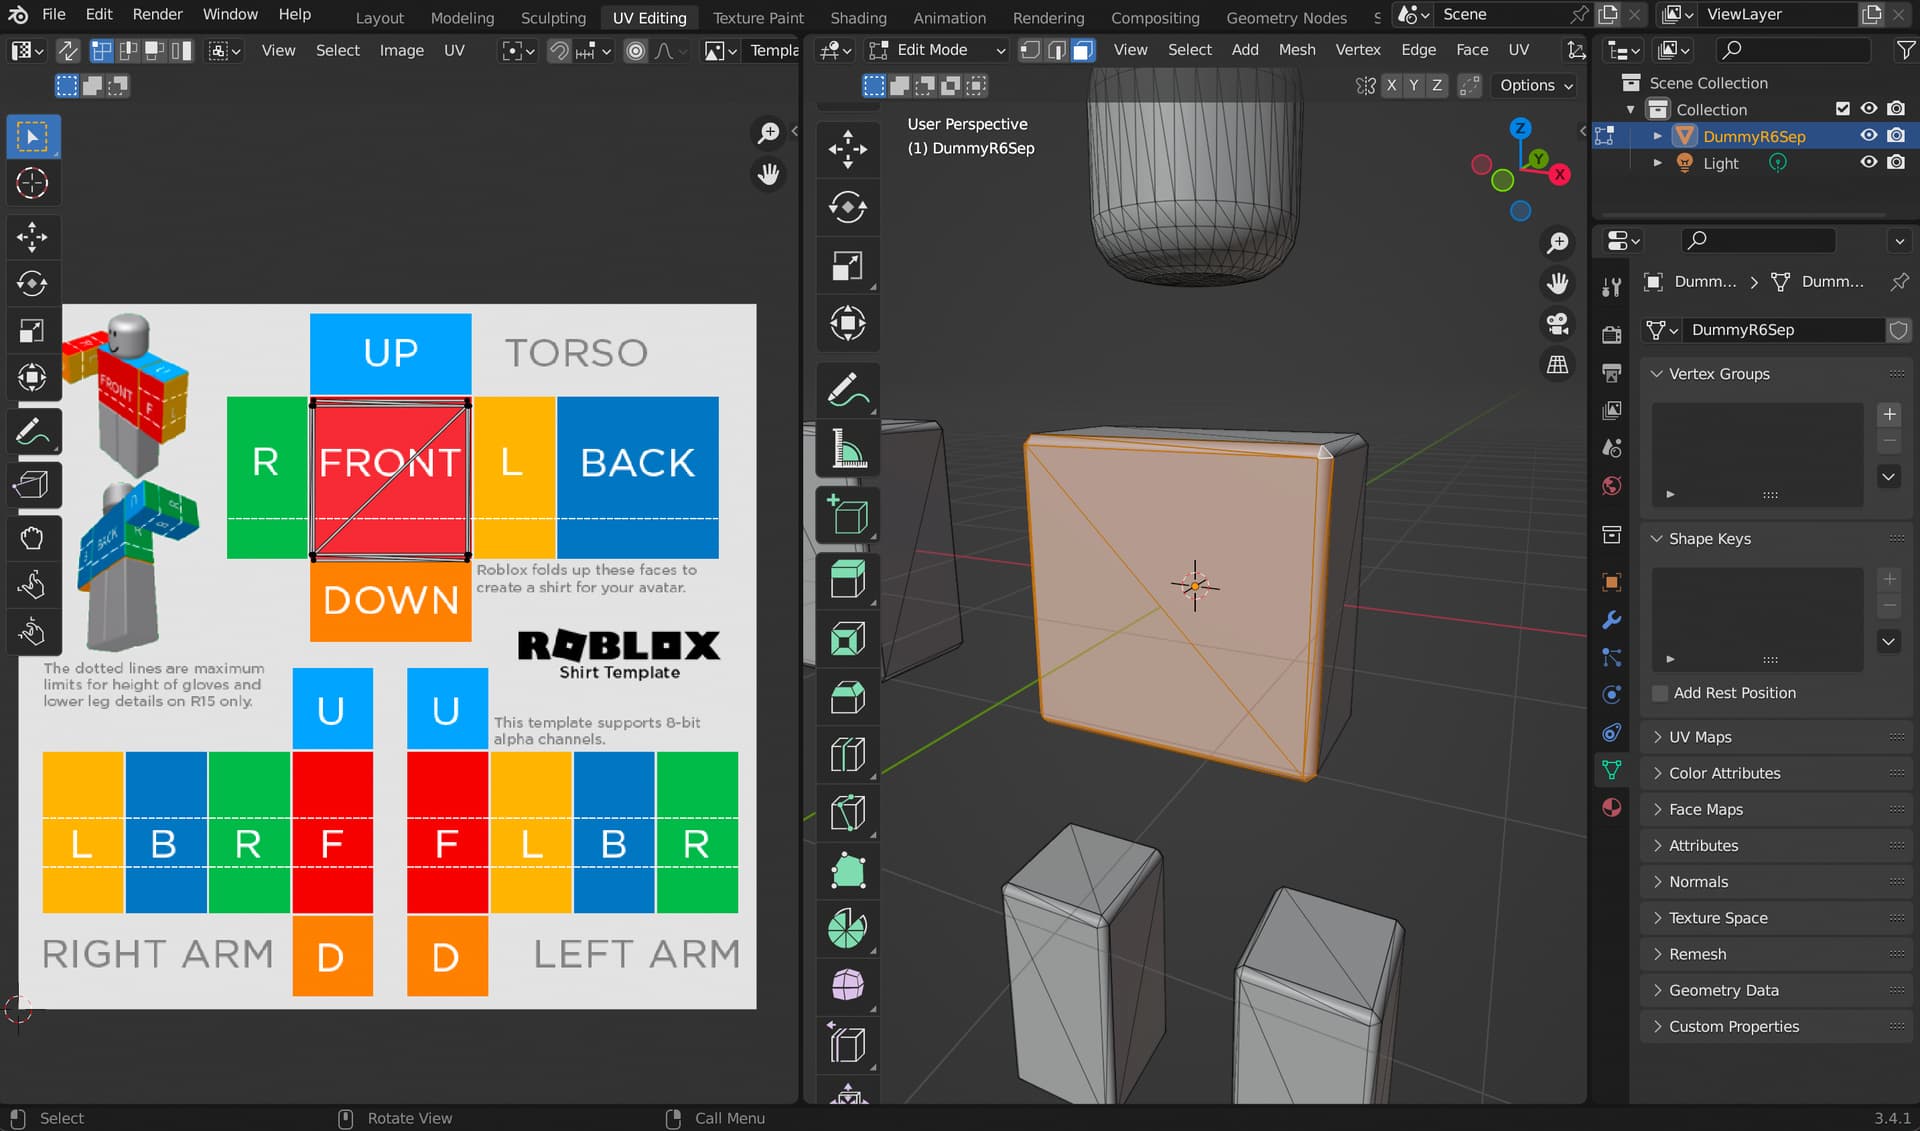
Now here’s the important part. You will need to edit your UVs on the rig to be in the faces shown on the template. You can do this by selecting the faces on the 3D window then editing the UVs on the image window. For example:
You’ll notice on the right that I selected the front part of the torso. When you do that, you should see some lines and dots pop up on the image in the left, but they likely won’t be aligned with your template. You will need to move, resize, and rotate them to fit in the appropriate face of the image. Repeat the process for the other faces.
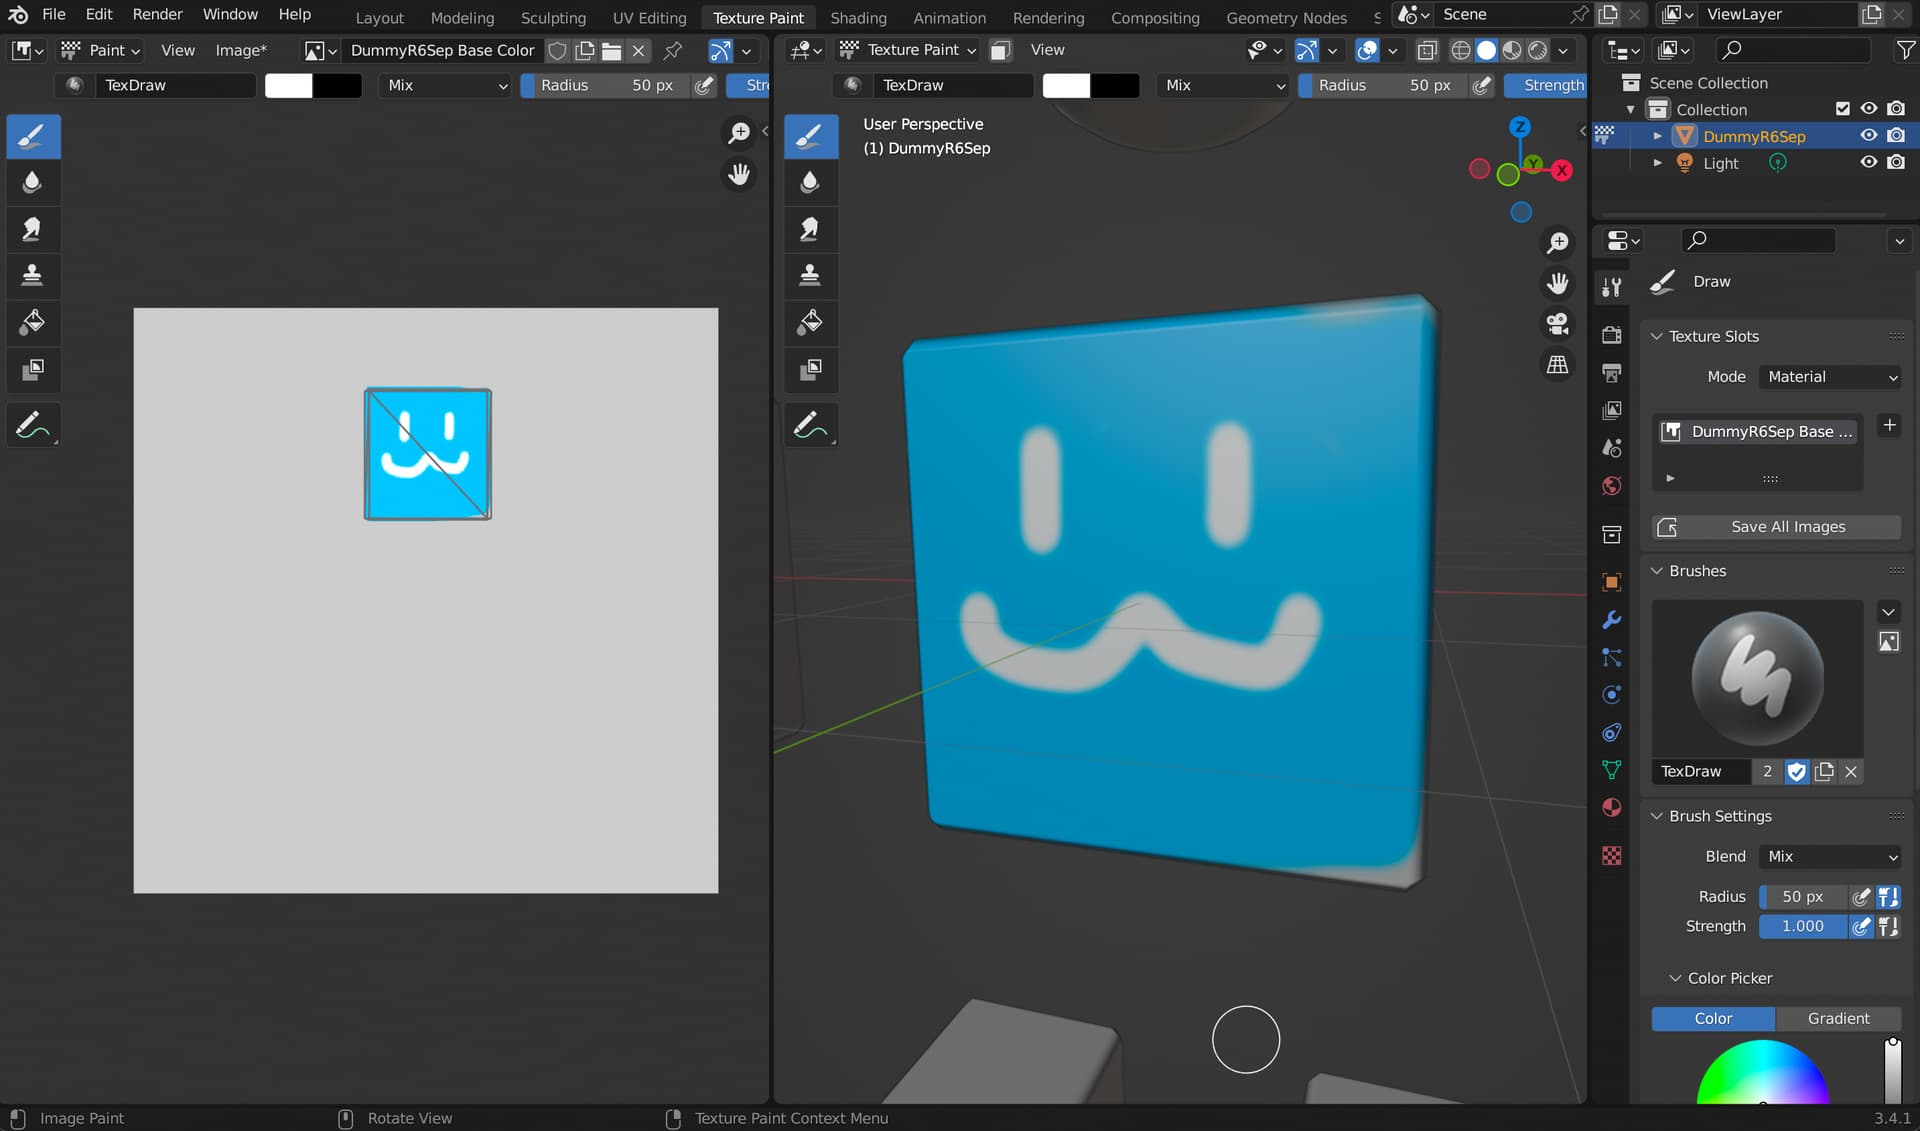
After that, you can directly paint on your rig and you’ll notice that your 2D texture will be drawn where you set your UVs. Like this:
Then when you’re done painting, you can export your 2D texture that now should be compatible with Roblox’s 2D clothing. Your UVs may not be perfect at first so you’ll likely have to edit them as you paint, but when you perfect those UVs, you will be able to reuse that for all your clothing, at least for that specific rig.
Also, if you want to paint your rig in other programs, you can export the rig from Blender as those UV changes should transfer over.
I’m assuming you already have some knowledge with Blender, but if you’re confused about anything, let me know and I can provide more info or some videos of how I did it.