Isometric Perspective Tutorial
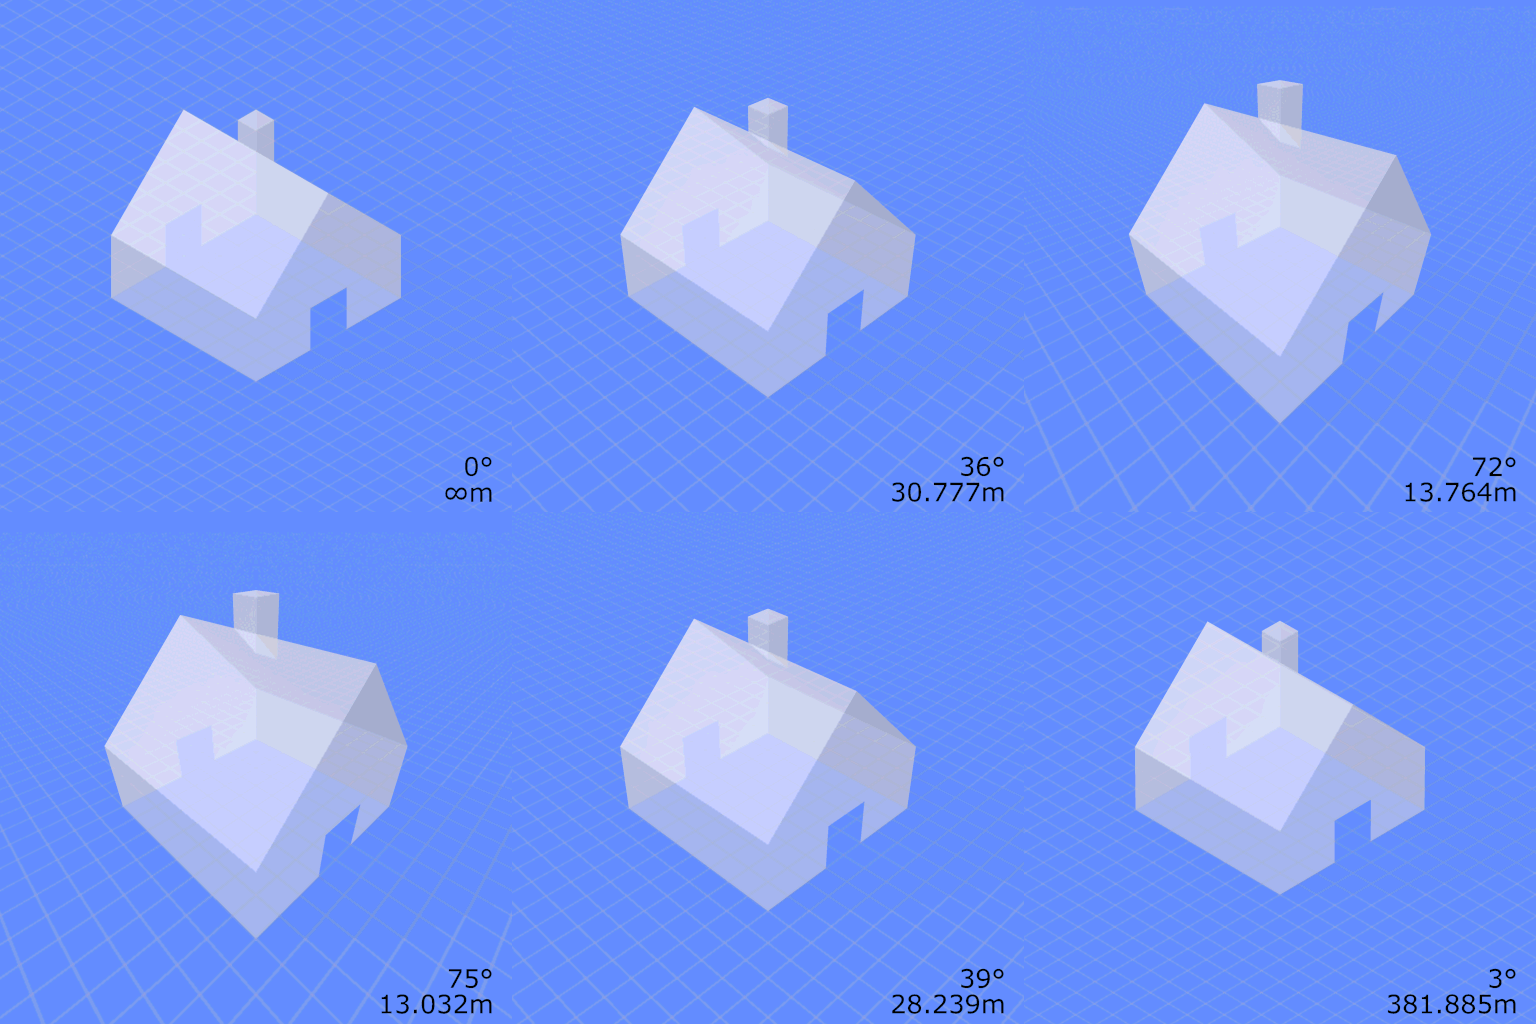
In this tutorial we will create an isometric perspective on our camera. This will not be perfect but it does look very close as long as you do not get too far away. Isometric just means that similar objects are the same size no matter how close or far away they are from the camera, and each side gets exactly 120 degrees (see image below.)

This is a gif of what we are trying to do. We cannot get a infinitely small FOV in Roblox Studio, nor can we get a camera infinitely far away, but we can get close

gif gotten from wikipedia
Make sure to put this as a local script inside of StarterCharacterScripts.
First, we will define our variables to make changing this easier in the future
--Settings
local FOV = 0.000125
local Zoom = 1000 -- 100<Zoom<=1000 --Controls how zoomed in the camera is
local Distance = 80 * Zoom
Now, we will declare these variables so that we can access them later in the script.
local player = game.Players.LocalPlayer
local camera = game.Workspace.CurrentCamera
local character = player.Character or player.CharacterAdded:Wait()
local humanoidRootPart = character:WaitForChild("HumanoidRootPart")
local humanoid = character:WaitForChild("Humanoid")
The Magic Formula is a CFrame that contains all of the information for the camera.
All of the values shown here are the default, except for the FOV
And I originally got this from this post by @Physicionics linked here
You can also play around in this game made by @Maximum_ADHD
local Magic_Formula = CFrame.new(0, 0, 0, 1, 0, 0, 0, 1, 0, 0, 0, FOV)
Next, we will set the camera type to scriptable and add the “RunService” variable
camera.CameraType = Enum.CameraType.Scriptable

local Run = game:GetService("RunService")
The next step is to make it so that every frame, the camera’s CFrame is multiplied by the Magic_Formula so that the Magic_Formula is applied
Run.RenderStepped:Connect(function()
	camera.CFrame = camera.CFrame * Magic_Formula
end)
Now, we are going to define some additional variables for this part of it (you can put these variables at the top if you would like)
-- Camera settings you can adjust

local cameraDistance = Distance
local Multiply = 0.7075      -- Line up multiple objects in a diagonal (default 0.7075)
local cameraHeight = cameraDistance * Multiply
local cameraAngleOffset = 0         -- Angle offset in degrees for tilting the camera around the Y axis

-- Convert angle offset to radians for camera rotation
local angleRadians = math.rad(cameraAngleOffset)
Finally, we will put this in at the end to put the camera in the correct position every frame.
-- Smoothly follow the character without rotating the camera
game:GetService("RunService").RenderStepped:Connect(function()
	if character and humanoidRootPart then

		-- Calculate the camera's position behind the character
		local offsetX = math.sin(angleRadians) * cameraDistance
		local offsetZ = math.cos(angleRadians) * cameraDistance
		local cameraPosition = humanoidRootPart.Position + Vector3.new(offsetX, cameraHeight, offsetZ)
		-- Set the camera's CFrame to follow the player, looking in a fixed direction
		camera.CFrame = CFrame.new(cameraPosition, humanoidRootPart.Position)
	end
end)
Additionally, I have made a uncopylocked game that you can edit in studio.
I hope this helps if anyone wants to create a isometric or other parallel projection!
Feel free to leave a comment if you are confused.
*Edit * Make sure to turn off fog. If you don’t, then the fog will stack up so much that you can’t see anything.
