Introduction
Hello developers! I’ll teach you how to make a realistic car with “a-Chassis” in this small tutorial.
Resources
What we need for this is:
- Sketchup
- Blender
- Roblox Studio
We also gonna need a website called 3DWarehouse
On this website, we can find the vehicle we desire!
You must log in to that website so you can follow the steps!
Downloads:
You can watch a tutorial if you don’t know how to install it!
(I recommend Sketchup Make 2017 since it’s free)
Blender installation
- Note: to install blender, you have to select your desired version.

In my case, I’ll be using Blender 2.79

When you click on your desired version, you’ll be redirected to another page, in this site, you’ll have to download blender depending on which OS you have.

I have windows 10 64 bits, so I’ll be downloading Blender-2.79-windows64.msi
After downloading, you’ll have a. MSI file in downloads.
Open it.

You’ll see something like this.
You’ll just click next and install.
After installation, you click on Finish and there we go!
Alright, now that we have all the stuff, we can go to 3DWarehouse.
Finding our vehicle
At the top search bar, we can search the name of the vehicle we want to make!
For example, I want to make a Toyota Corolla e90.

I search it up and then click on Models.

You will see a list of vehicles with that name. Select the one you want!
I recommend you to use cars more than 5K Triangles, but not higher than 100K.

Alright, I have found the car that I want to make! Now click on the picture.

You’ll see something like this. Click on download and select the SketchUp version that you have.
I’ll download it as Sketchup 2019 model.
Exporting our vehicle to blender
Open the vehicle you just downloaded.

As you see, I have my car over here.
Now we’ll click on file > Export and click on 3DModel

Now make sure you are exporting the model as an OBJ file, and then export it to any location.
Importing our vehicle to blender
Now that we have exported our vehicle, open up a blender tab, and delete the default block.
Now click on “File” > Import > Wavefront (.obj) and then search the location of your vehicle.
![]()
I’ve found it, now click on the.OBJ file of your car and wait a few seconds.

If your vehicle doesn’t show up, you can press S from the right top corner, and then drag your mouse to the bottom left corner, until you see your vehicle, when you are done, just click and there we go!

Importing our vehicle to Roblox
Exporting to our pc
Click A to unselect all the pieces of the car.
Open up another blender tab, and delete the default block.
In one tab, we’ll have the car, and in the second tab, we’ll be exporting the pieces of the car.
Now, we can select any piece of the car.

For example, I’ll select the sides of the car.
Now after you select it, press CTRL + C to copy, and go to the second blender tab, and press CTRL + V to paste.

Good! Now, in the same tab, we’re going to click File > Export > Wavefront (.OBJ) and select the location you want.
After you select your location, add a name to the piece. I’ll call it “Sides”
![]()
Great! Now click export.

We’ve just exported a piece of our vehicle!
As you see, we’ll have to export piece by piece, or we can save up time and do the following:
Optional: Join pieces and save up time
Let’s say that I want to import the whole body at once, we can do it by simply selecting every piece of the body, and then click “Join”.
As you see, I’ve selected everything that has a grey color, this will be the body, so now, at the left side of the screen, we’ll find an explorer.

Click on “Join”.

If the selection color turns yellow, you did it well!
Now, we can copy the body, and paste it on the second tab.
Now click on “File > Export > Wavefront (.OBJ)” And name it however you want.
Now, inside Roblox studio, make sure you have the “Asset Manager” window on.
You can turn it on by going to “View”

Importing
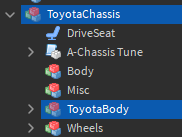
Inside the asset manager, double click on meshes

Now click on the upload icon

And find the piece of the car that we exported.
Select it and click “Open”.

It will show up this message, just click on “Apply all”.

And as you see, it will import into Roblox.

Now right-click on it, and select “Insert with location”
And as you can see, a mesh will create in the workspace.

It will be small, LEAVE IT LIKE THAT. Because if you make it bigger, pieces will not really match with each other.
Now, we can repeat the process with other parts of the car, until we import everything!
Note:
When you import the tires, make sure they are separated.
Example:
First export the left front tire.
Then the right front tire.
Then the rear left tire
Then the rear right tire.
Then you export the rims.
First the Left front rim
Then the right front rim
Then the rear left rim
Then the rear right rim.
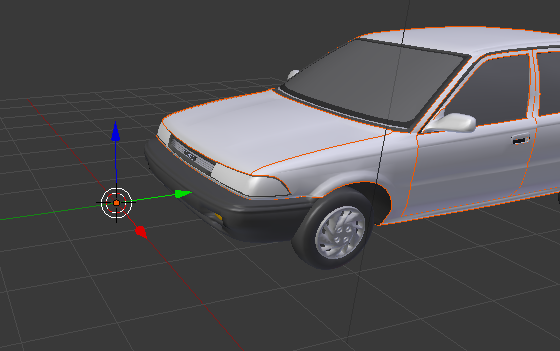
This is what you should have:


Using A-Chassis to make our vehicle work
Great! Now that we’ve just imported every piece into Roblox studio, we should have our car with all the pieces inside Roblox Studio. You can color your car however you want!
Note: When you finish, you need to anchor the whole A-Chassis Model! That way it will work perfectly!

Great! Now we can scale it and make it bigger. I recommend you use an NPC as a size reference.

There we go!
Now we’ll get A-Chassis inside the workspace.

Now, look closely, because this is gonna make the car work as best as possible.
Select all the pieces of the car, including the tires, and uncheck “CanCollide” Property

Great. Now, we can group the whole car to make it easier.

Now, in the “Explorer” window, we’ll move the Model we’ve just created inside the A-Chassis model
Great! Now move the Model we created inside the body, and ungroup it.

Now select the tires and rims, and drag them inside “Wheels”

As you see, the chassis comes already with some transparent tires, and those tires have some models inside:

Now, we’ll have to put the tires and rims inside the “Parts” model, but in the corresponding wheels:
Front left tire and rim, go inside the model “Parts” of the part “FL”.

Front Right tire and rim go inside the model “Parts” of the part “FR”

And we’ll do the same with the other tires and rims.

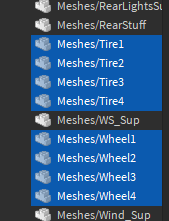
Great! Now it’s time to give positions.

We will select one of the tires, for example, “FL”, and select one mesh inside the “Parts” model.

We’ll copy the position.

And we’ll paste it on the Transparent wheel.

And as you see, it will fit perfectly!
We’ll just have to repeat this process with the other tires.

There we go! We’re almost done. We just need to position our Driver seat.
We’ll select it and move it wherever you want inside the car.

Now make sure to anchor the Chassis.

![]()
Now, we can set the transparency of the “Transparent tires” to 1, so we can appreciate it better.


Now let’s test our car!
robloxapp-20210623-1903564.wmv (3.1 MB)
As you see it works!
Horse Power
If you want to modify horsepower, you can simply open the A-Chassis tune script.

Go to line 112 and you’ll find these lines:

Just change the value of “Horsepower” to whatever you want!
That’s it, thanks for reading and I hope this is useful for you!
Please contact me if you are having issues, or trouble making something like this!
Let me know any other issues and mistakes! 


