In this tutorial, I will be showing you how to model a ship hull with CSG (Constructive Solid Geometry)! This guide is designed primarily for the Roblox maritime community but also for those who are wanting to model hulls or improve their existing hull modelling ability.
Please excuse my inconsistent screenshot sizes 
Requirements

(Example Hull)
Getting Started | References and Research
When beginning your maritime vessel in Roblox, I highly recommend that you take the time to collect an adequate amount of research and references as it will help you a lot when you start to map out your hull.
To collect references and research try searching these up on the following applications:
Google Images
- [vessel name] blueprints
- [vessel name] deck plans
- [vessel name] hull line plans
- [vessel name] evacuation plans
Youtube
- [vessel name]
- [vessel name] tour
Evacuation plans usually feature a drawing of a vessels hull, note that they aren’t always reliable as some are not the proper shape of the hull. A website that has ship blueprints that I recommend is www.the-blueprints.com - Be sure to get a blueprint that has a high resolution and as many different views as possible (front, back, left, right, top, bottom)

(Evacuation Plan^)
NOTE: blueprints, deck plans, hull line plans, evacuation plans or framing plans may not exist for certain ships online!
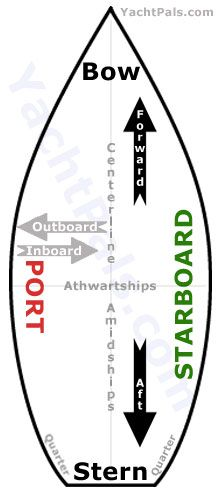
Youtube and Google images are both very helpful when it comes to researching as it helps you understands your vessel’s shape better. Usually, when doing so try googling the specific bit of the hull you are wanting to research on e.g Bow (Front of the Ship), Stern (Rear of the Ship), Port (Leftside of the Ship), Starboard (Rightside of the Ship)
Setting Up | Inserting the Plans
Before starting, ensure that CSG v2 is off as it will cause an immense amount of shading/smoothing issues, and also ensure that you have the necessary reference (blueprint/mapping) of your selected vessel.
Step 1. Upload your reference images to Roblox - Create a part in a studio and then insert the reference image onto one of its side surfaces.

Step 2. From there, size it so that the resolution of the image is fixed. Make sure that the hull is properly sized to a Roblox NPC; You can do so by positioning one next to one of the decks to see if its the right size; If it is not then size the part up.

Step 3. Duplicate and rotate your part so that the birds-eye view matches accordingly like so with the side view.

Modelling | Forming the Bow
Step 4. Create a new part and size it to the dimensions of the hull - Make sure to disable CastShadow in the properties of the newly created part. (Properties>CastShadow)

Step 5. Move the newly created part to the side via 10 or more studs so then when you want to put it back you can.
Step 6. Open up the curve cutter plugin and select the top surface of the bottom reference image; From here you want to click on the blueprint where the bow starts; A pink part should appear, if the pink part is facing inwards press f to flip the part the opposite way - Make sure the pink part is on the facing outwards.
Step 7. Continue drawing down towards the middle of the ship until the curve of the bow stops.

Note, For a smoother bow, curve it with more lines.

Step 8. Before confirming the draw, make sure that the end of your curve is facing away from the ship like so - This is to stop unioning issues down the road.

Step 9. Confirm the curve by pressing enter - Disable the plugin and select the curve, from here you want to ungroup and select all the curves parts and increase the height of all; Once done union all the parts together.

Step 10. Insert a new part and have it hover above the curve so they aren’t touching each other - Negate the new part and union it with the curve, this will fix the unions axises.
Step 11. Duplicate the union and rotate it 180 degrees, make sure to align it with the blueprint like such; Then union both of them together.

Step 12. Move the union over so that the middle of the bow is lined up with the side reference image - Change the transparency to 0.5 and make it more vibrant by changing the colour.

Step 13. Duplicate and rotate the unions so it traces the shape of the bow on the reference image.

Step 14. Once done, slide the unions across to the bottom reference image - The bottom of the unions do not need to align with the reference image; The reason why it appears out of line to the image is because the bow angles inwards and hence the bottom will be out of line from the blueprint.

Step 15. Negate both unions and turn CastShadow off in the properties - From here duplicate the hull part that we put to the side and slide the duplicate back into place with the blueprint.
Step 16. Slide the hull part forward so that the edge of it meets the negate part like so.
Step 17. For any excess bits at the front of the bow insert and angle a negate part as shown below.
Step 18. ENSURE that CSG v2 is disabled - Once it is, start to union the hull and negate parts together; Once done it should end up like this (If you encounter union errors, refer to the troubleshooting section below)

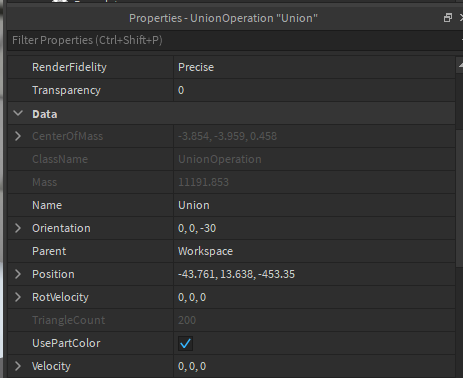
Step 19. To fix colouring issues, navigate to the union’s Properties and enable UsePartColor.
Troubleshooting | Unions
If you do encounter union error I recommend you try the following:
- If there are more than 2 parts, try only unioning two together at a time and then union those unions together.
- Save the negates to one Roblox model and save the parts to one Roblox model - Then, re-insert them into a new studio or the studio they were in.
- Start Union projects on a new place.
- Work with Unions as close to the 0,0,0 XYZ position in the workspace.
If these tips do not work for you, drop a comment on this post and I’ll try to help you out the best I can; An alternative way is to navigate through the DevForum for tips on how to fix these errors.
If you have any inquiries please leave a comment below! Cheers.


 It’s an attempt on the ship Celebrity Flora. Keep up the great work!

