I’ve been trying to re-create a certain arch from a movie for a showcase. I am unable to re-create this arch in blender. It is quite abstract with lots of twists and turns.
What have I tried:
I used a lattice in blender and scaled it to fit my cube. I looped my cube 5 times for each axis and then added a modifier to the cube to be edited whenever the lattice is edited. I started with simple modeling techniques to try to match the shape and did not succeed. I am stuck on what to do.
I have also tried:
Crating a Bezier curve and using a curve modifier to fit the object into the shape using that. This was quite hard for me to understand and I did not succeed with that.
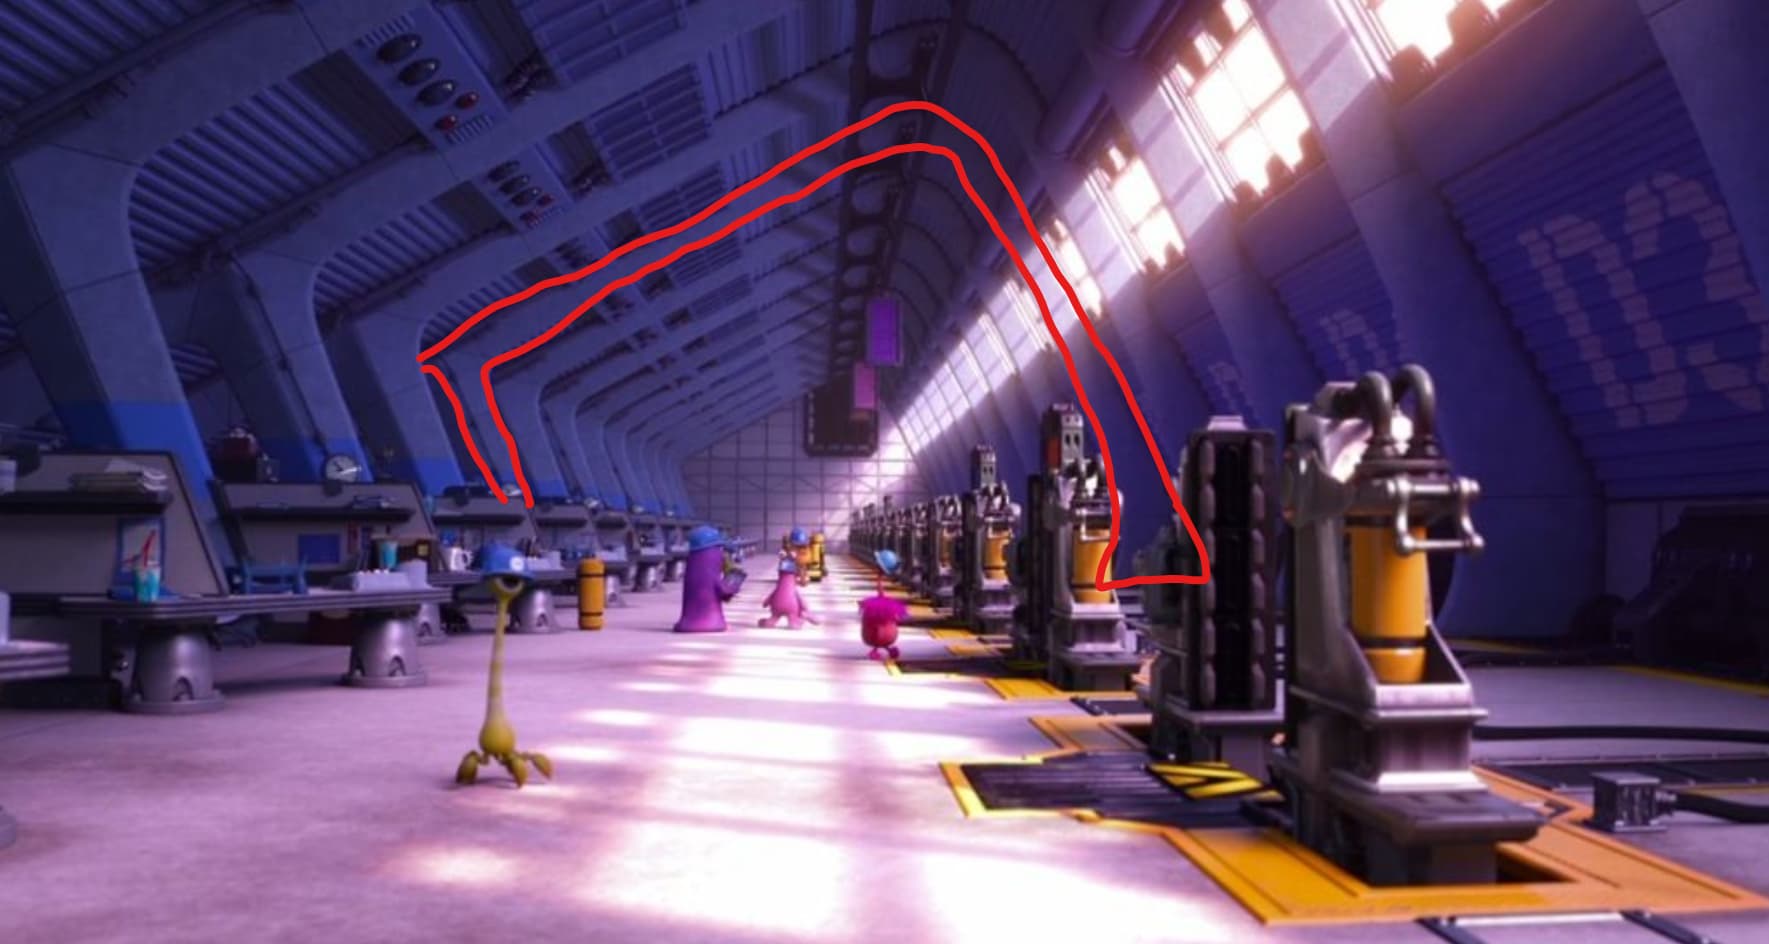
Tips on how to do this are appreciated and reference pictures are included below.
What I tried -
Reference -
The reference doesn’t fully show the arch, but by using other arches in the picture you can kind of piece together what it looks like.
btw: If you need other reference pictures from certain shows in the same building to get a better understanding or higher quality result please let me know and I will be happy to help you.
First of all. I assume you have been using Blender3D for quite some time now correct and you know your way around it’s inner workings?
Secondly. These kinds of things can get messy very easily. I’d recommend taking a cube, going into edit, and deleting all the vertices and starting from scratch, get yourself a reference image like you have. Freehanding things are hard. I should know, i’ve done it. It is rewarding to free hand but only experienced find it easy.
Find yourself and image and paste it into any 3rd party editing software you have access to. Blender can use png, jpg, any format that doesnt have layers and is flattened. Save that image somewhere you will remember. Go into blender and hit Shift + A. This will bring up a menu to add items into your scene. What you want here is “Image” and then “Reference” This is just like adding a decal to a part and using it for CSG. Select where the photo is and “Load Reference Image”. Now you should be able to see an image on a plane.
Go ahead and create a cube, center it as best as you can, edit, and delete all vertices. You will then want to use a Mirror modifier. Not long ways but enable it for width on what ever axis it is to ensure that you have the desired thickness, also because it will make your life easier. Also ensure clipping is enabled just so vertices dont overlap on the mirrored side. Go ahead and start “Alt + Right” clicking along the arch you want to make and essentially trace it. Make sure to make cuts and keep topography neat to ensure that normals look good and faces don’t appear creased when smoothed, also helps when you unwrap for UV editing.
This is just what I would have done but many others would have different ways of working. Hope this helps.