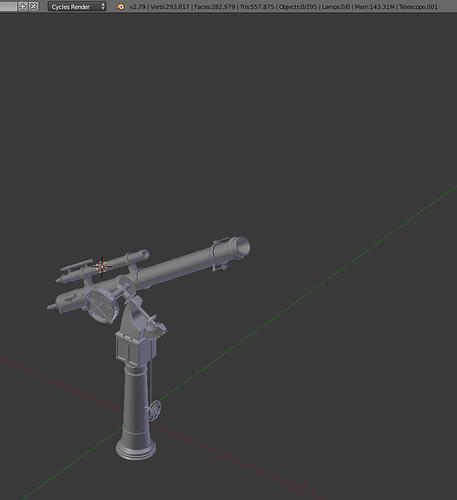
Hello everyone! I am creating a model for something, but I didn’t realize that there was a tri’s limit, and I have way overshot the limit, besides separating my mesh out, what can I do to remedy this problem? I’ve thrown around the idea of using Decimate but that is very destructive for my mesh, and I’ve tried to use lower Subsurf levels but it ends up very blocky. Thank you in advance, and sorry if I’m missing a useful forum post.
Are you familiar with the Smooth tools? You can take areas that aren’t too detailed and reduce the number of tris in those area, then Smooth them to make them appear more rounded.
Is this gun(?) going to be aim-able? If so you’d probably want to reduce it to 2 meshes anyway, one for the rotating base and the other for the tilting barrel section.
Putting lots of detail with curved surfaces that contain too many segments eats up your tri count. I’ve found that using curved sections with other curved details like your barrel with many rings on it can look better using the Smooth tool, but try to keep each cylinder the same number of segments so they match up to each other to make the flat sections less noticeable.
Hmm I see, I use smoothing a lot, and compensate for my topology by using 6/12 vertex circles. And I do plan on making this rotate (it’s a telescope btw but that’s besides the point haha). I’ll give that a try, but if you mean “rings” as loop cuts I’m afraid that’s what I use to hold smooth and sharp edges with Subsurf. But I’ll throw those ideas and see what I come up with! Thank you very much!
I’ve had this experience several times and found that separating the mesh is, unfortunately, the best way to do it without sacrificing detail.
the best way to import that mesh is just to seperate it, however next time dont use subsurf modifier because you can achieve the same effect with edge split and manually sharpening your edges, also by using only 8 and 12 sided cylinders instead of the default 32.
You could always try slapping a decimate on it and see if that helps. You can also do mesh cleanup by going into edit mode and clicking mesh, then cleanup. I don’t know if its different in 2.79 tho.
Hit “A” (select all), then go to Mesh, and (can’t recall the exact spot) look for “Limited Dissolve. I use this personally, instead of Decimate. It might not be what you are wanting, but maybe it is.
Roblox has a 10k tri limit and I understand it’s really annoying. If you want to smooth your meshes, you can enable “Auto Smooth” in the properties. Many people use “Shade Smooth” to smooth their meshes. “Shade Flat” and “Shade Smooth” share the same amount of vertices. So if your object is on “Shade Flat” mode and has 1200 vertices, if you enable “Shade Smooth” the vertices stays the same. Try to use Subdivision Modifiers as few as possible. Many people enable “Shade Smooth” then add a Subdivision Modifier, this increases vertices.
As the previous reply said, you can export them separately.
You can export them separately different ways.
The way I do it, I join parts that share the same colors and export those. You can export parts that share the same shapes or object. For example, based off your image, you can join the wheels together and export those.
If your object is joined together, you can export them by top, bottom, left and right. In your case, it’s top and bottom piece.
I hope this helps, I understand it might be very confusing to read. My English grammar isn’t the best. Use the method that works for you.
Ohh thank you everyone a lot for the replies!! I finished the model by breaking down each piece into 10k tri objects and exporting each one individually, but thank you very much for the suggestions!!
btw what actually is the tri limit?
Oh sorry for extremely late reply but 10k is the limit for meshes I believe
