Update
We have temporarily reverted this update to investigate an issue. We apologize for the inconvenience and will update this post once it is available again.
Hi Creators!
We’re thrilled to announce the Studio Beta release of Emissive Maps support for SurfaceAppearance, MaterialVariant, and TerrainDetail. This feature allows you to use a texture to control emissiveness for your models. It gives you more artistic control than the all-or-nothing Neon material, allowing you to create detailed glowing effects like glowing text, futuristic armor, or bioluminescent creatures.
This new feature also makes some changes to existing emissive materials:: emissives will now appear at all quality levels and they won’t fade out in far distances.
To try out this new functionality, go to File > Beta Features and enable “Emissive Maps”
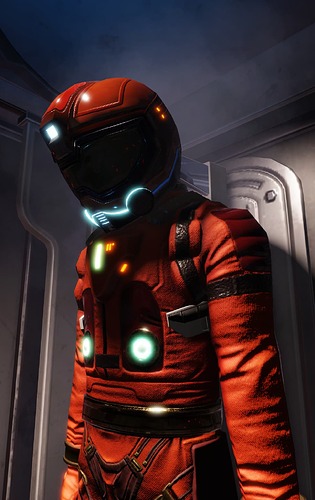
Example of using Emissive Mask maps for the glowing helmet and suit lights from the Beyond the Dark showcase experience.
Credit: @CurbM0nkey
Usage
The following properties have been added to the SurfaceAppearance, MaterialVariant and TerrainDetail instances to enable Emissive support:
- New
EmissiveMaskContentproperty: A grayscale texture, where brighter areas means more emissive. If you supply an RGB(A) texture, only the red channel will be used. Note: EmissiveMaskContent can only be modified at edit time or when creating a newSurfaceAppearanceinstance through theCreateSurfaceAppearanceAPI - New
EmissiveStrengthproperty: A multiplier to set how strong the emissive property of the material is. The Studio inspector slider range for this property is set to [0, 40], to be consistent with light brightness values. This is just a suggested range and you can use larger values but not negative values. Based on the color map and mask values, the final emissive value will clamp based on the maximum dynamic range. - New
EmissiveTintproperty: Apply a color globally over the emissive areas of the material.
The AssetService:CreateSurfaceAppearanceAsync API has also been updated to now accept an extra EditableImage for the EmissiveMask.
How it works
The Emissive Mask is a grayscale texture that defines what parts of a model are emissive. The emissive mask is combined with the diffuse color and any emissive tint to create the final emissive color. At a high-level, here is the math used to determine the final color:
Final Color = (EmissiveMask value * EmissiveStrength value * EmissiveTint + Combined light) * Color Map value
Using a single-channel grayscale map as an Emissive Mask instead of adding 3 extra RGB channels in a separate Emissive map helps save a lot of memory and performance overhead across the range of devices that Roblox supports.
Importing / Exporting models:
When importing models with separate, RGB 3-channel Emissive Maps, an Emissive mask is created automatically by averaging the emissive map RGB channels, and transferring the color information on top of the diffuse texture.
Conversely, when exporting Roblox models that have an Emissive Mask, the emissive mask is multiplied with the diffuse and emissive tint (for better format support) to create the final emissive map RGB texture.
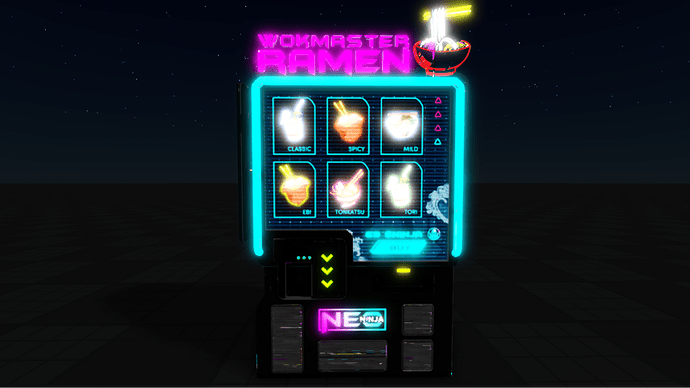
As an example, this external “Ramen Vending Machine” gLTF model, has a separate RGB Emissive Map but imports correctly into Roblox:
Importing a sample gLTF with an RGB emissive map into a dark Roblox place.
The only change made after importing was to set the EmissiveStrength value to 5.5 to illustrate the emissive support.
Credit: “Ramen Vending Machine” by JustFaith licensed under CC-BY-4.0
Example Place file

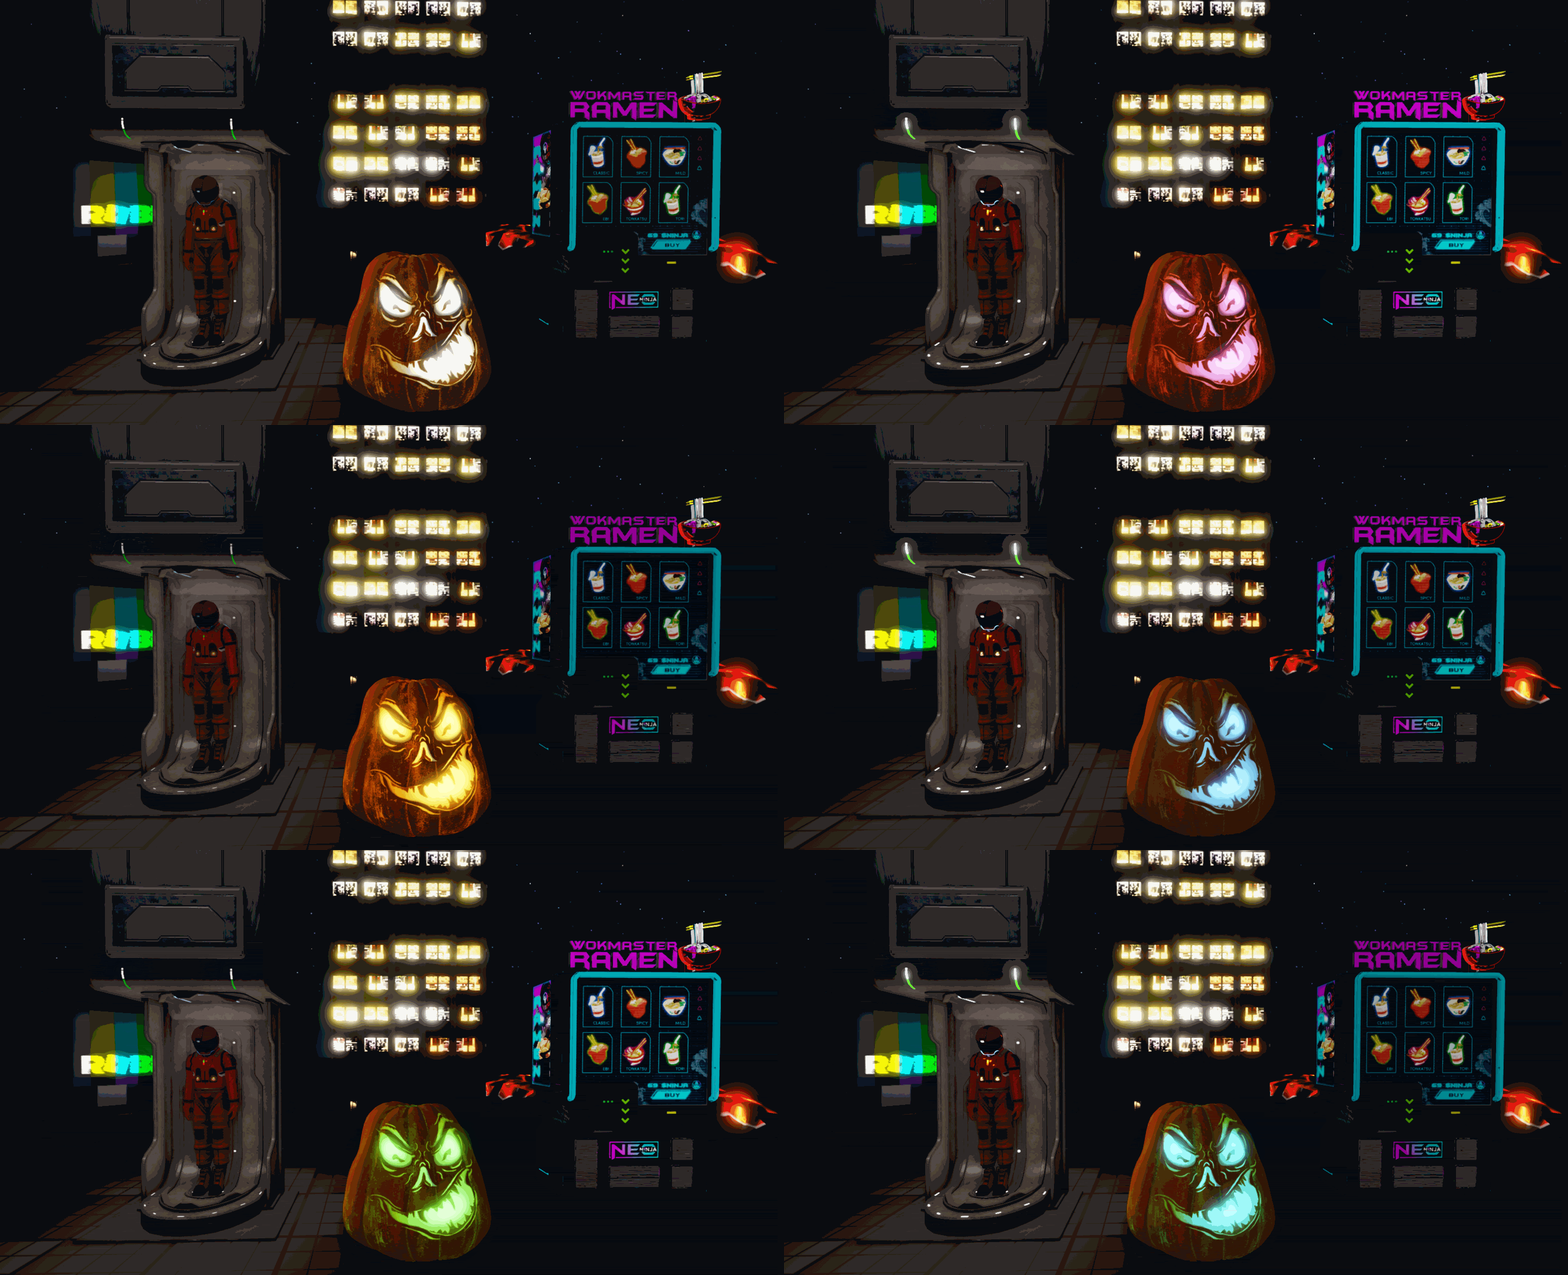
Example place file showing a number of emissive examples
To access the sample place file, visit this link: Rendering-Emissive-Sample - Roblox, click the three-dot menu and click on Edit in Studio. (Playing the experience is disabled while Emissives is in Studio Beta)
This minimalistic place file has a few examples of different ways you can leverage Emissive support in Roblox – SurfaceAppearance, MaterialVariant, TerrainDetail and Importing an external gLTF model with an emissive map.
-
The Pumpkin, CRT screen, Ramen vending machine and the Astronaut suit all use
MeshPartinstances withSurfaceAppearanceinstances under them that contain Emissive Masks. Each one has a script that directly modifies theEmissiveStrengthorEmissiveTintto get a flickering, glow or random color effect. -
The building model in the middle uses a
MaterialVariantcalledBuildingVariantthat has an emissive mask added to it. -
The two lava flows show how to add emissive support to
TerrainDetailas well. -
The Ramen vending machine is the same gLTF imported from above
Known issues
We are working to resolve the following known issues during the Studio Beta.
- The Material Manager window does not have support for the Emissive Mask map on material variants yet. The
MaterialVariantinstance property inspector does have support though. - When importing a 3d model with a separate Emissive Map, the Import Preview window does not show an entry for the Emissive Texture file path yet even though the emissive map will be properly imported as explained above.
What’s Next?
We are working to fix all the known issues and bugs before we can enable emissives support for published experiences. We also plan to support emissive masks for decals when they get support for PBR textures through the new ComposeDecalAsync API that is currently in Studio Beta as well.
We are also eventually planning support for emissives in UGC avatar marketplace items after we have had a chance to roll-out and stabilize emissive support in places. Until then, UGC items that contain emissives will not pass validation.
We can’t wait to see all the amazing things you will create with these new tools. Please feel free to share screenshots of your creations, ask questions, provide feedback or report any bugs by responding to this post.
The Roblox Rendering Team


