Hello everyone,
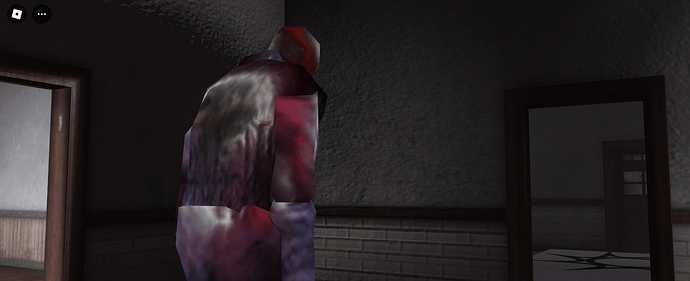
I’m excited to introduce a free, browser-based PBR texture generator that is completely client-side! This tool is perfect for anyone working with Physically Based Rendering (PBR) workflows, or anyone wanting to make their flat textures pop some more!
Key Features:
-
Base Texture to PBR Maps: Generate:
- Normal Maps (add depth and detail)
- Metallic Maps (define material properties)
- Roughness Maps (control surface irregularities)
- Ambient Occlusion Maps: Not yet supported but could be added by request
- Export Options: Easily export all generated maps for use in your projects.
-
Two Processing Modes:
- Canvas API: CPU-based, works across all devices.
- WebGL: GPU-accelerated, faster, and more accurate for supported hardware.
-
Local Material Library:
- Upload, store, tag, and version control your PBR materials.
- Store multiple maps (Normal, Metallic, Roughness) for each material.
Check out the material library here
New Feature: 3D PBR Viewer
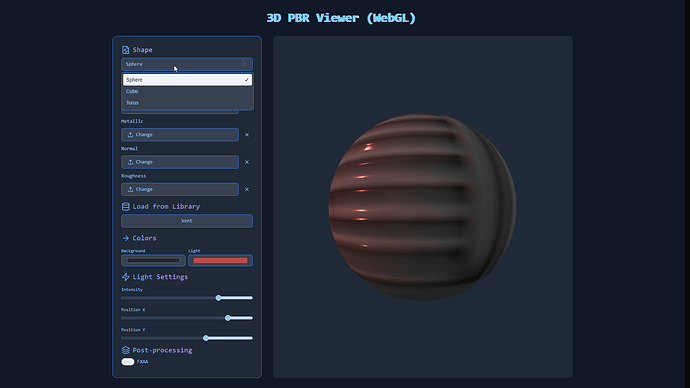
I’ve added a 3D WebGL PBR Viewer! You can now preview your materials in a real-time 3D environment. Load materials directly from the library and apply them to 3D objects, adjusting lighting and maps to get instant feedback. A supported GPU is required.
Why Use This Tool?
- Make Flat Textures Pop: Turn ordinary textures into stunning PBR assets.
- No Installs: Fully browser-based, works anywhere.
- Client-Side Processing: No data uploads—everything happens on your machine.
- Free Forever: All features are free to use!
Try the PBR Texture Generator Here!
WebGL Version (Recommended for GPU)
Examples/Screenshots
(Examples and screenshots use quite exaggerated strength values)
📺 Canvas Comparison Video (Maps/No Maps)
📺 WebGL Comparison Video/Gif (Maps/No Maps)

How the Algorithms Work (in Simple Terms)
🛠️ How the Pixel (Canvas) Algorithms Work
The Canvas version processes each pixel individually using basic 2D image operations on your CPU.
-
Normal Maps:
- The tool looks at your image, pixel by pixel, and tries to detect the edges and depth in the image. It uses something called a Sobel filter to find these edges, which measures how quickly the colors change from one pixel to the next.
- Once it finds the edges, it creates a map where these changes represent bumps or indentations in the surface. This is how it simulates 3D effects (like bumps) from a 2D texture.
-
Metallic Maps:
- The very simple algorithm checks how bright or colorful each part of the image is. It uses this information to decide whether a part of the texture should look metallic or not.
- For example, shiny areas are usually treated as more metallic, while duller areas are treated as less metallic.
-
Roughness Maps:
- The roughness map calculates how rough or smooth each part of the image should look. It checks how much the colors in the texture vary between neighboring pixels.
- If there’s a lot of variation (meaning the colors change a lot), it will be considered rough. If the colors are similar, it will be smoother.
🛠️ How the Shader (WebGL) Algorithms Work
The WebGL version uses GPU-powered shaders to process textures efficiently. Shaders are programs that run on the GPU, which allows for complex and fast calculations ideal for 3D graphics and effects. In contrast, the Canvas API processes textures using your CPU, pixel by pixel, which is slower for intensive operations.
What Each Shader Does:
-
Normal Maps:
- The shader compares the brightness of neighboring pixels in the texture to figure out where the edges or bumps are.
- It uses vectors to simulate the direction of these bumps, creating a “normal map” that gives the illusion of depth and texture when light interacts with the surface.
- The shader calculates the differences in brightness (like a slope) and assigns colors that correspond to the direction of the “bumps”.
-
Metallic Maps:
- This shader checks how colorful each pixel is by converting the image to a format called HSV (Hue, Saturation, Value).
- Less colorful (desaturated) areas are considered metallic, meaning they reflect light like metal. The more colorful areas are treated as non-metallic, making them look less reflective.
- The metallic intensity is adjustable, allowing you to fine-tune how shiny or metallic the texture appears.
-
Roughness Maps:
- The roughness shader determines how “rough” or “smooth” a texture should look. It calculates the brightness variance (how much the brightness changes) between neighboring pixels.
- If there’s a lot of variance, it makes that area look rougher. If the brightness is similar across pixels, the surface looks smoother.
- This is important for making materials like wood, metal, or fabric look more realistic in 3D environments.
Why Use Shaders?
- Shaders run directly on the GPU, making these operations fast and efficient.
- They handle complex math (like vector calculations and lighting effects) that are essential for realistic textures in 3D environments.
- The normal, metallic, and roughness maps generated by the shaders enhance the appearance of materials by simulating real-world lighting and surface behavior.
Note: Performance may vary depending on your hardware and browser. For best results, I recommend using a modern browser with a decent CPU/GPU.


