Render Effects from Hundreds and Thousands of studs out

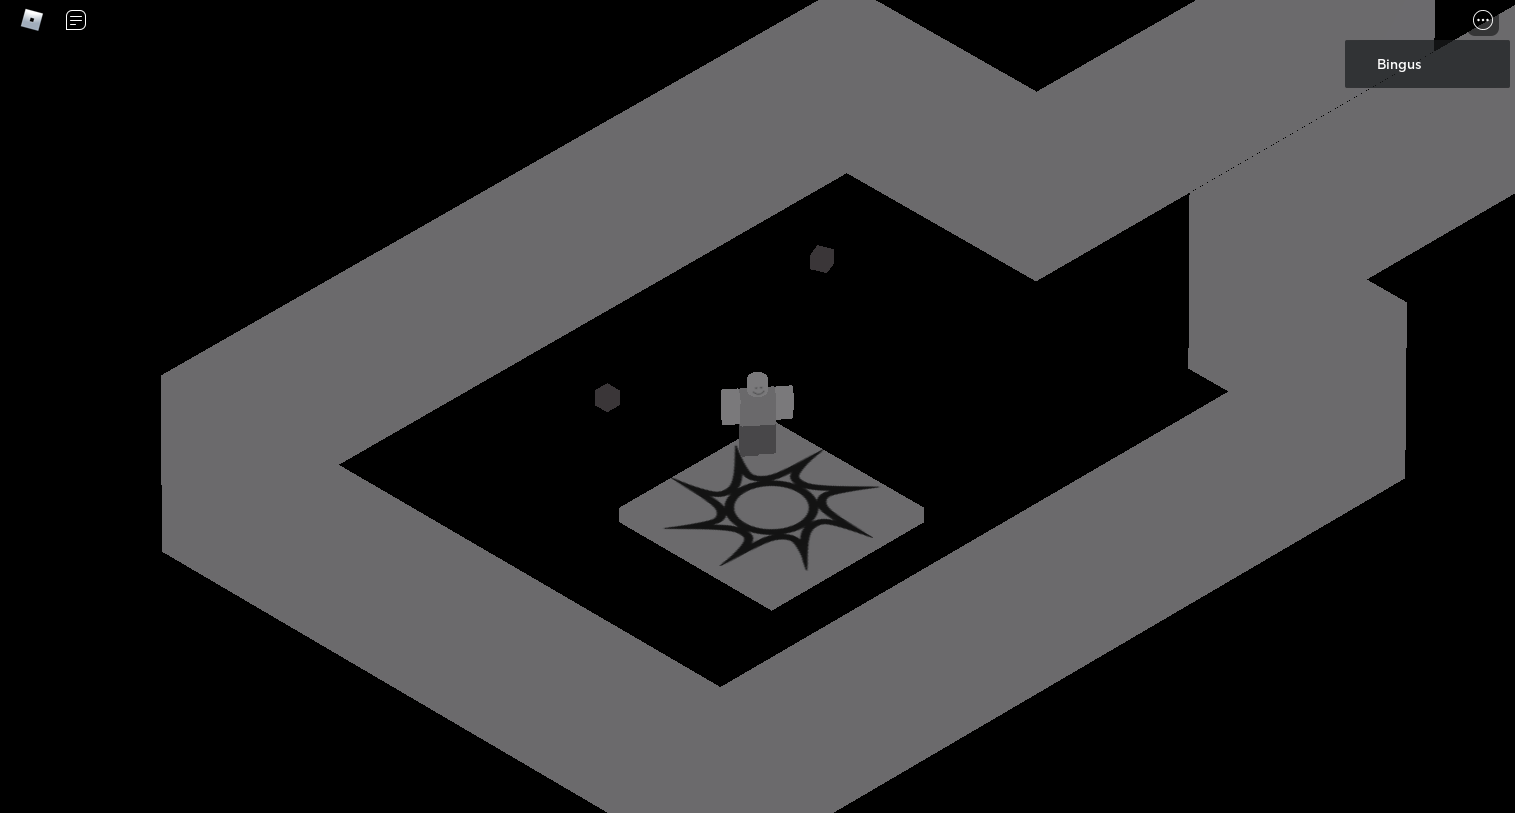
So, I’ve been trying to create/simulate a sort of orthogonal-eqsue camera with Roblox’s Camera system, no current support for different orthographic. The way how most, if not all, people do this is by pushing back the camera a couple hundred or thousands of studs away from the camera whilst lowering the FOV - In this screenshot I’ve pushed it back 1500 studs away with the FOV of 1, before you were able to set it to 0.. However this poses some issues. One being that for optimisation and performance reasons, Roblox has made it so lighting, particles, and what not won’t render past a certain distance (it’s surprisingly small at around 200 studs away). I was wondering if there was a way to bypass this. Here is a list of things that I’ve considered when making this:

  • The Client Graphics Settings does not affect this distance.
  • Tried to think of some hacky method using ViewportFrames but to avail.
  • Tried to move the camera in closer and tweaking with the FOV to still generate an affect, but it just doesn’t look good.
  • I believe @sleitnick did make a project like this a while back, with ImageLabels (I may result to that option but I’m not sure how I’d ideally go about that or if I should in the first place).
Have you tried messing around with Camera.Focus?

https://developer.roblox.com/en-us/api-reference/property/Camera/Focus

2 Likes

It’s been many years, but I wonder if setting Camera.CFrame to a non-orthognal matrix still warps the view space. I can’t check it right now, so I’ll leave it to you. It does this because every point needs to first be transformed into local camera space before the projection matrix is applied.

If it is still the case (they don’t perform orthogonalization every render step), then your goal is to make the inverse camera CFrame cancel out the perspective matrix being applied by Roblox and apply the orthogonal transformation.

If Roblox transforms from world to screen space like so:

Eq 1: s = P * C^-1 * p
Where
s is screen space coordinate
P is the perspective matrix
C is the camera CFrame
p is the coordinate being transformed

Then we want to find a way to transform C (the such that the above equation becomes:

Eq 2: s = I * C_0^-1 * p
Where
I is the isometric transformation matrix
C_0 is the original camera CFrame, equal to C in Eq 2

For this to work, C^1 must be equal to P^-1 on the left, then I, then C_0^-1 like so:

Eq 3: C^-1 = P^-1 * I * C_0^-1

The following value for C satisfies these conditions:

Eq 4: C = C_0 * I^-1 * P

Since matrix inversion is associative but changes the multiplication direction.

So, you need to fill in the variables on the right of Eq 4 and set the camera CFrame to the result. C_0 is simply the original camera CFrame. I is the isometric transformation matrix you desire. Then P is the prospective matrix. I am not quite sure which equation Roblox uses, but this may get you close to it:

You may have to change the sign of the off diagonals to account for Roblox using a positive Z as forward instead of negative. I am not sure which version this one is.

1 Like

It does.


These settings seems to imitate the effect that he wants to achieve

2 Likes

How did you reproduce that? I don’t know much about perspective mathematics and camera stuff

Just a heads up before you try implementing this into your game: The camera was never designed to be manipulated in such a way. Doing so can give you undesired results, such as incorrect scaling for particles, faulty Z-culling, and broken sound engine. You should always test everything.

So basically, you want to modify the CFrame matrix of the camera. But since the camera updates every frame, you will also need to manipulate the CFrame every frame in an order such that it happens after Roblox’s internal camera update (as to override it), but before the rendering engine uses the camera CFrame (so the changes actually apply).

To achieve this, you can use the :BindToRenderStep method since it allows you to fine-tune the order of execution.

local rus = game:GetService('RunService')

rus:BindToRenderStep(
	'funny camera', --name of the connection
	Enum.RenderPriority.Camera.Value + 1, --the function will run right after the internal camera updates
	cameraFunction --the function that will manipulate the camera
)

To actually manipulate the CFrame, we just need to multiply it by a matrix. The matrix itself is arbitrary depending on how you want the camera to look.

local rus = game:GetService('RunService')

--CFrame used to manipulate
local cf: CFrame = CFrame.new(
	0, 0, 0, --position; this isn't relevant
	
	.05, 0, 0, --modify R00
	0, .05, 0, --modify R11
	0, 0, .005 --modify R22
)
local function cameraFunction()
	workspace.CurrentCamera.CFrame *= cf --simply just multiply the preexisting camera CFrame with our modifier CFrame
end

rus:BindToRenderStep(
	'funny camera', --name of the connection
	Enum.RenderPriority.Camera.Value + 1, --the function will run right after the internal camera updates
	cameraFunction --the function that will manipulate the camera
)

You can see in the video just how broken things can be. It will take a lot of fine-tuning to get the effects just right for your game if you ever plan on actually using this.

1 Like

Oh, now that I’m looking at it I have done something like this by accident yesterday. I was messing around with a part and accidentally screwed up the rendering (the normals were flipped and weird things happened). This looks pretty much identical to what I done by accident but you’re applying it to the camera. Thanks for the help : P