Locker System
In this document, you will see how to work and configure the locker system.
Here is a video preview of the system:

Configuring
To start off, you need to move the correct things to the correct places.
It should look like this:

Next, you should place the background place somewhere very far of the rest of the map. Make sure you grab “CharacterPos” and “ViewArea” parts with it aswell.

Now you may want to…
move the camera position or the character position
Moving the camera position and character positions
By default, the view looks like this:

You can move the character position and camera position easily by just moving these 2 parts inside the background area building!

add new teams and/or divisions
Adding new teams and divisions
You can have as many teams and divisions in those teams. To start, open up the “LockerSystemServer” Folder and create a folder inside of it named your team name:

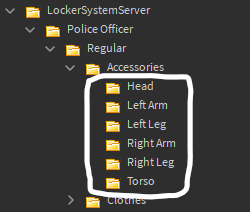
In each team, you can add divisions. To do this, create a folder inside of the team. In there, create “Accessories” and “Clothes” named folders.

In the Accessories folder, there must be folders named the following: Head, Left Arm, Left Leg, Right Arm, Right Leg and Torso
add new accessories (kits)
Adding new accessories (kits)
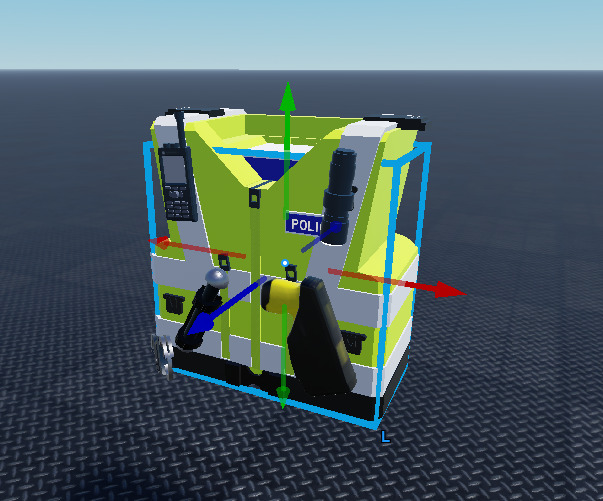
Let’s say I want to add the following vest for my police officers

This is an item for a Torso, so we need to make a part sized a Roblox character Torso (2, 2, 1).


Next, name the part “Middle” and make it transparent and anchored. Move this to the middle of your kit.
Now, you can place this in the proper folder:

or add new clothing
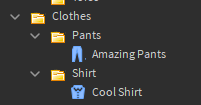
Adding new clothing
Open up the “Clothes” Folder in your division and insert your clothing in the appropriate folder.
Pick one and follow the instructions! Let me know if you need any help in the Discord server or DM me on Discord.