


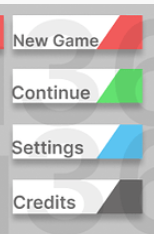
Made this for fun, actually pretty happy with this!
Style: Clean
Program used: Studio, Adobe XD
Inspiration: Pinterest, Dribble
Icons are placeholder, but I really like my UI so far!


That last one, I started to make something similar to this awhile back based off of the main screen for a game I was working on with Endorsed model.
who knew this game would be popular
lol
SCPF Communications Radio
Style: Simple, Modern
Programs used: Affinity Designer, Roblox Studio

Style: Don’t really know… Vintage? Not really. Mostly modern with these run-down type hints to it.
Program used: Roblox Studio
Images

:

That’s stunning. How do you do that?
Style: Modern/Fluid
Program Used: Adobe Illustrator, Adobe XD, ROBLOX Studio, Photoshop.
Gifs: https://gyazo.com/7898f4f5a51a937e6775c9ff31d8ce04 https://gyazo.com/6c4a016196c8326a5345660565b95443
Feedback is really appriciated!
same. I would like to know how making something like that.
Though @ManamiWasThere could obviously share more details, since there seems to be interest, I can quickly explain how I’d expect such a system can be done:
The entire thing is contained in an ImageLabel which is the white, rounded corner box you see as the backdrop with a light shadow. Inside that is another two ImageLabels that are the grey and blue bars at the bottom, with the grey bar always full width and the blue bar being tweened in size and position as necessary for the animations. Also you’ll need an ImageLabel for that darker grey circle that takes over when focusing on the input, and again you’ll need to tween its size and position as necessary when changing states. Then there’s the Placeholder TextLabel, which gets tweened in size, position, textsize, and textcolor3 as necessary to reflect the appropriate state. And finally there’s the actual TextBox which is what you actually end up focusing on when you click the entire box. And there’d have to be some sort of input event listeners set up on the first imagelabel to listen for focusing on the widget itself and a focus lost event listener on the TextBox as well. Then, on each event, just tween the elements as necessary and set the focus to the TextBox when it should be.
Note, I used a button to capture focus, rather than using a textbox.
I’ve included this textbox for my framework system, which is OOP based.
The source code and documentation will be available soon.
Not sure am I in the wrong trend but neumorphism isn’t translucent.
Who else likes physics?
Style: Clean
Program used: Studio, Adobe XD
Inspiration: Pinterest, Dribbble

Looks great! One thing I would suggest is making the text size constant between all button & perhaps some spacing from the left-side of the text?
dont mind if i had some of these buttons? ![]()