Hello Developers!
This is going to be a simple tutorial on how to work the basics of Roblox Studio, mainly for scripting.
Why make this tutorial when there are many others just like it?
Because this is the first lesson in many lessons on how to learn scripting and want it all to be reliable info.
Part One, How to install Roblox Studio
In this part of the Tutorial, I will be showing you how to install Roblox Studio on your PC.First:
Go to https://www.roblox.com/create
Next:
Press the “Start Creating” button in the middle of the screen:

Part Two, How to Open Roblox Studio, and set it up
In this part of the Tutorial, I will be showing you how to open, and set up Roblox Studio so you can follow along in other tutorials of mine, and to make it easier to develop on your ownFirst:
Open Roblox Studio in One of Two Ways:
1. From your Desktop
Go to your desktop screen, and press on the Roblox Studio Icon (Labeled Roblox Studio)
2. From your search menu (Windows Only)
Press on your search menu and type “Roblox”, one of the results should be Roblox Studio.
Next:
You should see a list of templates in front of you, these are the default templates that you can build your game off of.

Press on “Baseplate”, and wait for it to open. This will open up a place for you to make games.
Now let’s set up Roblox Studio so you can easy make games:
First, Press on the VIEW tab on the top bar:
![]()
Next, You will see many buttons, there are 3 you should have presses, Explorer, Properties, and Output:

(You can tell it is open if it is grayed out)
Part Three, Lets introduce the Windows
In this part of the Tutorial, I will be telling what all 3 of the Windows you have open, do.First, the Explorer:

The Explorer is how you make objects in the game, let me explain.
The first thing you see in the window, called a Service, is “Workspace”:
![]()
So, you can see a arrow on the side, pressing this expands to show what’s inside “Workspace”, press the arrow.
Now you see this:

And there are a few things, the “Camera”, you should know what that is, “Terrain”, which is another Service that is unused for right now, “SpawnLocation”, which is the Spawn point in the game, and “Baseplate”, which is the Baseplate, in the game.
Next, the Properties Tab:
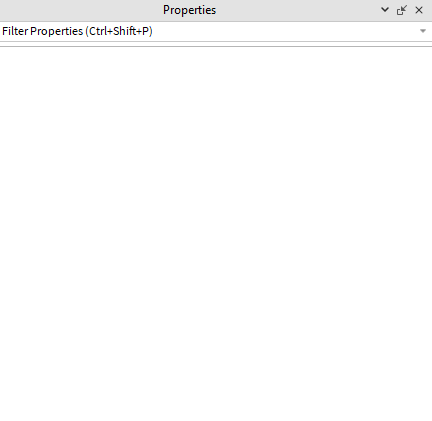
The Properties Tab is what is used to view, and edit the properties of an object, let me explain.
Go back up to the Explorer and press on the “SpawnLocation”, and you will see stuff pop up in the Properties Tab:

You can see many things, for example, the color, which is Medium stone grey, and Material, which is Plastic, etc.
Now let’s have some fun, press on the “BrickColor”, and you will see a color menu pop up, if you hover over the colors, you can see the spawn point change color, and if you press on one, the menu will close, and now the spawn point is that color.
Lastly, the Output:
To put it simply, the Output is a window that will show you Studio Errors, Scripting Errors, Prints from Scripts, etc. That’s all it does.
Part Four, How to Make and Remove Objects
In this part of the Tutorial, I will show you how to Make and Remove Objects using the Explorer.1. How to Make an Object:
You can make an object in almost anything in the Explorer, but I will show you how to make a object in “Workspace”, but this will work anywhere else.
First, Hover Over “Workspace”, a + sign will apper, press the + sign.
Lastly, press on the object you want to make, for this example, a “Part”.
Now, in Workspace, you will see a “Part”:

and you will also see it in the game as well.
2. How to remove a Object:
One Step: Right Click a object, and press “Delete”, for this example, on the “Part”.
Now the “Part” is no longer in Workspace.

and now it’s no longer there.
Part Five, How to Edit Objects in the Game.
In this part of the Tutorial, I will show you how to edit objects in the game.First, you will need to switch your tabs from VIEW to HOME:
![]()
Now, let me explain the Tools:
The Select Tool:
![]()
The Select Tool is very simple, you can press on something in the game, it will select it. Then you can hold, and drag, to move it around, go ahead and try this with the “SpawnLocation”:

(You can tell you have selected it if there is a blue box around it)
The Move Tool:
![]()
The Move Tool is a simple tool that allows you to, well, move an object, go ahead and press on it:

Now you should see 6 arrows, pointing in all directions, by holding, and dragging on of the arrows in the direction it is facing. Try this with the top green arrow, hover over the arrow, and it will turn bright green, and drag it up slowly:

and it will move up!
The Scale Tool:
![]()
It’s a very helpful tool that allows you to change the size of objects, press on it:

Now, it looks kind of like the Move Tool, but it’s 6 balls, drag the top green ball up:

and it will expand up!
The Rotate Tool:
![]()
This tool is also very helpful, it allows you to, well, rotate an object, press on it:

You will see 3 rings, one for every direction, drag the blue ring, and drag it, following the ring:

As you see, it moved in the direction you dragged the ring, this will work for all rings, try it!
Part Six, How to move around in Roblox Studio, and Run the Game
In this part of the Tutorial, I will show you how to move around in the game on Roblox Studio, and run it. (Play Test)How to move around:
Quick Note: I will be calling what you see in the game, the “Camera”
First, to Rotate the Camera, hold right click in the game view, and drag it around, your camera will stary moving!
Second, to Move the Camera, use ASWD, just like you would in a game, and anyway your facing, you will go.
Third, Use Both to move easily around the game, by holding W, and holding right click.
How to Run the Game:
It’s Simple, Press the Blue Play Button, or press F5 on your Keyboard to run/play test the game.
![]()
Part Seven, Conclusion
In this part of the Tutorial, I will go over what I said, and give some tips on how to continue.In Part One: You learned how to Install Roblox Studio.
In Part Two: You learned how to Open and Set up Roblox Studio.
In Part Three: You learned what and how the Explorer, Properties, and Output worked.
In Part Four: You learned how to Make and Remove Objects in Roblox Studio.
In Part Five: You learned how to use the Select, Move, Scale, and Rotate Tools in Roblox Studio.
In Part Six: You learned how to Move in and Run your Game
Tips:
Recommended Sources:
Scripting:
TheDevKing Beginner’s Roblox Scripting
TheDevKing Advanced Roblox Scripting
AlvinBlox Roblox Scripting Basics
I hope you enjoyed this Lesson, and learned a lot from it! If you will like to continue with my scripting lessons, here is Lesson One! Have a Good Day! - Dan_foodz
