If you’re looking to create screenshots or videos for promotional material, experience thumbnails, or to document your experience in any way, these tips will help you capture your work at its best. This content gives you quick guidance on:
- Maximizing your image and rendering settings in Studio
- Setting up screen recording with OBS
- Using the built-in free camera mode to showcase your experience
To follow along, make sure you have Roblox Studio installed and OBS (Open Broadcaster Software) for screen recording.
Image and Rendering Settings
To ensure your screenshots and videos are visually stunning, it’s essential to maximize your rendering settings. While Roblox automatically adjusts rendering quality to balance between performance and quality, you can temporarily adjust these values to ensure you’re capturing your experience in its highest fidelity. Use the following tips to ensure your experience looks great:
In Studio
To maximize your graphic quality in Studio:
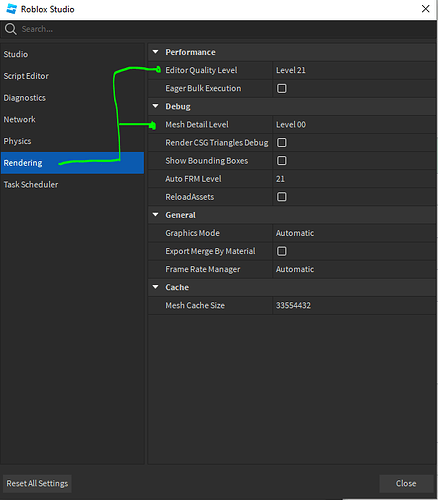
- Navigate to File > Studio settings and click the Rendering Tab.
- Set Editor Quality to 21.
- Set Mesh Detail Level to Level00.
During Runtime
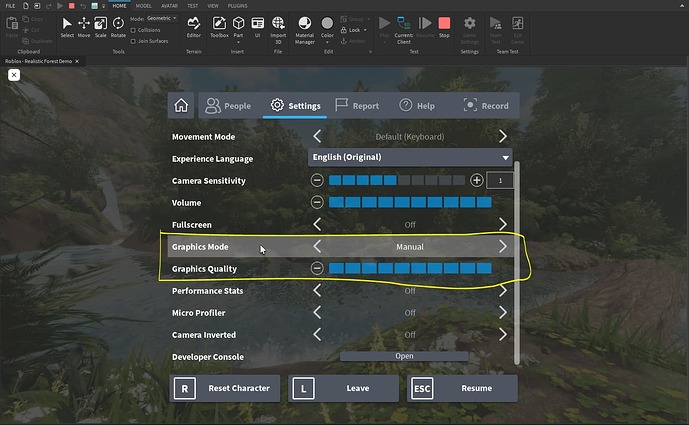
To maximize your graphics quality while joining or testing a Roblox experience:
- Press Escape or the Start button on a controller to get to the Player menu.
- Set Graphics Mode to Manual.
- Set Graphics Quality to its maximum level.
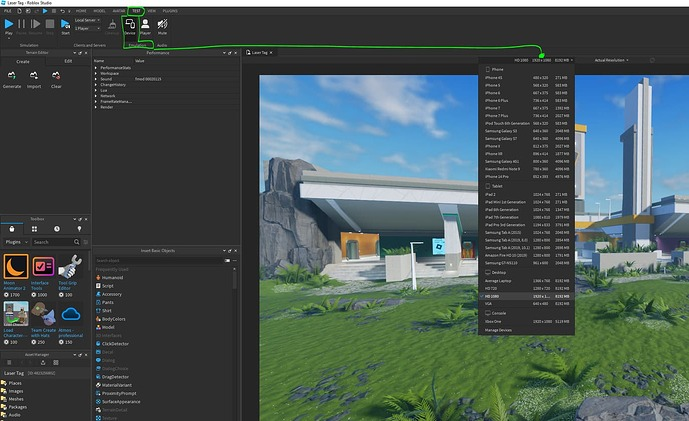
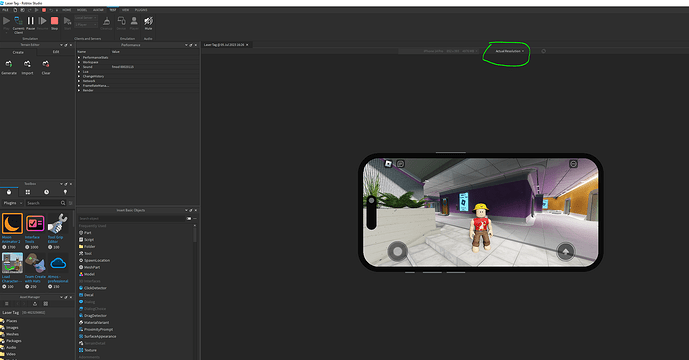
Setting and Saving Resolutions
When showcasing your experience and trying to engage new users, it’s important to showcase how your experience may look on different devices. Use the following steps to quickly change and save resolution settings:
-
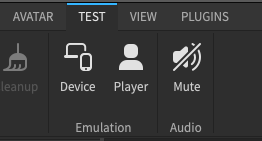
In Studio, navigate to the Test tab and select Device.
-
Above your viewport, click the resolution dropdown and select your desired device and resolution. This also affects the resolution when testing your experience.
How To Take The Screenshot
Now, when everything is set up as you like. Let’s do the actual Screenshot. To do this, let’s go to the VIEW Tab – and Click The Screen Shot Icon, please see the screenshot below.
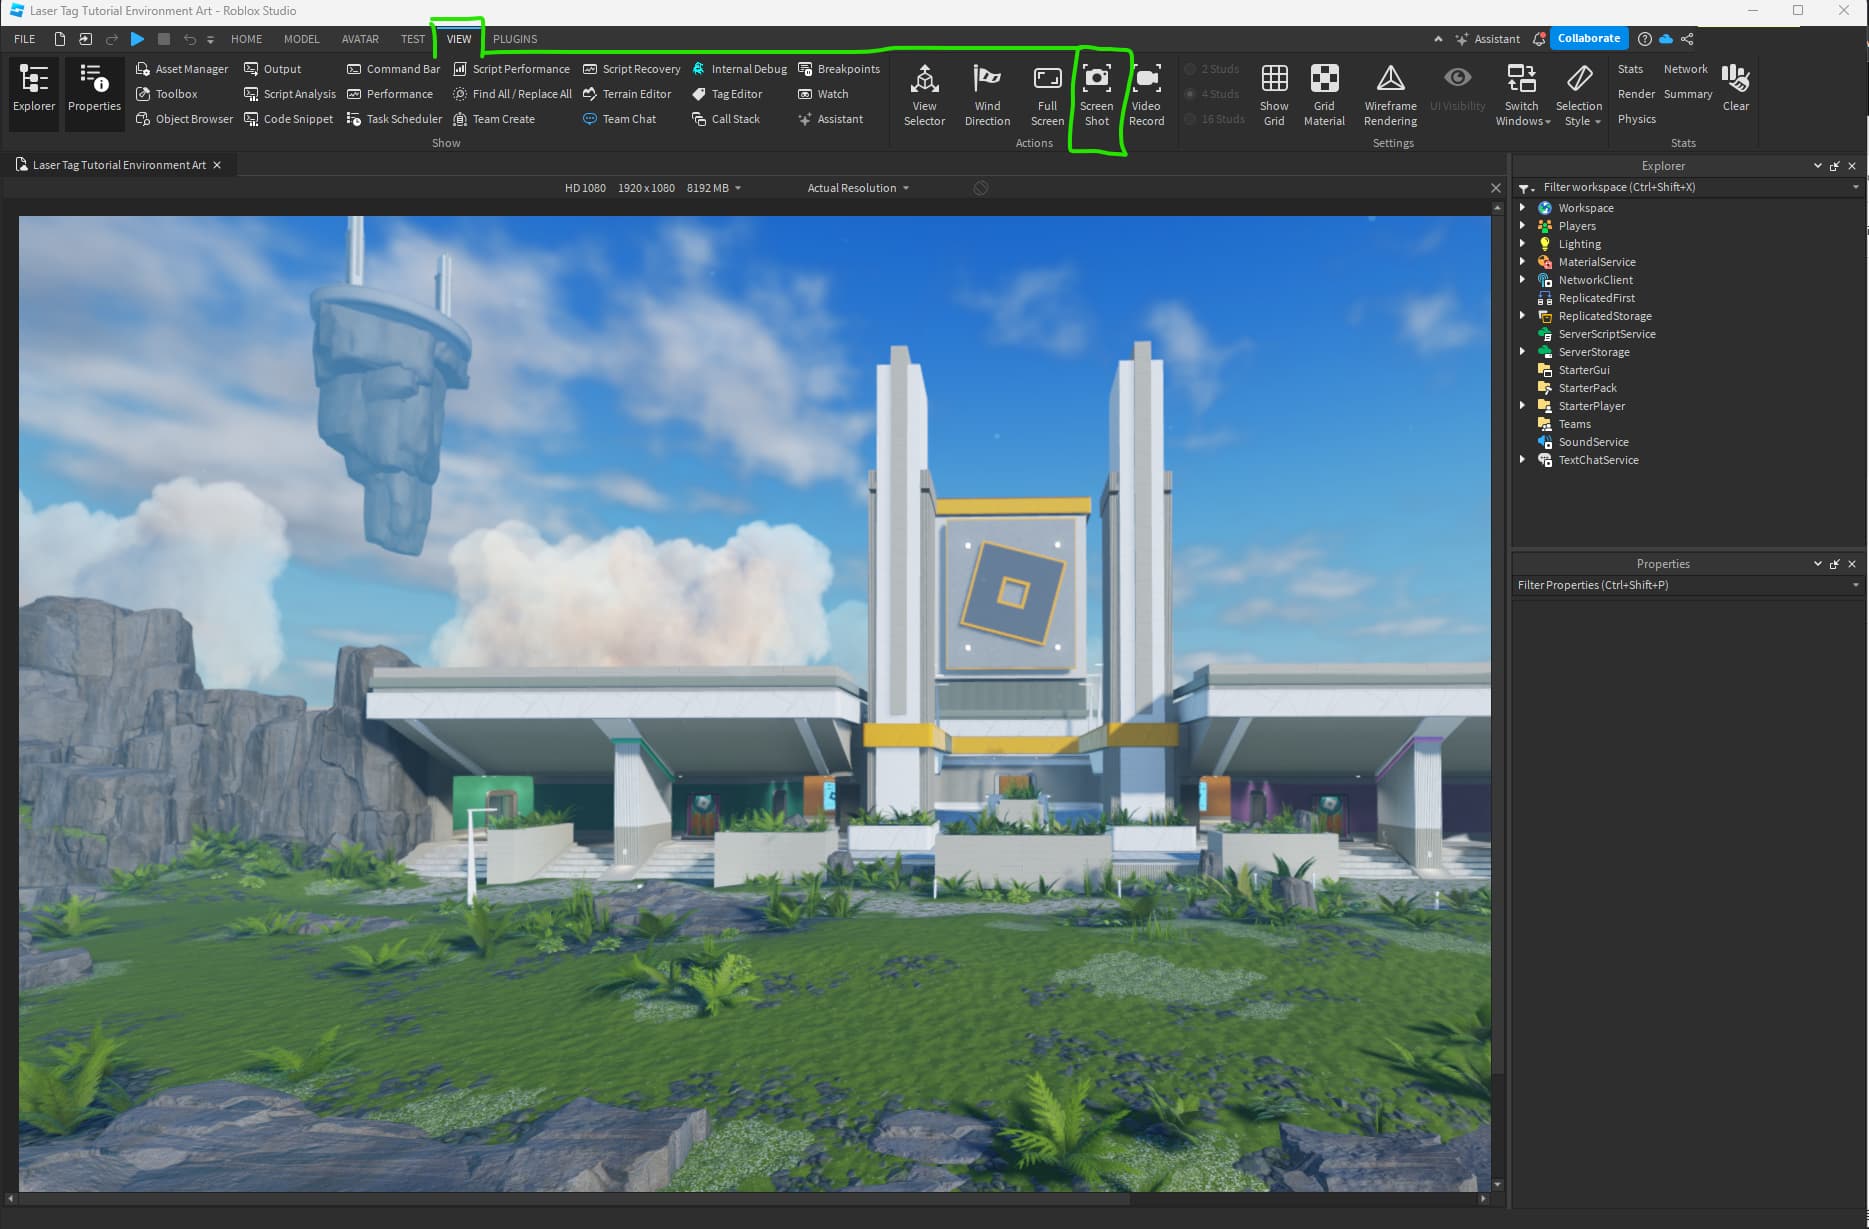
Once clicked, your screenshot will be automatically saved in the default output folder. Which is within your computer’s profile Pictures Folder.
Any other help needed?
If you’re still scratching your head, don’t hesitate to drop a comment below. Got more questions? Ask away! Whether it’s about screenshots or anything else, I’m here to help. Let’s tackle those Roblox Studio challenges together!
Using Free Camera
While testing experiences in Studio, you can use the free camera to disconnect the camera from your avatar and explore your environment using keyboard or controller movement. While testing an experience during runtime, press Shift + P to toggle the free camera and F11 to go full screen.
Use the following tips to get the most out of the free camera mode whether you are using a mouse or controller:
For mouse and keyboard:
- Hold and drag right-click to pan.
- Use WASDEQ/UHJKIY to move
- Use the mouse wheel to adjust field of view
- Use the up & down arrows to adjust movement speed.
For controller:
- Left analog stick - Dolly left/right, truck forward/backward
- Right analog stick - pan left/right, tilt up/down
- Left Trigger - crane down
- Right Trigger - crane up
- Gamepad Top Button (Y) - zoom in/decrease FOV
- Gamepad Left Button (X) - zoom out/increase FOV
Additional Hotkeys:
- Press L CTRL + L SHIFT + C to toggle basic UI visibility
- Press L CTRL + L SHIFT to exit the free camera mode
No matter what type of media you’re creating, experiment with different camera angles, lighting, and settings to discover what works best for your style. Use these tips and settings as your starting point to enhance the visual impact of your Roblox experiences and promotional materials.
Feel free to experiment and share any of these tips and settings. Leave a comment letting us know if these tips are helpful or if there are any other settings or tips you’ve found helpful in showcasing your content!
OBS Settings
OBS is a free and open-sourced video recording software available for all operating systems. Once you’ve installed OBS, you may need to adjust a few settings to ensure that your video looks as good as possible.
In OBS, navigate to File > Settings and use the following setting recommendations to get the most out of your screen captures.
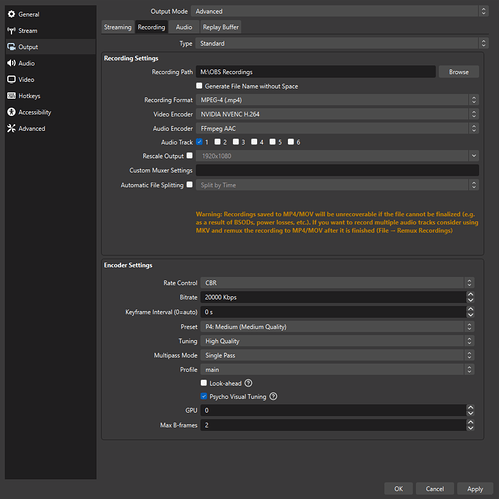
Output Tab
- Set Output Mode to Advanced to access additional settings.
- Navigate to the Recording tab.
- Set Type to Standard.
- Set Recording Path to your desired local directory.
- Set Recording format to MPEG-4 (.mp4) or MOV (.mov) for Mac.
- If using an Nvidia graphics card, set Video Encoder to NVIDIA NVENC H.264
- If using an AMD graphics card, set Video Encoder to x264.
- Set Rate Control to CBR.
- Set Bitrate to 20000 kbps as a minimum. You may want to increase later based on performance.
- Set Preset to P4: Medium (Medium Quality). You may want to increase later based on performance.
- Set Tuning to High Quality.
- Set Multipass Mode to Single Pass. You may want to increase this later based on performance.
- Set Profile to main.
Video Tab
- Set Base (Canvas) Resolution to 3840x2160 for 4k capture. For smaller screens, reduce this to your primary monitor’s resolution.
- Set Output (Scaled) Resolution to 3840x2160 for 4k capture. For smaller screens, reduce this to your primary monitor’s resolution.
- Set Common FPS Values to 60.

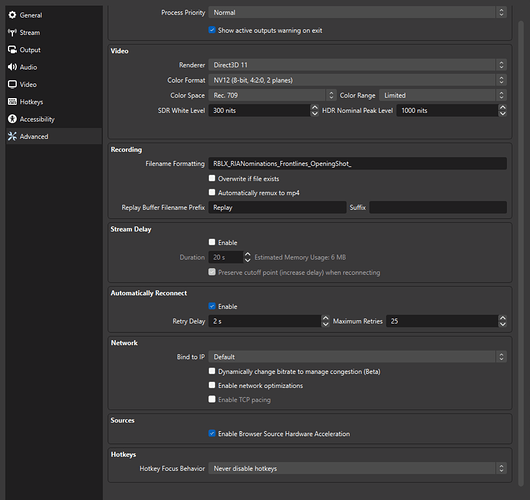
Advanced Tab
- Set Filename Formatting to your own file naming convention, such as RBLX_ProjectName_ShotType_ShotName.
Setting Scenes and Source Capture
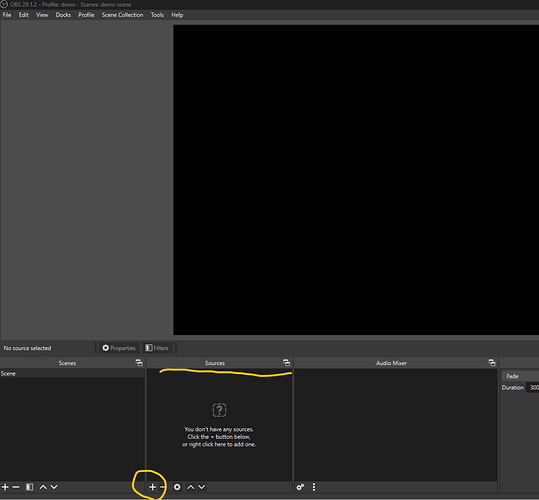
Use the following steps to create your scene and recording sources:
-
In the OBS main window, navigate to the Sources panel and select the + icon.
-
Select Display Capture.

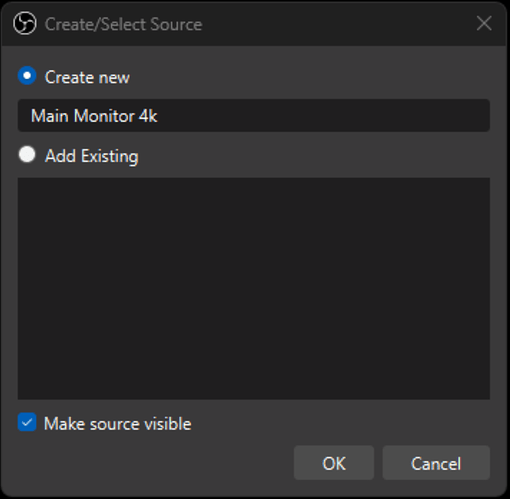
-
In the new Create/Select Source popup, set a name for your display source.
-
Set DISPLAY to your display source.
-
If you want to prevent OBS from capturing your cursor, set Capture Cursor to Off.
-
Click OK when complete.
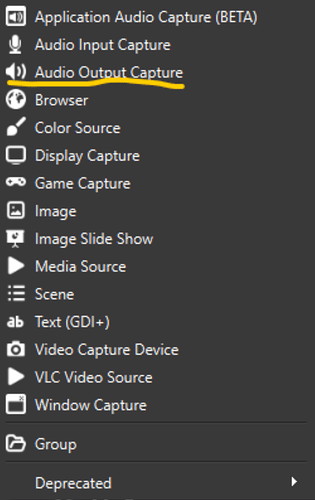
-
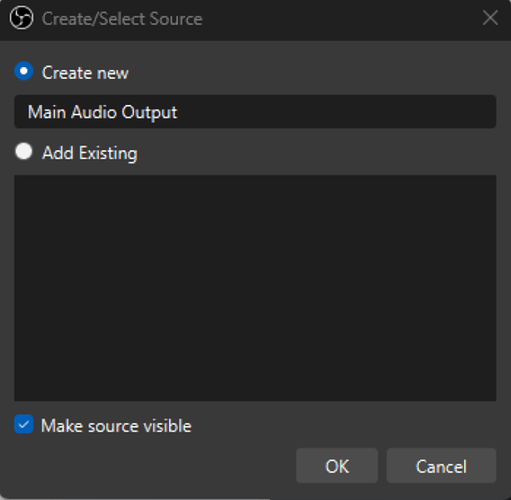
In the Sources panel, click the + button and select Audio Capture Device.
-
Select Create New and name the source for your audio import.
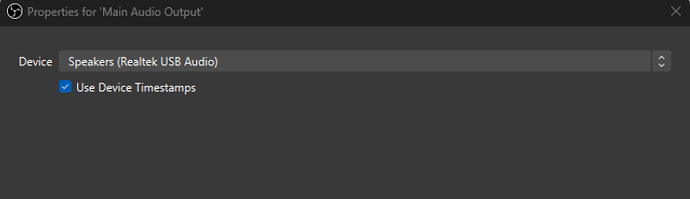
-
Double click your new source and set the Device to your computer’s current audio device.
With these quick settings, you can now begin recording your screen and audio by pressing the Start Recording button.
