What is this?
UIParticles is a simple yet effective plugin/module designed for creating and displaying UI particles. It is light, simple to set up and easily customizable.
Functionality
- Flipbook support!
- Copies almost all properties from the default Roblox ParticleEmitter!
- Preview UI particles before coding them in your game!
- Ability to automatically update the module to the last version with the plugin updates!
- Wide customizability!
- Easy to understand API!
Installation
Install the free Plugin from the Roblox Marketplace to get started!
Plugin details
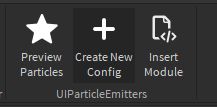
Preview button
This button opens up a new tab that allows you preview your UI Particle Presets. To use this, simply select an existing UI Particle Preset and it will automatically show up in the window. You can click on the Particle Preview Screen to manually emit particles. You may edit the properties of the particle’s attributes while previewing it.

Note that the properties inside this tab are only used for previewing and do not edit the actual particle!
Create New Config button
This button creates a new UI Particle Preset using the default config. You must first select an object to parent the preset to!
Insert Module button
This button inserts the UIParticleEmitter module into your currently selected instance (or ReplicatedStorage if nothing is selected) that you can use for coding. To see how to code with this module, please view the Coding section.

Update Modules button
This button allows you to automatically update any outdated UIParticleEmitter module in your current place.
Please note that the plugin has to be manually updated first, signified by a yellow text at the bottom of the plugin stating that there’s a new update available.
This button only shows up if your UIParticleModule is outdated.
Getting Started
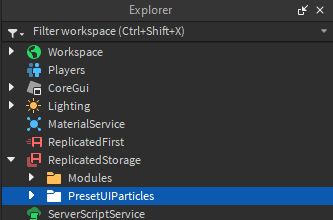
- First, select an Instance where you want to keep all of your presets. I recommend having a folder named “UIParticlePresets” in ReplicatedStorage for organization.


- Create a new UI Particle Preset using the Create New Config button on the plugin. The new config should be automatically selected upon creation.
- Open the Preview tab of the plugin and, if not already selected, select the newly created UI Particle Preset. You may now edit the preset to your liking!
If you’re not planning to use Flipbooks, delete the Flipbook Configuration folder found inside of the Preset folder and use the Image property inside of the Preset instead.
All Editable Properties
If you set a property to a NumberRange, then the particle will randomize that property in the set interval.
-
Acceleration : Vector2 (in pixels)- this Vector2 is added to theVelocityevery second. -
AffectedByParentTransparency : bool- decides if the particle parent’s BackgroundTransparency property also applies to the particles inside of it. For example, if you have a BackgroundTransparency of 0.5, then 0.5 will be added to the particle’s current transparency -
Color : Color3 or ColorSequence- color of the particle -
Enabled : bool- decides if the particle emitter will emit particles based on theRate -
Image : number or string- sets the image of the particle -
Lifetime : number or NumberRange- sets for how long particles will remain on the screen after emitting -
LockedToParent : bool- decides if the particle will be locked to the parent or not. Works the same way as Roblox’s ParticleEmitter LockedToPart property -
Parent : Instance- sets the parent of the particle. Required in order to display a particle! -
Rate : number- how many particles every second will be emitted, ifEnabledistrue -
ResamplerMode : "Default" or "Pixelated"- sets the ResampleMode of the particle -
Rotation : number or NumberRange- describes the rotation of the particle upon emitting -
RotationSpeed : number or NumberRange- how much rotation gets added every second to the particle. -
Size : number or NumberSequence (in pixels)- describes how large the particle is on the screen. -
SizeIsInPixels: bool- determines if the particle will use Scale or Offset for sizing the particle -
SizeDominantAxis: X or Y- sets theSizeConstraintof the particle (AKA what Axis will take priority over the other while using Scale sizing) -
SizeMultiplier : number or NumberRange- how much to multiply theSizeby -
Speed : number or NumberRange- how much to multiply theVelocityby -
SpreadAngle : number or NumberRange- how much spread is applied to the particle’sVelocity -
StartPosition : UDim2- selects a certain point of the parent to use, instead of being randomized. -
Transparency : number or NumberSequence- transparency of the particle -
Velocity : Vector2 (in pixels)- describes where the particle will go upon being emitted. -
ZIndex : number- ZIndex to use for the particle (for overlapping UI elements).
Default Config
Inside of the module script you insert with the plugin, you can find a DefaultConfig Configuration folder. You can change the default attributes of it, but I don’t recommend deleting any of them as it may break the module completely.
This config folder also carries over when you update your module.
Flipbook Properties
-
FPS : number- framerate of the flipbook -
Image : number- ID of the flipbook image -
Size : Vector2 (in pixels)- Size of the original image. Recommended to leave as-is, unless you know the specific size of the flipbook image and it’s not displaying properly. -
Speed : number- speed of flipbook playback -
Tiles : number- how many tiles total there are in the flipbook’s image
Coding Guide
Coding with the module is fairly easy.
-
First, you must insert the UIParticleEmitter module using the Insert Module plugin button. You can put it anywhere, but I recommend putting it into a folder named
ModulesinsideReplicatedStorage. -
Now, create a LocalScript inside of a Frame, as the module can only be used on client. We must require the script before we do anything:
-- Your module path may not match!
local UIParticleEmitter = require(game.ReplicatedStorage.Modules.UIParticleEmitter)
- Now that we’ve gotten all the functions of the module script, lets create a new UI Particle Emitter!
-- Change PresetConfig to the preset you want to use.
-- You can use a table of properties instead of a configuration folder if you want!
local PresetConfig = game.ReplicatedStorage.UIParticlePresets.Preset
local NewEmitter = UIParticleEmitter.new(PresetConfig)
- We created a new particle emitter! Now let’s start rendering it.
NewEmitter.Parent = script.Parent -- Can set it to any frame!
NewEmitter.Enabled = true -- Starts emitting the particle
- Congrats! You just made your first UI particle emitter! You can edit basically any of the properties in the script. If you want to learn more about all the different properties and functions you can utilize, please view the API and All Editable Features tabs!
Final Script
-- Your module path may not match!
local UIParticleEmitter = require(game.ReplicatedStorage.Modules.UIParticleEmitter)

-- Change PresetConfig to the preset you want to use.
-- You can use a table of properties instead of a configuration folder if you want!
local PresetConfig = game.ReplicatedStorage.UIParticlePresets.Preset
local NewEmitter = UIParticleEmitter.new(PresetConfig)

NewEmitter.Parent = script.Parent -- Can set it to any frame!
NewEmitter.Enabled = true -- Starts emitting the particles
API
UIParticleEmitter
-
UIParticleEmitter.new()– creates a blank UIParticleEmitter using the Default values.-
Returns:
Instance UIParticleEmitter
-
Returns:
-
UIParticleEmitter.new(Configuration)- creates a UIParticleEmitter using the Configuration folder provided.-
Returns:
Instance UIParticleEmitter
-
Returns:
-
UIParticleEmitter.new(table)- creates a UIParticleEmitter using the table as the configuration.-
Returns:
Instance UIParticleEmitter
-
Returns:
-
UIParticleEmitter.SetUI(Instance)- When any particle hasLockedToParentproperty set tofalse, the particle will be inserted into this UI. Only really usable if you need to change theDisplayOrder. -
UIParticleEmitter:Enable()- enables the particles. Can also be achieved by setting theEnabledproperty totrue. -
UIParticleEmitter:Emit(Number)- emit a number of particles. If argument is not provided, emits a single particle. -
UIParticleEmitter:Clear()- remove all currently emitted particles. Does not prevent future ones. -
UIParticleEmitter:GetUpdaters()- returns a dictionary of Updater module name - Updater module function-
Returns:
Dictionary Modules
-
Returns:
You may also check out/download the template place here, with some example usages included.
P.S.
This is my first plugin, and this is my first time posting anything on the DevForum. I hope it serves you well in making games!
If you have any suggestions, questions, complaints or anything of that sort, please do leave a comment! I will be reading and responding!
Thank you!
