NOTE: THIS IS WINDOWS 10-11 ONLY. IF YOU HAVE MACOS AND WANT TO HELP, PM ME WITH THE MACOS STEPS AND I’LL ADD THEM TO THIS POST.
GitHub is a popular platform for sharing and collaborating on software projects. If you have created plugins for the Roblox platform, you can use GitHub to share your plugins with the Roblox community and collaborate with other developers. This can be especially useful if you are working on a larger, more complex plugin that requires input and contributions from multiple developers.
It is vital that developers know about this tool as it provides a powerful and flexible way to share, code and contribute on your projects.
Sharing your Roblox plugins on GitHub has several benefits:
-
Allows you to collaborate with other developers and receive feedback on your plugin.
-
Makes it easier for other developers to use and contribute to your plugin, as they can simply clone or fork your repository and make their own changes. Developers can also use GitHub Issues to report bugs in your code or make feature requests.
-
Sharing your plugins on GitHub can help you to build a reputation as a reliable, trustworthy, and skilled developer within the Roblox community.
-
Your work on these plugins can be used as proof of work for employers.
Here is a step-by-step guide on how to share your Roblox plugins on GitHub:
-
Create a GitHub account: Go to github.com and sign up for an account.
-
Install Git: Git is a version control system that allows you to track changes to your code and collaborate with other developers. You will need to install Git on your computer in order to use it with GitHub. You can download Git from the official website or use a package manager like Homebrew on macOS.
-
Go to the Git website (https://git-scm.com/) and click on the “Download” button. This will take you to the download page, where you can choose the version of Git that you want to install.
-
Select the appropriate version for your operating system and click on the “Download” button to begin the download process.
-
Once the download is complete, open the installer file and follow the prompts to install Git on your computer. This process may vary slightly depending on your operating system.
-
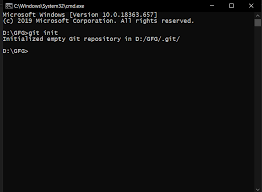
Once the installation is complete, open a terminal or command prompt window and type “git --version” to verify that Git has been installed correctly. You should see a message displaying the version of Git that you have installed.

-
If you want to use Git from the command line, you will need to configure your terminal or command prompt with your username and email address. To do this, run the following commands:
$ git config --global user.name "Your Name"
$ git config --global user.email "your@email.com"
-
-
Create a new repository: A repository is a place where you can store your code and collaborate with others. To create a new repository, click on the “+” icon in the top right corner of your GitHub dashboard and select “New repository”. Give your repository a name and a brief description.
-
Upload your plugin files: Once you have created your repository, you can upload your plugin files to it. To upload your files through the GitHub website, click on the “Upload files” button and select the files you want to upload.
-
Share your repository: Once you have uploaded your plugin files to your repository, you can share it with the Roblox community by sharing the link to your repository. You can also add a “Readme” file to your repository, which will provide information about your plugin and instructions for how to use it.


TL;DR: Sharing your Roblox plugins on GitHub is a useful way to collaborate with other developers and share your work with the Roblox community. By creating a repository and uploading your plugin files, you can make your plugins easily accessible to others and receive feedback and contributions from the community. Additionally, using GitHub allows you to track changes to your code and collaborate with other developers in a organized and transparent manner.