Hi there! I’m Ggblocks20, a intermediate scripter who has been on the platform for 3 years now! Today, I will be making a chest that utilizes the math.random() function to give a random item to the user who clicked the chest.
If you don’t want to do the tutorial scroll down below for the link
Intro
There are a few things we have to do before we can start making the script and such.
Lets start out by inserting a chest model into our game:

This is a chest model I found in the toolbox. If you do grab a free model chest make sure you remove all scripts from it.
Next lets add a click detector into our chest model:
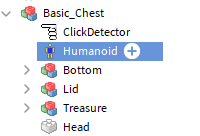
We will use our click detector to find out when a user has clicked our chest, so we know when to give them an item.
It shouldn’t take to long to setup your chest and add the click detector inside of it. Once your finished we will move onto scripting the base of our chest!
Scripting part 1
Now that we have our chest in our game, we will make the base functions of our script.
First lets insert a script into our chest:

You can name the script whatever you want, we won’t need to call the script name in order to give a player an item.
Now, inside of the script you have to add this variable into the script:
local Part = script.Parent--Defines the part
local CD = Part.ClickDetector--Defines the click detector.
The part var defines the parent so we know what the parent is, then the CD var searches through the parent to find the click detector.
Next lets make our function that fires when the part is clicked:
CD.MouseClick:Connect(function(Player) --Find out when the player clicks the chest
print("Event fired")
end)
This event fires when the parent is clicked, and when the event fires all the code inside of it runs. The print function isn’t needed but is good to have for debugging purposes.
Finally, lets add our math.random() variable:
CD.MouseClick:Connect(function(Player) --Find out when the player clicks the chest
print("Event fired")
local randomNum = math.random(1,4)--Choose a random number from 1 to 4
print(randomNum)
end)
You can name randomNum to whatever you want, but you will need to change the code to match your var name. We have just made the first part of our script! The part var and CD var define the click detector and the script’s parent, the function finds out when it’s been clicked and the randomNum var picks a random number from 1 to 4 and then prints it.
When you run it, it should look like this:
https://drive.google.com/file/d/1BZS7kEbh1OFA0qCHLhZlObqwFPpimlmr/view?usp=sharing
Scripting part 2
Now that we have our base functions made, lets make it so when math.random() is a certain number it fires an event:
	if randomNum == 1 then--If math.random is equal to 1 then fire fire the event
		print("Math.random = 1")
	end
This code makes it so when the var randomNum is equal to 1 it prints out “math.random = 1” , you should copy this to tell all numbers print out something when they are chosen.
Currently your code should be somewhat similar to this:
local Part = script.Parent--Defines the part
local CD = Part.ClickDetector--Defines the click detector.

CD.MouseClick:Connect(function(Player) --Find out when the player clicks the chest
	print("Event fired")
	local randomNum = math.random(1,4)--Choose a random number from 1 to 4
	print(randomNum)
	if randomNum == 1 then--If math.random is equal to 1 then fire fire the event
		print("Math.random = 1")
	end
	if randomNum == 2 then--If math.random is equal to 2 then fire fire the event
		print("Math.random = 2")
	end
	if randomNum == 3 then--If math.random is equal to 3 then fire fire the event
		print("Math.random = 3")
	end
	if randomNum == 4 then--If math.random is equal to 4 then fire fire the event
		print("Math.random = 4")
	end
end)
If you test the game it should look like this:
https://drive.google.com/file/d/1-kW-IJjmaieJB8u-WPxbsGEkuW52pge1/view?usp=sharing
Next lets make it so when a certain number is reached a certain UI shows up:
local gui = Player.PlayerGui
local UI1 = gui:FindFirstChild("AK-47")--Change this to whatever your UI name is
The code should be right under the MouseClicked function. This just defines the UI and what the UI name is, you should change it to whatever your ScreenUI name is for example:

My UI’s name is AK-47, if your UI’s name was “e” then it would be gui:FindFirstChild("e"). I will add 3 more UI’s so each number has a different UI when it is called.
Your code should look somewhat like this:
local Part = script.Parent--Defines the part
local CD = Part.ClickDetector--Defines the click detector.

CD.MouseClick:Connect(function(Player) --Find out when the player clicks the chest
	local gui = Player.PlayerGui
	local UI1 = gui:FindFirstChild("AK-47")--Change this to whatever your UI name is
	local UI2 = gui:FindFirstChild("Shotgun")
	local UI3 = gui:FindFirstChild("MAC10")
	local UI4 = gui:FindFirstChild("UZI")
	print("Event fired")
	local randomNum = math.random(1,4)--Choose a random number from 1 to 4
	print(randomNum)
	if randomNum == 1 then--If math.random is equal to 1 then fire fire the event
		print("Math.random = 1")
	end
	if randomNum == 2 then--If math.random is equal to 2 then fire fire the event
		print("Math.random = 2")
	end
	if randomNum == 3 then--If math.random is equal to 3 then fire fire the event
		print("Math.random = 3")
	end
	if randomNum == 4 then--If math.random is equal to 4 then fire fire the event
		print("Math.random = 4")
	end
end)
Next lets make it so when the number is called the UI become visible:
	if randomNum == 1 then--If math.random is equal to 1 then fire fire the event
		print("Math.random = 1")
		UI1.Enabled = true
		wait(5)
		wait(5)
		UI1.Enabled = false --Make sure the "UI" part is the same is the one above or the UI will stay there forever
	end
The UI1 can be changed, but I’ll just have it as UI1 for now. Make sure to change UI1 to a different var when you call a different UI. I am going to copy the code to each of my numbers that I have in my events.
The code should now look like this:
local Part = script.Parent--Defines the part
local CD = Part.ClickDetector--Defines the click detector.

CD.MouseClick:Connect(function(Player) --Find out when the player clicks the chest
	local gui = Player.PlayerGui
	local UI1 = gui:FindFirstChild("AK-47")--Change this to whatever your UI name is
	local UI2 = gui:FindFirstChild("Shotgun")
	local UI3 = gui:FindFirstChild("MAC10")
	local UI4 = gui:FindFirstChild("UZI")
	print("Event fired")
	local randomNum = math.random(1,4)--Choose a random number from 1 to 4
	print(randomNum)
	if randomNum == 1 then--If math.random is equal to 1 then fire fire the event
		print("Math.random = 1")
		UI1.Enabled = true
		wait(5)
		wait(5)
		UI1.Enabled = false --Make sure the "UI" part is the same is the one above or the UI will stay there forever
	end
	if randomNum == 2 then--If math.random is equal to 2 then fire fire the event
		print("Math.random = 2")
		UI2.Enabled = true
		wait(5)
		wait(5)
		UI2.Enabled = false
	end
	if randomNum == 3 then--If math.random is equal to 3 then fire fire the event
		print("Math.random = 3")
		UI3.Enabled = true
		wait(5)
		wait(5)
		UI3.Enabled = false
	end
	if randomNum == 4 then--If math.random is equal to 4 then fire fire the event
		print("Math.random = 4")
		UI4.Enabled = true
		wait(5)
		wait(5)
		UI4.Enabled = false
	end
end)
We are now ready to move on to the final parts of the script!
Scripting part 3
Now that we have most of our script done, we will make it so when a certain number comes up a certain tool is given to the player:
game.ServerStorage.Tool:clone().Parent = Player.Backpack --Change tool to your tool name
Make sure to add this to all numbers or just when one certain number is printed the tool will be given to the player. Your tool must also been in serverstorage
Your code should look like this:
local Part = script.Parent--Defines the part
local CD = Part.ClickDetector--Defines the click detector.

CD.MouseClick:Connect(function(Player) --Find out when the player clicks the chest
	local gui = Player.PlayerGui
	local UI1 = gui:FindFirstChild("AK-47")--Change this to whatever your UI name is
	local UI2 = gui:FindFirstChild("Shotgun")
	local UI3 = gui:FindFirstChild("MAC10")
	local UI4 = gui:FindFirstChild("UZI")
	print("Event fired")
	local randomNum = math.random(1,4)--Choose a random number from 1 to 4
	print(randomNum)
	if randomNum == 1 then--If math.random is equal to 1 then fire fire the event
		print("Math.random = 1")
		game.ServerStorage.AK47:clone().Parent = Player.Backpack
		UI1.Enabled = true
		wait(5)
		wait(5)
		UI1.Enabled = false --Make sure the "UI" part is the same is the one above or the UI will stay there forever
	end
	if randomNum == 2 then--If math.random is equal to 2 then fire fire the event
		print("Math.random = 2")
		game.ServerStorage.SPAS12:clone().Parent = Player.Backpack
		UI2.Enabled = true
		wait(5)
		wait(5)
		UI2.Enabled = false
	end
	if randomNum == 3 then--If math.random is equal to 3 then fire fire the event
		print("Math.random = 3")
		game.ServerStorage.MAC10:clone().Parent = Player.Backpack
		UI3.Enabled = true
		wait(5)
		wait(5)
		UI3.Enabled = false
	end
	if randomNum == 4 then--If math.random is equal to 4 then fire fire the event
		print("Math.random = 4")
		game.ServerStorage.UZI:clone().Parent = Player.Backpack
		UI4.Enabled = true
		wait(5)
		wait(5)
		UI4.Enabled = false
	end
end)
When you test it out it should look like this:
https://drive.google.com/file/d/11pfNdweTVk2phAxZVIBvy7NV8EUBtFZ8/view?usp=sharing
Now we are almost finished, we are just missing one thing. The price. We want the chest to take money away from the player, and if they don’t have enough money we don’t want to give them a tool.
Right below the UI vars you have to add this code:
	local stats = Player:findFirstChild("leaderstats") --Find the leaderstats folder
	local sp = stats:findFirstChild("gold")--Change gold to your leaderstat value
Next below that add this:
	if (sp.Value >=4000) then --If the value is over 400 then subtract 4000 gold from them
		sp.Value = sp.Value - 4000
	else
		print("Not enough money")
		sp.Value = 0
		Player.Backpack.Parent = game.ServerStorage
I suggest changing the else as currently the way I prevent a user from getting gold is by parenting the backpack to nil, and setting their money to nil.
Then if you test it, it should look like this:
https://drive.google.com/file/d/112gYhGQQpI_xamQMtvZibwBsBb_PkDqo/view?usp=sharing
Outro
Thanks for reading my tutorial, even though the code is kind of messy and bad I hope you learn something from this! If you want to support me, the model link directly supports me and allows me to do more epic free model stuff  If there are any bugs, or you are having trouble with it, please let me know in the replies!
Model link:
Random chest free model