Hi DevForum!
This will be a very basic tutorial on how to use procedural noise inside of Roblox Studio, and will skim the surface of what you can do with it.
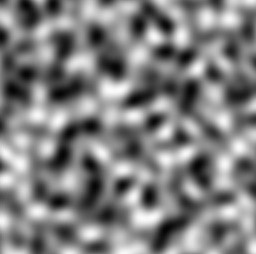
Noise is an algorithm that creates a “random” image, and is used for an incredibly large amount of computer generated imagery, along with much more.
The first form of noise was called Perlin Noise, and was created by Ken Perlin in 1983.
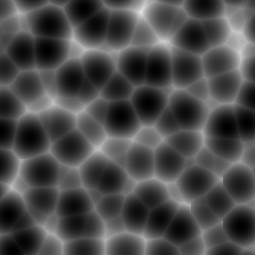
There are many other variations of noise, such as Simplex, Worley, and many, many, more.
Perlin Noise

Simplex Noise

Worley Noise

We can use this inside of Roblox with the math.noise() function. The particular version that Roblox uses is Perlin Noise.
To test this, we can run some code like this:
print(math.noise(12.34, 56.78)) -- Outputs 0.41 (and some more numbers)
The first parameter of this function is the X coordinate of the noise, and the second parameter is the Y coordinate. You can also use a Z coordinate as a third parameter, but 3D noise isn’t too different from 2D.
Think of this function as picking a colour from an infinite image, and the coordinates are choosing which pixel to pick.
How about we run some code that visualizes this?
for x = 1, 100 do
	for y = 1, 100 do
		local xNoise = x / 10 -- Dividing by 10 increases the size of the noise. To decrease it, divide by less; and to increase it, divide by more. You will likely have to play around with this.
		local yNoise = y / 10

		local part = Instance.new("Part")
		part.Anchored = true
		part.Size = Vector3.new(1, 1, 1) -- Stops parts from colliding with each other.
		part.Position = Vector3.new(x, math.noise(xNoise, yNoise) * 3 + 5, y) -- Multiplying by 3 increases the strength of the noise; to increase or decrease the strength, change that number. Adding 5 creates an offset, so that everything is visible.
		-- If you want to half the scale, use the commented code below instead:
		-- part.Size = Vector3.new(0.5, 0.5, 0.5)
		-- part.Position = Vector3.new(x / 2, math.noise(xNoise, yNoise) * 3 + 5, y / 2)
		part.Color = Color3.fromRGB(50, 50, 50)
		part.Material = Enum.Material.SmoothPlastic
		part.Parent = workspace
	end
end
This will make lighter numbers of the noise protrude more than the darker numbers.
We can also visualize noise with colour with this:
for x = 1, 100 do
	for y = 1, 100 do
		local xNoise = x / 10
		local yNoise = y / 10

		local part = Instance.new("Part")
		part.Anchored = true
		part.Size = Vector3.new(1, 1, 1)
		part.Position = Vector3.new(x, 5, y)
		part.Color = Color3.fromRGB(math.noise(xNoise, yNoise) * 250 - 250, math.noise(xNoise, yNoise) * 250 - 250, math.noise(xNoise, yNoise) * 250 - 250) -- Multiplying by 250 increases the strength of the noise, so that it is easier to see. Subtracting 250 stops a large portion from being just white.
		part.Material = Enum.Material.SmoothPlastic
		part.Parent = workspace
	end
end
There are many uses of noise inside of Roblox, but a common one is terrain generation. One good example of a game that uses this is Minecraft; although it isn’t in Roblox. (I also think that it uses a different type of noise)
The biggest problem with using this for your game is how resource demanding placing so many parts is; so if you’re making a large open world game, I would recommend Roblox terrain or using a script to load and unload portions.