Hello everyone. Today I am going to show you how to create a Simulator style pet in blender. I am going to try my best to include every step, but let me know if you all need me to add any more information you feel this is lacking.

Step 1: Getting started
Open the scene and remove your lamp and camera. You don’t need these.
Shift + Right Click + X to delete them. Your scene should look like this once you’re done.

Step 2: Shaping the Pet
Shape the pet body how you prefer. I really like the pet simulator 2 style pets, so I am going to use those as a reference when shaping this model.
Loop cut the body and shape the body of the pet if you like. If you don’t want it to have any curvature and just prefer a rounded square look, skip this step.

Select the cube

Go into edit mode by changing it here… or press TAB.
Loop cut your model and roll your mouse twice as seen above.
Once you’ve cut the model, select the edges you want to shape and bring them up.

It is handy to enable proportional editing ( to toggle it on and off, press O ) to shape the edge.
- Understanding Concepts : Proportional Edit is a way of transforming selected elements (such as vertices) while having that transformation affect other nearby elements
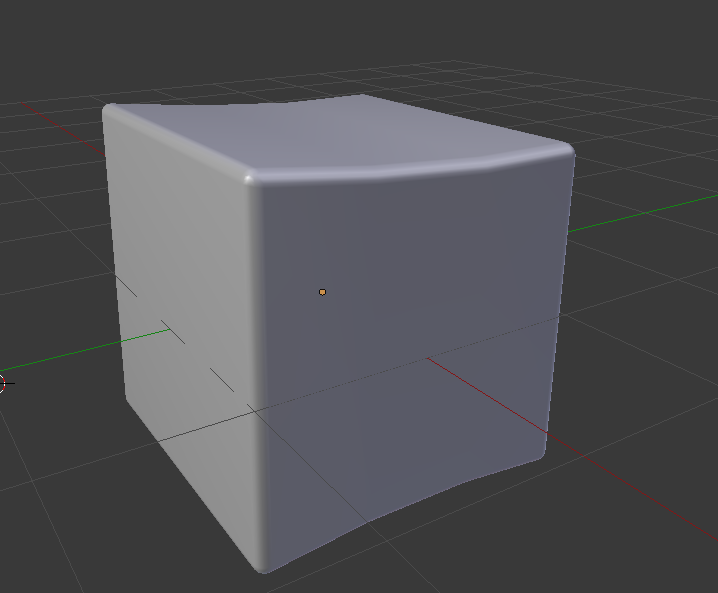
Once you’re done shaping it, it should look like this.

Step 3: Beveling
We will be using a bevel to give it a nice smooth look.
Select all the edges along the sides of the cube but don’t select the cuts from the loop cut. Here’s what I mean.


Once you have them all selected, press Ctrl + B to bevel. You can drag your mouse to change the intensity of the bevel then roll your middle mouse to change the segments.
I beveled mine .2 (Type .2) and I did 6 segments (roll your middle mouse 6 times)

Now, all we need to do is make it smooth.
Press A twice to select everything. Then go to Shading/UVS and set everything to smooth.

Here’s what my model looks like now.
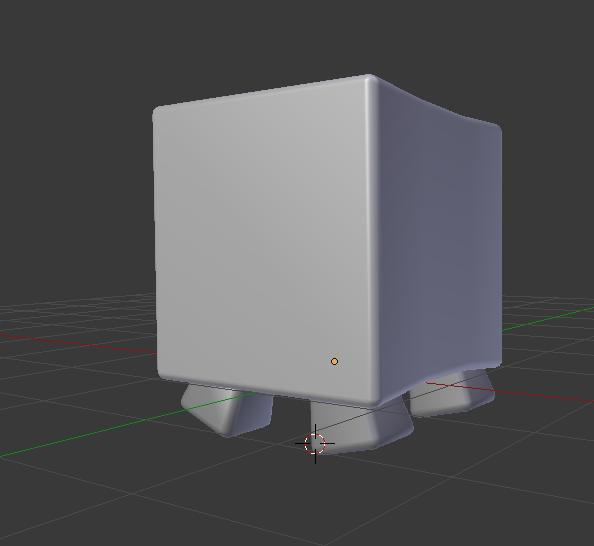
Step 4: The feet/paws
Paws are easy. I try not to spend too much time on them.
Insert a cube. In edit mode, select the top face and scale it down. Next, bevel the foot. There is one. Shift + D 3 times and position them correctly and then you have 4 feet. Heres a gif of me doing this.
Make sure to set shading to smooth for this as well.
Shift + D to duplicate. Ctrl+J to join them together. Keep them separate if you plan on animating them.
One trick I learned is that if you keep them separated, you can rotate them on the Y-axis (R + Y) to make them point outwards. Here’s what I mean.
Step 5: The ears
This step was very difficult to explain so I recorded me doing it. You can find a detailed explanation and tutorial here.
Dog Ears Tutorial
Once you’ve crafted the ears, position them on the pet.
R + Y to rotate on the Y-axis and get the ear facing the right way. S to shrink it down. Shift D to duplicate it to create the other ear.

Step 6: The tail
Create a cube. Select the left face and type E + 2. Select the newly created face and type E + 3 now. Your cube should look like this.

Next, give it a curve and bevel it. Once beveled, set your faces to smooth.

Position your new tail on to the model.
Step 7: Exporting + Final touches
Time to export. The first step is to Open studio and right click and insert a Meshpart
Next, go into blender and go to file>export and then wavefront (.obj) from here you can select each part and Export them
Make sure under export you have selection only turned on so you don’t export the entire mesh at once

Under the properties tab of your mesh in studio open up the mesh from your file and when it asks for locational data click yes repeat this step until your entire pet is imported and assembled.
Set your material to smooth plastic and color it a nice brown color
I use the color 206, 132, 98.
Next, we’re going to make the face using decals on meshes is tricky because sometimes they map on the mesh weird to combat this we’re going to use an invisible brick as the face and put the decal on the brick.
For the face you can use any decal that you prefer however I’m using decals that I purchased online. If you’re tight on money you can draw your own faces using a photoshop application.
For the face, we’re going to insert a part and size it to (0.1, 2, 2).
Set the transparency to 1.
Next right click and insert an object and from there select decal.
Under the properties tab you can upload your face as the texture.

Finally, group everything and anchor it. You have your dog! Hope this tutorial helped you.