Hello everyone! I recently released DynamicDonations, an open source software that enables you to dynamically create developer products for your games.
Use case
Have you ever added donations to your game? If you did, you probably added some UI buttons that prompt the player to purchase a developer product to make the donation. Although it works, you are limited to setting caps and minimums on donation amounts and this might push players away from donating because they don’t have enough robux.
With DynamicDonations you can programmatically create developer products of a player-defined price so that everyone can donate as much or as little as they want.
What you will learn
In this tutorial you will learn how to integrate DyamicDonations in your game for free.
Configuring the server code
DynamicDonations by default requires a SSL certificate to start and enable HTTPS on your API, although if you run it on Render without using a custom domain, your API will be protected by Render’s SSL certificate.
Roblox requires a HTTPS connection to allow interacting with external APIs through HttpService
If you do not provide a SSL certificate, the server will crash on startup.
If you do not have a SSL certificate, you can use a modified version of DynamicDonations that you can find on my GitHub profile here
- Navigate to the GitHub repository
- Click “Fork” in the top right corner
- From the dropdown menu choose the forked repository owner
- Click “Create fork”
If you want to deploy DynamicDonations with a SSL certificate, you can find the documentation to do so in the README.md file
Setting up servers
There are two great tools you can use to host DynamicDonations for completely free. DynamicDonations relies on the Node.js runtime and the MySQL database.
You can get a free MySQL instance that runs 24/7 on Railway.
As for the server hosting provider you can use Render.
Setting up MySQL server and Render project
- Open the Railway dashboard
- Click
 in the top right corner
 - Click

- Click on the deployed MySQL instance

- Go to the variables tab
- Copy the
MYSQL_URLvariable using the copy button ( )
)

MYSQL_URLVARIABLE CONTAINS THE CREDENTIALS TO CONNECT AND INTERACT WITH YOUR DATABASE INSTANCE. KEEP IT PRIVATE!
- Open the Render dashboard
- Click
 in the top right corner
 - From the dropdown menu that appears, select “Web Service”
- Select “Build and deploy from a Git repository”
- Click Next
- If you did not sign up with GitHub, click “Connect GitHub”
12.1) Select the account under which you forked the repository
12.2) Under “Repository access”, select "Only select repositories
12.3) From the dropdown menu, select the forked repository
12.4) Click “Save”
12.5) Go back to Render - From the “Connect repository” list, click “Connect” on the forked repository
- As “Region” select one where you can connect using a VPN (VPN is required due to IP changes invalidating ROBLOSECURITY cookies)
- Leave “Root Directory” blank
- Select “Node” as Runtime
- Set “Build command” to
npm i && npx prisma db push && npx prisma generate && tsc - Set “Start Command” to
node . - Expand the “Advanced” tab
- Click “Add Environment Variable”
- Set “key” to
API_KEYand for the value, either input a string you want to use as the API key that will be required for authentication to the DynamicDonations API or click the “Generate” button and Render will generate a random string for you
21.1) AddDATABASE_URLand set the value to the URL you copied from the Railway dashboard
21.2) AddHTTP_PORTand set the value to80which is the default port for the HTTP protocol
21.3) AddNODE_ENVand set the value toproductionto tell the server to read the environment variables from Render rather than a.envfile which is used for development only
Setting up a Roblox bot account
It is good practice to use a bot account when you need to use its ROBLOSECURITY cookie.
-
Connected to the region you chose on Render using a VPN
-
Open Roblox in an incognito window
-
Create a new account
-
Once you are done creating the new account, open your browser’s dev tools.
On Firefox
- Press F12 on your keyboard
- Go to the “Storage” tab
- Expand the “Cookies” section
- Select
https://www.roblox.com - Locate the
.ROBLOSECURITYcookie in the list - Double click on the “Value” field and copy it
On Chromium based browsers
- Press F12 on your keyboard
- Go to the “Application” tab in the top area of the dev tools window
2.1) If you don’t see an “Application” tab, click
2.2) From the dropdown menu, select “Application” - Follow steps 3-6 of the “On Firefox” section above
- Close the incognito window
- You can now disconnect the VPN
Make sure not to login to the bot account without being connected to the Render server region through a VPN. If you do, the .ROBLOSECURITYcookie of the account will be invalidated and your DynamicDonations deployment will stop working.
Continuing enumeration of Setting up MySQL server and Render project
- Add
ROBLOSECURITYand set the value to the cookie’s value you copied through your browser’s dev tools. - Click “Create Web Service”
Give Render a few minutes to download, build and start the DynamicDonations API server.
When the server is ready, Render will print Build successful 🎉 to the console.
Your DynamicDonations API is now available at the URL in the top left corner (<project-name>.onrender.com).
You have now successfully deployed the DynamicDonations API server.
Integrating in a Roblox game
Now that the DynamicDonations API is deployed, you need to let players create custom developer products.
I will not go over how to create a GUI and configure the server script as this tutorial assumes you already know how to.
Here’s a design you can follow to do this:
- Create a GUI with a TextBox and a TextButton. If you want to let players cover the Roblox tax on items purchases, you can add a checkbox to enable the user to do so
- When the button is clicked, use a RemoteEvent to send the amount of Robux typed by the user into the TextBox and the eventual
coverTaxbool value to the server - In a server script, listen to the RemoteEvent and make the following call to the DynamicDonations API
local data = {
data = {
price = amountOfRobuxTheUserWantsToDonate
coverTax = playerCoversTax -- or set it to false if you don't want to implement this feature
}
}
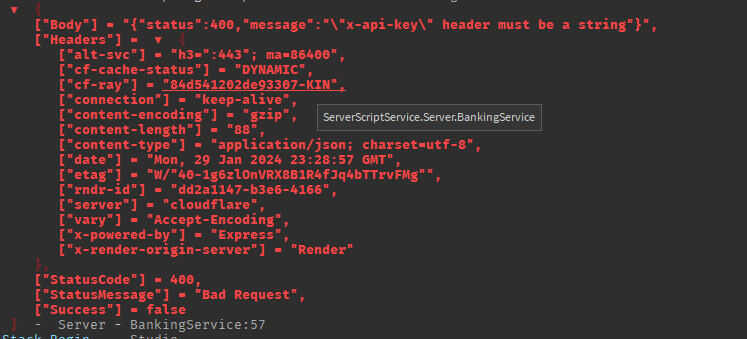
local headers = {
["Content-Type"] = "application/json",
["x-api-key"] = "<The API key you set on Render">
}
local success, result = pcall(function()
return HttpService:RequestAsync({
Url = "<Your Render DynamicDonations API server URL>/api/v1/donations/dev-products",
Method = "POST",
Headers = headers,
Body = HttpService:JSONEncode(data)
})
end)
if success and result.Success then -- result.Success indicates if the DynamicDonations API returned a successful response
local resBody = HttpService:JSONDecode(result.Body)
local devProductId = resBody.data.devProductId
-- Prompt the player to purchase the product using MarketplaceService
-- NOTE: For the purchase to be successful you also need to implement a ProcessReceipt callback
end
Note
Render pauses free projects for inactivity and restarts them when they are interacted with. This may cause slow API responses when the server is woken up. To address this issue you can setup a service that constantly interacts with the API that you can also use to monitor its status. I personally use Uptime by Betterstack.
If you have any questions feel free to ask!