Firstly Id like to say thank you to these helpful resource right here:
please check this forum out since its great to also understand this forum here.
Tool 6D | Tool Animation Compatibility Layer!
Hello this forum is a more explained and easier to understand version of the forum I pasted above. Again this forum will show you how to make a tool that is fully customizable to your liking, like in the title it will have an idle, unsheathing/pullout, multiple attacks (or one), and lastly an inspect animation to show off your tool.
The reason why Im making this is so that people who want to animate their tools and instead the handle/tool being stuck to your hand you can freely move it around.
SHOWCASE:
If you want to try out the tool yourself itll be here
Chapters
- Chapter: 1 Setup an Animation Dummy with Motor6D and your tool
- Chapter: 2 Animating
- Chapter: 3 Configuring the Script
- Chapter: 4 Inserting the Animations into the Tool
- Summary: Testing
Lets get started.
Chapter: 1 Setup an Animation Dummy with Motor6D and your tool
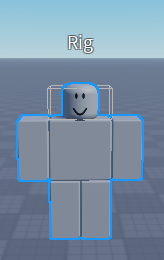
Youre gonna want to go to the Avatar tab and go to the Rig Builder then youre either gonna get the R6 or R15 whichever one youre gonna do and make sure it is the Block Avatar because its easier to animate on there.

Im doing R6 for this case
After doing that youre gonna want to get your tool in this case im using this sword and putting it inside of the Rig Model THEN add Motor6D into the Rig aswell. Then after that youre gonna change some part about the Motor6D, firstly the part0 should be the part where you are gonna be holding the tool. So if you were holding the tool in your Right Hand, make sure the Part0 is the Right Hand. If it the Left Hand then make sure it is the Left Hand. etc… etc… Then your Part1 would be the Tool/Item.
MAKE SURE YOUR TOOL IS UNANCHORED
Now that youre done setting it up its time to move on into the next chapter
Chapter: 2 Animating
You can either animate in Moon Animator if you have that or just Animate with the normal roblox Animator. Youre gonna need to make an Idle, Inspect, Unsheathe/Pullout, and Two Attack Animations. Ill show you how to add more in the configuring script chapter.
Chapter: 3 Configuring the Script
Firstly youre gonna want to download this, what Im providing you is modified scripts of the forum that gave us this but I modified it for people to understand it better and just overall easier really.
Once youve downloaded it, it should be a model called “Modified Scripts UNGROUP ME”
BUT BEFORE YOU UNGROUP THIS
youre gonna have to put it inside of a tool, in the tool properties make sure that the “Require Handle” Property is set to false otherwise this wouldnt work at all.
then you are able to ungroup this, it should look like this.


to get your tool/item back just copy it from the Rig and paste it inside the tool.
Now were gonna go inside of the ServerMain script and scroll down until we find configuration.
After that your Tool_Part should be the name of your Handle then the Body_Part should be the name of which your body is holding the Handle.
For example earlier I put the Motor6D Part0 as my Right Arm so Im the Body_Part it should be named Right Arm, and as for the Motor6D Part1 it was the scythe, and so the Tool_Part should be also named scythe.
After youve successfully configured the ServerMain Script were gonna go inside of the ServerMain Script and go into the LocalScript.

In here the only thing you really need to change is the handles name.

This is to ensure that this is the right handle.
Chapter: 4 Inserting the Animations into the Tool
The last and a bit important chapter youre gonna take all of your Animations and replace the Animation IDs inside of the Animations Folder

PLEASE REPLACE ALL OF THEM.
Summary: Testing
See if it worked, if something is wrong make sure to reread all of the steps and importantly dont forget to turn off the “Require Handle” property inside of your tool.


