I am trying to make a flashlight script without it being a tool (like evade) but I can’t figure out how to attach it to the players hand. I’ve tried using GripAttachment’s but I don’t understand how it works, I’ve been trying to use this tutorial How to weld objects onto an R6 character's left hand? - #5 by colbert2677.
Have you tried making it an accessory?
1 Like
I did, but its not 1 mesh, its a model with 8-9 parts in it.
then just weld all the parts together…
Will it work if I put all the parts in the accessory or the model?
Yes just have one main part and connect all the pieces to it, follow that tutorial i sent aswell
I tried the tutorial and It didnt work.
The script:
local player = game.Players.LocalPlayer
local char = player.Character or player.CharacterAdded:Wait()
local hum = char:WaitForChild('Humanoid')
local uis = game:GetService('UserInputService')
local flashlighte = false
local FlashLightLight = Instance.new("SurfaceLight")
FlashLightLight.Parent = player.Character:FindFirstChild("Head")
FlashLightLight.Brightness = 2
FlashLightLight.Range = 60
FlashLightLight.Face = "Front"
FlashLightLight.Angle = 40
FlashLightLight.Enabled = false

uis.InputBegan:Connect(function(key, gp)
	if gp then return end
	if key.KeyCode == Enum.KeyCode.F then
		if flashlighte == true then
			flashlighte = false
			print('unequipped')

		elseif flashlighte == false then
			flashlighte = true
			print('equipped')
			local flashlight = game.Workspace.Flashlight:Clone()
			flashlight.Parent = workspace

			player.Character.Humanoid:AddAccessory(flashlight)
		end
	end
end)
The accessory:

You could weld the primary part of the model to the hand, but make sure that all the parts inside the model are welded to the primary part so everything sticks together :)’
making it an accessory just makes it more complicated **
1 Like
When I tried this my avatar just froze and there wasn’t anything in the players hand.
As an accessory, attachments will snap together - or in other words, be in the same position. The idea is that you want to create a RightGripAttachment under the accessory so that when you add it to the character it will line up the flashlight’s RightGripAttachment to the character’s right hand’s attachment.
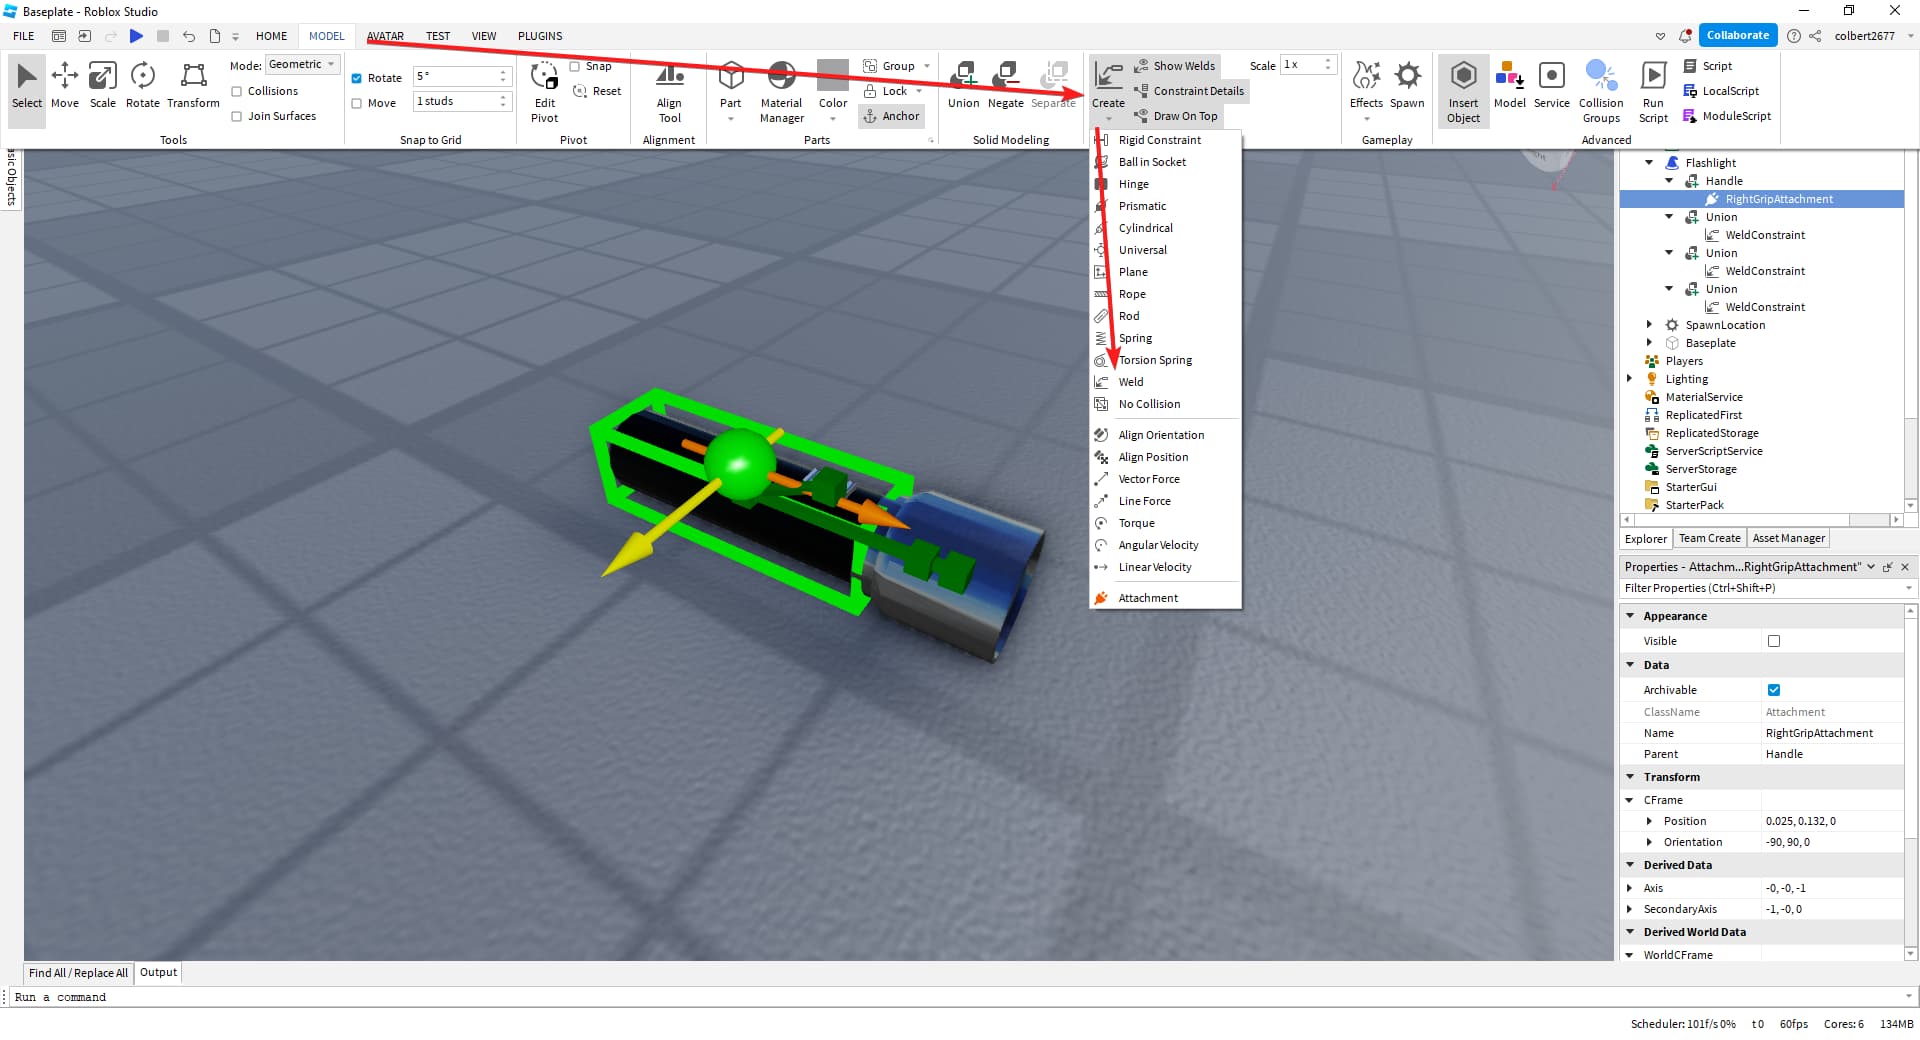
If you have an object with multiple parts you can weld them together first and make sure they’re unanchored, then you should get the results you’re looking for.


You can weld them together in the Model menu:
Although the post I made there has to do with using accessories to attach items to characters without using any code (and you can even do that for accessories with multiple parts although conventionally accessories only have the Handle part), since then I’ve personally preferred to write code to weld my extra parts to characters and cut out the accessory part. Both are nice solutions though in my opinion and have their own valid respective use cases.
2 Likes
The new rigid constraints make the welding process much easier to visualize. Consider it as an alternative method:
I tried the welding by using the model tab, still doesnt work, at least my avatar doesn’t get stuck anymore.
Try using Motor6D constraints!
To attach something using a Motor6D constraint, you need to set Part0 to the player’s hand, and Part1 to the model, welding it together and setting the PrimaryPart beforehand.
If you want to offset its position, modify the C1 CFrame property, responsible for Part1’s position.
Example of a script: (warning: was not verified!)
local Player = game:GetService("Players").LocalPlayer
local Character = game:GetService("Players").LocalPlayer.Character
local Model = -- the model you would like to use...
local Motor6D = nil

Motor6D = Instance.new("Motor6D")
Motor6D.Parent = Character
Motor6D.Part0 = Character:FindFirstChild("Right Arm")
Motor6D.Part1 = Model
Make sure that Model is NOT anchored!
1 Like
Thank you! This is working perfectly!
1 Like
Am very happy to help! 
This topic was automatically closed 14 days after the last reply. New replies are no longer allowed.