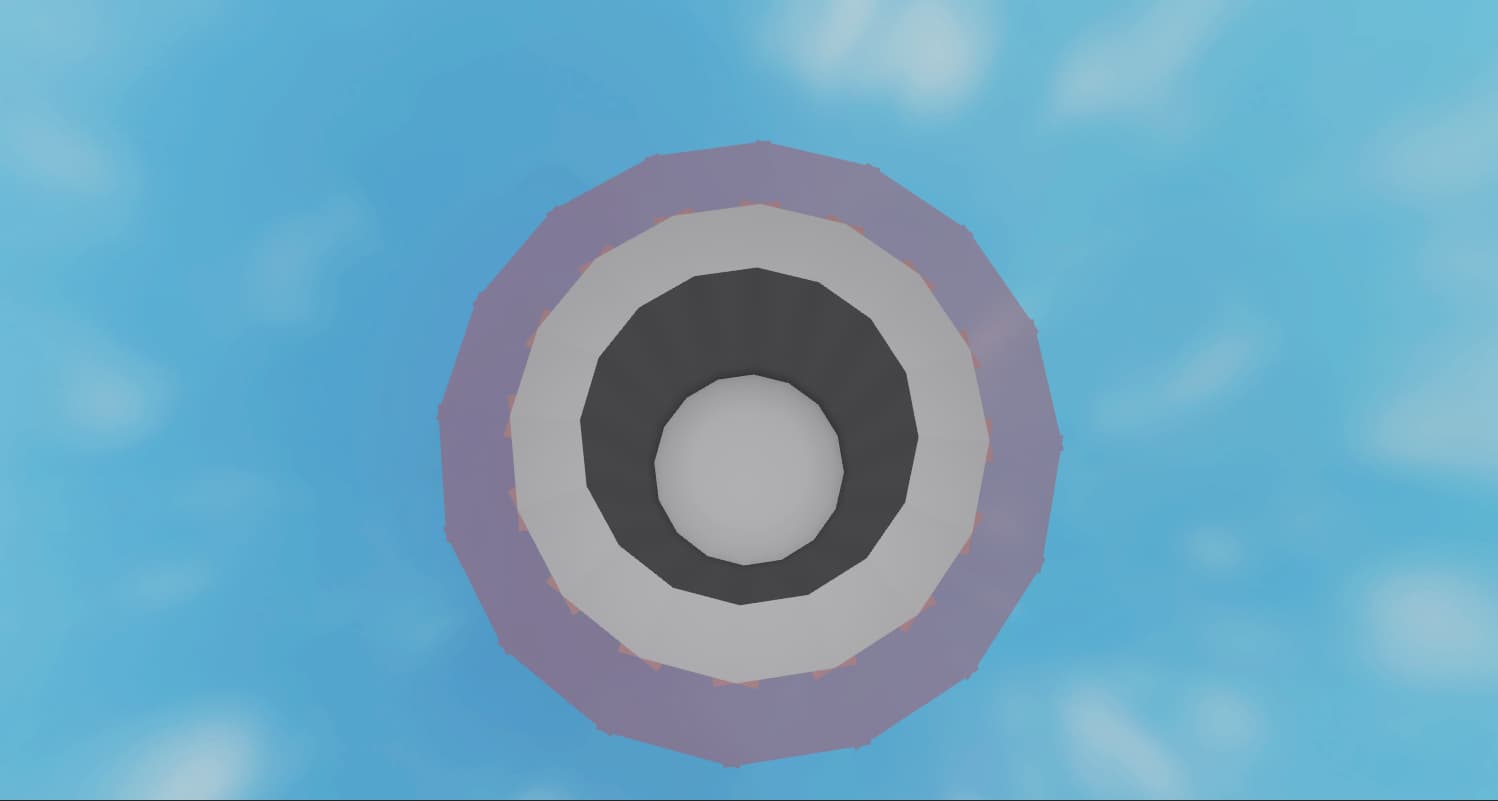
Welcome builders! This tutorial is pretty specific, but it was requested, so today I will show how I created the walls of this lighthouse I’m working on.
STEP 1:
In Studio, insert a Part and a Cylinder. For this example, I am using a small base. Make the cylinder into a 1x30x30 stud disk, like this
STEP 2:
Next we will want to place a 1x2x15 stud Part on the edge of the disk, and make sure it is centered. Duplicate the Part and move it across to the other side of the disk. It should look like this
In the Model Tab, we’re going to change the Rotate Snapping to 5 degrees, and Move Snapping to 0.125 studs.
Now rotate both of the Parts inward to the disk, each by 5 degrees. Afterwards, push both the Parts in by 0.875 studs. When you’re done, it should look like this
Now position yourself to face the top of the model. In the Model tab, we will want to change our Rotate Snapping to 11.25 degrees
Select the two Parts, then select the Cylinder. Duplicate them, and rotate them one click (11.25 degrees) horizontally. If done correctly your model should look like this
Rinse and repeat this process until you have completed the shape. Be sure to delete all the Cylinder duplicates – we only needed them to center and level the duplication process of the Parts.
By this point, if you look along the walls, you will quickly notice all of the jagged edges. Don’t worry, your lighthouse will not look this way; we will take care of these jagged edges now.
Back to the top of the model, select a Part, duplicate it, and move it 1 stud to the outside, like this
Rinse and repeat this process until you have one chunky circle
Now select all of the outside parts. In the Model Tab, we’re going to focus our attention to the Solid Modeling tab. Select that, and with all the outside parts selected, click on Union.
After when the outside walls are unioned, immediately go back to the Solid Modeling tab and select Negate. Your model should now look like this
Next we’re going to select all of the inside walls. Head on back over to the Solid Modeling tab, and union these walls. Do not negate them. Afterwards, you should see a NegativePart and a Union in your Workspace. Select them both

With both of the objects selected, head back to the Solid Modeling tab for the final time and union these bad boys together. Your end result, should be a beautiful, smooth, lighthouse-like shape
Hope this tutorial helps! If there’s any further questions please ask away in the comments. Thank you ![]()


