Introducing FluidForceSensor: Enhancing Precision and Usability for Aerodynamic Design

Hi Creators,

We’re excited to announce the release of FluidForceSensor, a powerful new tool for creators working with aerodynamics. This sensor, which works both in Studio & in-experience, allows you to measure forces, torques, and the center of pressure for aerodynamic assemblies, making it easier than ever to design, debug, and fine-tune your creations.

What is the FluidForceSensor?

The FluidForceSensor is a new instance that enables creators to measure the aerodynamic properties of an assembly, including aerodynamic forces, aerodynamic torques, and the center of pressure. It provides two key ways to access this data:

  1. Properties Access:

Reading the Force, Torque, and CenterOfPressure properties of the sensor returns the corresponding values for the assembly at the last physics simulation frame.

  1. EvaluateAsync Method:

You can also call the EvaluateAsync function with specified linear and angular velocities, as well as a coordinate frame, to get aero forces/torques and center of pressure values based on those conditions.

How can you use the FluidForceSensor?

This sensor opens up exciting new possibilities for aerodynamic design. Here are just a few use cases we’ve envisioned:

  • Auto-trimming systems for aircraft: Use EvaluateAsync on an aircraft’s body and control surfaces to find optimal deflection angles for ailerons, elevators, and rudders, improving the stability and performance of your designs in level flight.
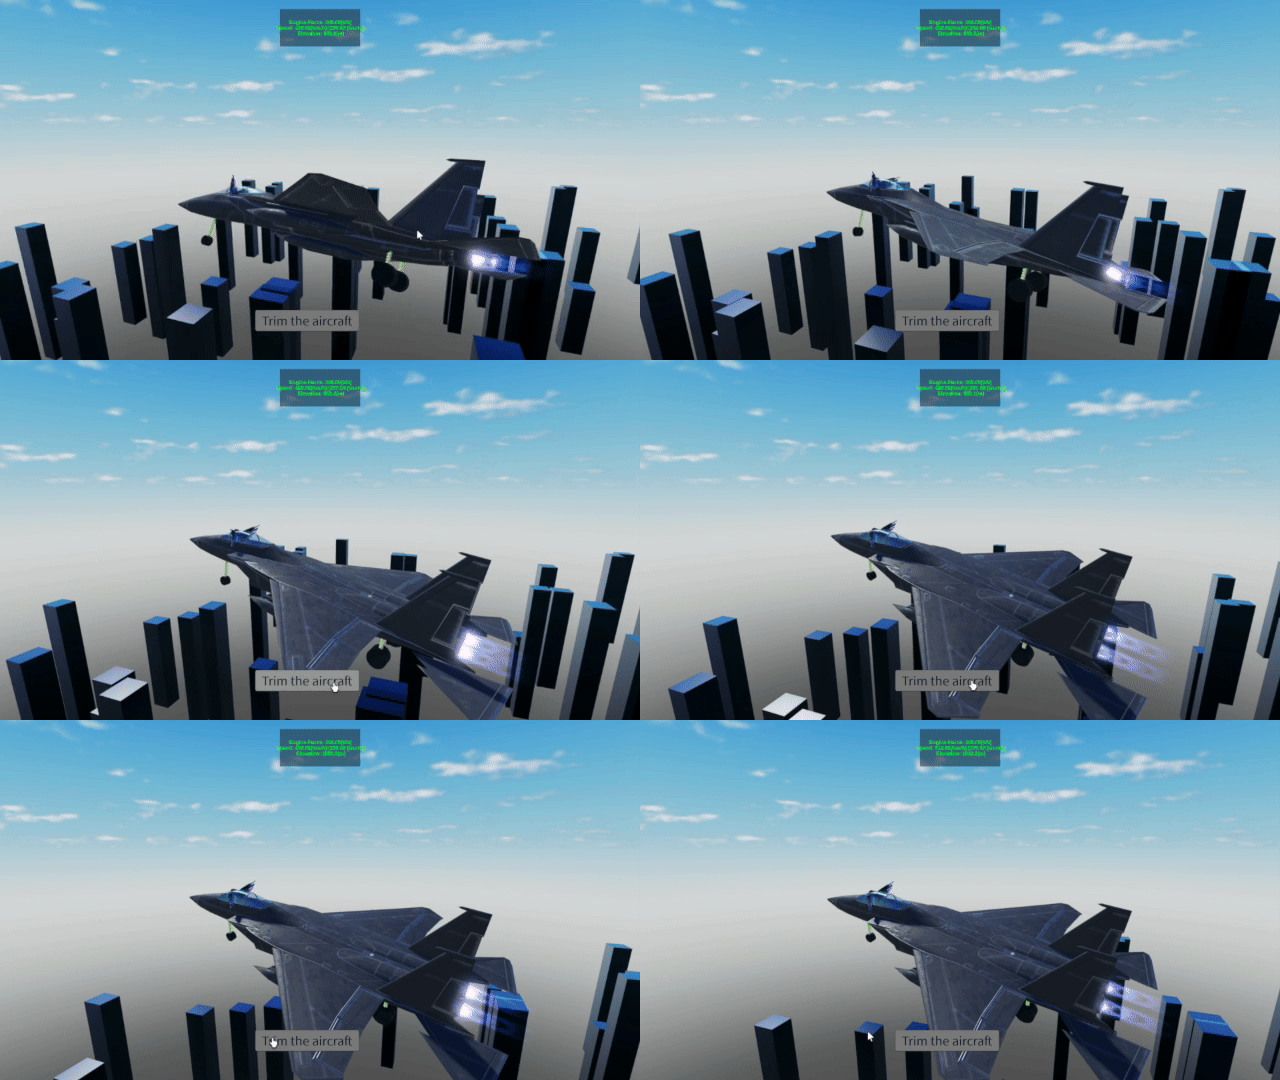
  • Aerodynamic force visualization: Visualize forces, torques, and the center of pressure in real time by reading the sensor’s properties and applying them to adornments, or by plotting the data for deeper analysis.

  • Wind tunnel simulations: Create wind tunnel-like tools that use EvaluateAsync to test assemblies under different conditions, helping you fine-tune aerodynamics directly within Studio.

We can’t wait to see what the community creates with this sensor!

How to get started

Using the FluidForceSensor is simple:

  1. Create a FluidForceSensor instance under the part you want to measure.

  2. Either read the sensor’s properties to get the most recent aerodynamic data, or use EvaluateAsync to compute values based on your specific conditions.

Example use cases

To help you get started, we’ve included some example use cases in the attached place file.

F15_force_sensor.rbxl (294.4 KB)

One example demonstrates an auto-trimming system for an F-15 aircraft (based on our Studio Beta sample). This system calculates the optimal trim angles for different aerodynamic surfaces. Here’s a snippet of the calcTrim function used in the sample:

-- Calculate forces and torques for the body and control surface
local bodyF, bodyT, bodyCop = 
   bodySensor:EvaluateAsync(vel, angVel, cframe)
local surfaceF, surfaceT, surfaceCop = 
   surfaceSensor:EvaluateAsync(vel, angVel, cframe)

-- Sum up the torque
local totalTorque = bodyT + surfaceT + surfaceArm:Cross(surfaceF * 2) 
   -- Multiplied by 2 for two surfaces

Another example demonstrates how to create aerodynamic force visualizations by reading the sensor properties and applying them to adornments. Here’s a snippet from the ForceVisualization script:

rs.Heartbeat:Connect(function(dt: number)
   local centerOfPressure = sensor.CenterOfPressure
   local normForce = sensor.Force / (20.0 * workspace.Gravity)
   local invTrans = part.CFrame:Inverse()
   forceAdorn.CFrame = invTrans * CFrame.new(centerOfPressure + 
      normForce * 0.5, centerOfPressure + normForce)
   forceAdorn.Height = normForce.Magnitude
   forceAdorn.Transparency = 0
   copAdorn.CFrame = invTrans * CFrame.new(centerOfPressure)
end)

Get Started Today!

Download the attached place file to explore these examples and more. We’re excited to see how you’ll use the FluidForceSensor to push the boundaries of what’s possible in aerodynamic design.

As always, we’re eager to hear your feedback, questions, and requests. Please let us know what additional features or sensors you’d find helpful for getting more direct physics data. We look forward to hearing your thoughts and suggestions!

Happy building,
The Physics Team

163 Likes

This topic was automatically opened after 10 minutes.

I see many uses for this to improve cloth physics when it comes to vehicle cloth! I had a question though, if I wanted to profile the forces on a specific point of a surface could I use an attachment then out the sensor inside of it?

18 Likes

I am absolutely in love with all the new physics additions recently :heart_eyes:

KEEP IT GOING ROBLOXXXX

21 Likes

These new sensors are really cool.
Whilst it’s not exactly physics related, I’d love to see a LightSensor of some kind in the future.

28 Likes

Unfortunately, this use case isn’t supported at the moment. Could you elaborate on how you would use this sensor if that was possible?

7 Likes

Tell us more! What information would you like from a Light Sensor and what would you use it for? :eyes:

25 Likes

Considering Roblox started as a educational physics sandbox, it is good too see more physics updates being added.

12 Likes

Properties: Light intensity, spectrum (color), direction of light source

Usage: Measures the amount of light in an area. Can be used to create stealth effects, where the player is more visible in lighted areas, or to change the behavior of NPCs depending on the lighting (such as monsters appearing only in the dark)

This is my idea of how it would be useful in my opinion

26 Likes

Ideally it would provide the average light colour and direction around a part (taking into account any dynamic lights and the sun). I could then feed those values into a ViewportFrame to have the lighting react with the real world.

17 Likes

A light sensor could help bring another level of immersion to npcs. Enemies being attracted to a player’s flashlight, npcs being blinded if you shine an intense light right in their eyes, etc. I’d love to see that!

15 Likes

while a sensor would be amazing there is a way to make this already by using raycasting and parts in radius if im not mistaken. like lighting properties are quite straight forward and for a spot light for example its pretty much just a cone, with some math u can sort this out!

6 Likes

I can see a huge use in light sensors for calculating exposure & bloom in real time to simulate the way we dilate our eyes depending on how bright it is. Like right now, I have triggers at the exits of rooms to change lighting and exposure, but if I could measure brightness it could all be procedular!

17 Likes

This is great! I really like how Roblox is starting to expand its capability’s.

7 Likes

not in any meaningful way for it to be useful. it’s far more expensive to use LUA code to detect the brightness of any point in space, an in-engine implementation would be far more useful and accurate.

13 Likes

Actually, using the inverse square law to approximate light intensity isn’t heavy at all :slight_smile:

it’s just a simple division based on distance, which is quite efficient. Since its only using basic arithmetic (no complex loops or high-cost calculations), the overhead should be minimal.

I agree that an in-engine lighting solution would be more accurate, but for many applications (and since the usecase is not that huge), this approximation is quite effective.

4 Likes

Honestly, this looks amazing! I hope more physics related updates happen in the future. This is the side of roblox everyone needs!

4 Likes

This is great that you are rolling out more physics updates for the community.
However, many of us would still prefer to use custom aerodynamic solutions for our games due to the control. Can you add a checkbox to Workspace to disable this for the place outright if desired to ensure no performance loss is being attributed to this implementation of aerodynamics? Already had a mishap with Experimental mode being left on and taking a lot of computation time away from the game.
Thank you.

(ps, a feature that would be absolutely insanely awesome would be for the .Touched event of parts to return the position of the intersection/collision between the 2 parts)

2 Likes

Thanks for your feedback! After the Client Beta we plan to transition a workspace FluidForce Property that will be the usual rollout Enum options of Default | Disabled | Enabled. At that point there will be two ways to disable aerodynamics:

  • Set workspace.FluidForces to Disabled (Default today during the Client Beta)
  • Set workspace.AirDensity to 0

We are interested in your experience with the aerodynamic model.

  • What kinds of customization options would you like to see.?
  • Can you elaborate on the performance issues you experienced, or provide (via DM?) a reproducer we can analyze? Part of the Client Beta is collecting data we can use to refine the model and improve its performance.

Thanks again!

There is currently a glaring issue with physics system in roblox: lack of proper control over objects that need it. More specifically:

  • Touched and TouchEnded events do not provide any useful info, like collision points, normals and velocity changes. This makes it difficult to script things that rely on physics, like cars or planes, since I can’t reliably monitor what exactly happens to them.
    There are a lot of mechanics that require such info, like calculating how much damage car should take on collision. Shapecasts are handy, but using them means not using any existing physics.

  • There is no easy way to make motion of an object more ‘absolute’ relative to other objects. For example, opening a door might require it to move disregarding most objects, but still pushing those objects aside.
    Another example is a moving platform (or an elevator), which might utilize complex physics and interact with physical objects, but should not be affected by any forces except those prescribed by scripts.
    This is usually called ‘Kinematic’ objects in game engines. You can sort of use anchored parts for this, but you lose all physics-related tools and, more importantly, proper replication to clients.

These 2 things together (collision info + kinematic objects) create an extremely powerful combination: a physical object that can be reliably controlled by scripts and fully interact with complex physical systems. Without it I don’t see myself coding a solid system for anything (cars, planes, elevators, pushable or kickable objects) and utilizing roblox physics at the same time. I simply do not have control.