Pet follow system?

Hey there! So today i decided that i want to rework the pet grid/follow system i already had. So, a few weeks ago, i made a post on how to make a pet grid system.

I was honestly surprised by the fact duck (the guy who solved it) actually gave me full working code.

Now, I want to take it a step further, I feel like I honestly learned nothing when I was just given the code so now preferably I want to make it like “pet simulator x” makes me wonder how @BuildIntoGames actually did this:
image


Maybe I haven’t gotten to that skill level yet :joy:
I want maybe a starting ground on how I could make this system, I find it very hard to tweak code that isn’t mine which is a problem, also that pyramid on 3 pets thing and more.

Maybe making this system could make me learn stuff that I didn’t know before and maybe, just maybe ill improve when it comes to scripting skills.

Anyway, Thanks so much!

5 Likes

Idk lol
Have u checked these

2 Likes

First one is going in a circle
and second one, well I don’t really know how i could use it much (idk what im saying :joy:)

also /\

1 Like

Oh right, sorry bout that

Well, good luck, I dont really know how to script this stuff
I hope u get a solution

2 Likes

lol yeah I find stuff like this is always hard, but if you learn a lot of math its just a matter of figuring out how to apply it into roblox studio.

I made a system like this a while ago… Tbh no idea how long ago, but it works like this:

I use a Renderstepped to update the pets every frame ( on client works best, but if you need to just work on server )

inside this RenderStepped / HeartBeat function I just did math to place each pet

BY THE WAY theres probably better way to setup this math… it uses a lot of variables and stuff
I think if you want your code to run realllllllllllly fast or some weird / cool positions experiment with some of the math. You will learn a lot of math just by messing with vectors or just how to mess with them I guess xD

local RunService = game:GetService("RunService")

local function test_obj(Name)
	local p = Instance.new("Part")
	p.Name = Name
	p.Anchored = true
	p.CanCollide = false
	p.CanTouch = false
	p.CanQuery = false
	p.Size = Vector3.new(1,1,1)
	p.Parent = game.Workspace
	return p
end

local test_left = test_obj("Left")
local test_base = test_obj("Base")
local test_right = test_obj("Right")

local Player = game.Players.LocalPlayer -- you could probaly leave this out if you are on server

RunService.RenderStepped:Connect(function(Delta) -- DeltaTime ( time between frames )
	--for i,plr in pairs(game.Players:GetPlayers()) do
	-- this could be used to also work with server ( update each player instead of one)
	
	-- Anyways this is how im going to do it on client
	
	local plr = Player -- im just doing this so its easier to replace if you are on server
	
	local char = plr.Character
	
	if not char then
		return
	end
	
	local lookvector = char.PrimaryPart.CFrame.LookVector
	
	local Charlocation = char.PrimaryPart.CFrame.Position
	
	local behind_player = lookvector * -1 -- the opposite direction the character is looking :O
	-- yes u can do ( -Lookvector ) lol
	
	-- this is where it gets tricky..


	-- lets get a left and a right vector ( so we can move the pets left and right )
	
	local left_vector = char.PrimaryPart.CFrame.RightVector * -1  -- CFrame.new(behind_player) * CFrame.Angles(0,math.rad(90),0)
	local right_vector = char.PrimaryPart.CFrame.RightVector
	-- we just make a CFrame using behind players lookvector
	-- then rotate with CFrame.angles it uses radians so i convert 90 degrees to radians
	
	-- I also learned a thing... I dont need to do any of that LOL


	-- i usually set the base position ( behind player ) to the ground and you can increase the distance to the player:
	local distance_to_player = 3
	local base_petlocation = Charlocation
	base_petlocation += Vector3.new(behind_player.X * distance_to_player, behind_player.Y - 2, behind_player.Z * distance_to_player)
	-- still ~0.5y above the ground
	
	local char_n_look = Charlocation + lookvector
	
	local look_at = Vector3.new(char_n_look.X,base_petlocation.Y,char_n_look.Z)
	
	test_left.CFrame = CFrame.new( base_petlocation + left_vector * distance_to_player , look_at )
	test_base.CFrame = CFrame.new( base_petlocation , look_at )
	test_right.CFrame = CFrame.new( base_petlocation + right_vector * distance_to_player , look_at )
	
end)

OKAY THATS A LOT, but even all of that doesnt explain how to expand your pets left and right or backwards, but I was hoping you would explore some vector math I guess I can reply again with some more math if you want that. I should have it done in a bit. ( thinking of saving it somewhere so I dont have to redo this. )

4 Likes

oh btw you can change the look for the final cframes ( its a little better if you just give it position of the pet + lookvector of the player )

im going to add that to my final thinggy xd

1 Like

Sure thing! no need but if you don’t mind xd

yeah, im prob gonna explore it a ton during the making of this system lol

oops forgot to solution sorry

1 Like

Okay I finished it and added a lerp to the positions >:D

local RunService = game:GetService("RunService")

local list_of_tests = {}

local function test_obj(Name) -- 
	local p = Instance.new("Part")
	p.Name = Name
	p.Anchored = true
	p.CanCollide = false
	p.CanTouch = false
	p.CanQuery = false
	p.Size = Vector3.new(1,1,1)
	p.Parent = game.Workspace
	return p
end

local Player = game.Players.LocalPlayer -- you could probaly leave this out if you are on server

-- you can just edit the pets with these numbers below lol

local Number_of_objects = 50

local distance_to_player = 3

local space_between_rows = 2

local space_between_pets = 2

local objects_per_row = 5

for i = 1,Number_of_objects do -- creates 5 test parts ( we can use these to test the rows math )
	table.insert(list_of_tests,test_obj(i))
end

RunService.RenderStepped:Connect(function(Delta)
	
	local char = Player.Character
	
	if not char then
		return
	end
	
	local lookvector = char.PrimaryPart.CFrame.LookVector
	
	local Charlocation = char.PrimaryPart.CFrame.Position
	
	local behind_player = -lookvector
	
	-- lets get a left and a right vector ( so we can move the pets left and right )
	
	local right_vector = char.PrimaryPart.CFrame.RightVector
	
	-- I also learned a thing... I dont need to do any of the tricky math LOL
	
	-- i usually set the base position ( behind player ) to the ground and you can increase the distance to the player:
	
	local base_petlocation = Charlocation
	base_petlocation += Vector3.new(behind_player.X * distance_to_player, behind_player.Y - 2, behind_player.Z * distance_to_player)
	-- still ~0.5y above the ground
	
	local Row_offset = objects_per_row % 2 == 0 and -right_vector * space_between_pets / 2 or Vector3.new(0,0,0)
	-- only add offset if Even ( otherwise its 0 )
	
	local Complete_left = (-right_vector * objects_per_row / 2 * space_between_pets) + base_petlocation + Row_offset
	
	local rows = math.floor(#list_of_tests/objects_per_row+0.5) -- 2 in this case 5/3 = 1.66 or something 1.66+0.5 = 2.1 -- floored = 2
	
	for i,obj in pairs(list_of_tests) do -- if you really wanted to you could make this math change based on how many are equipped
		-- so it looks good when you only have 1, 2, 3, 4 pets ( i mean it looks okay right now, but it looks odd with one tbh )
		
		local row = i % objects_per_row == 0 and i/objects_per_row or math.floor(i/objects_per_row)+1
		
		local object_number = i % objects_per_row
		object_number = object_number == 0 and objects_per_row or object_number
		
		local pet_position = Complete_left + (behind_player * row * space_between_rows) + (right_vector * space_between_pets * object_number)
		-- ( complete left + row vector + the position in the row)
		
		obj.CFrame = obj.CFrame:Lerp( CFrame.new(pet_position,pet_position+lookvector), 0.9*Delta*5 )
		
		-- or you can use obj:SetPrimaryPartCFrame() for models ( you dont need tweens or anything :P )
		
	end
end)

Have fun with that lol

I put the variables at the top so you can test it and stuff

3 Likes

Can agree so i did a little tweaking

image

pretty much (if people are curious how i did this)
all i did was check if there was only one part, if there was then i add a:

 Vector3.new(3,0,0)

pretty simple, not that complex xd

1 Like

Also, quick question (if you don’t mind) I don’t understand much whats going on so can you explain a bit? Thanks

(the complex math i mean)

example:

local nv = checkParts(#list_of_tests,i,obj)

		local row = i % objects_per_row == 0 and i/objects_per_row or math.floor(i/objects_per_row)+1

		local object_number = i % objects_per_row
		object_number = object_number == 0 and objects_per_row or object_number
		
		local pet_position = Complete_left + (behind_player * row * space_between_rows) + (right_vector * space_between_pets * object_number)
		-- ( complete left + row vector + the position in the row)

		obj.CFrame = obj.CFrame:Lerp( CFrame.new(pet_position,pet_position+lookvector), 0.9*Delta*5)

So sorry for asking so much :sweat_smile:

Oh dont worry about it sorry it took me so long to respond!

for the row it works like this:
Loopnumber % objects_per_row
meaning the item number we are currently editing divide by the number of objects per each row
and modulus is a little weird ( only returns with the remainder so if you do 5%2 this will do 2 ( 2’s ) can go into 5 , but 1 is leftover

( this one is now the result of the modulus or ( % ) )
if the item number evenly goes into the objects per row then
just give me the item number / objects per row
othewise give me the ( item number / objects per row ) without the decimal then add one ( its our row count ) it just works ? I mean you can write it down or something it will probably make more sense that way ( you can try some examples )

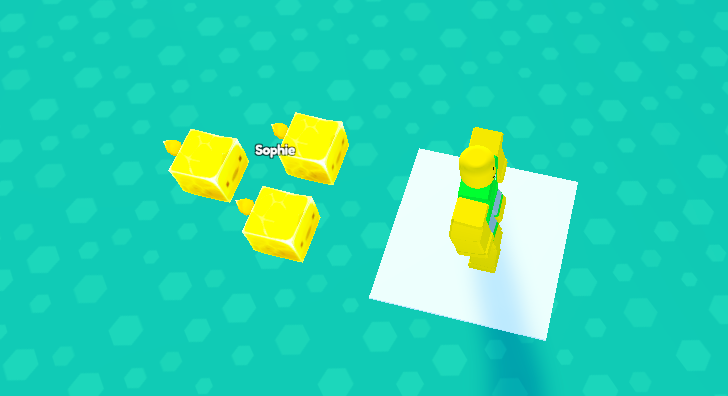
Object number is supposed to be the spot in the row ( basically if we are number 8 and each row is 3 then the object number is supposed to be 2 )

its quite similar ( item number % objects per row ) all i did to make sure if it was 3 and the number per row is 3 then it wont be 0 ( 3/3 has no remainder )

The main thing that happens in pet position is it merges all of the vectors to place the pet at the new location.

The vector for complete left ( thats on the first row and behind the player and as far left as possible ) if you are looking forward

then we add rows, but we have to make sure we are adding a vector based on the behind the player ( so we multiply it by the behind the player vector and the row count then make sure we update it to the space between rows.

Now we want to center the pets behind the player using the right vector ( so we do something similar to the rows ) so we take right_vector and multiply it by the pet number ( for the row → object number ) and multiply the space between pets

FINALLY we want to move the pet to the actual position so we set the CFrame for the object to a lerped cframe ( a position between two points ) so the first position is the current position of the object
then we have a second position ( the PET POSITION!! ) and we just go about ~0.2 from the old position to the new position with ( 0.9 * delta * 5 )

delta is the time between frames, but it is usually 0.02 if you have around 60 frames in game

you can increase the speed or decrease it by changing how much you multiply 0.9 and delta

you could also modify 0.9

Dont worry about asking too much I had fun making this!

let me know if you have any other questions.

1 Like

Ah, thanks!

its alright, don’t worry about it, im the one asking anyway

I could do this myself but you are the creator of the code so it will be a lot easier to configure it when you do it xd.

How would i change the offset? I can already check if the part is the third one but how would i put it to the middle? Adding a new vector 3 works but it messes up when i rotate.

Thanks so much btw!

1 Like

Well I dont actually know what you are looking for change an offset for what?

1 Like

Oh right sorry forgot


Here ill have this as an example, there are 3 pets and the third pet is at the middle 2nd row (i made it so third pet is alr at the 2nd row its just that idk how to offset it into the middle)

my main weakness in scripting is literally this i should prob learn soon :sweat_smile:

ahh okay

Well you could try figuring out if you are at the last row ( you dont have enough pets for this last row or something

then add an offset based on the number of pets

so it would look something like this:

if last row ( probably just going to check number of items then add offset ( like i am item number 2 and there are 2 other items in this row but max items in a row is 6 or something ) ) then

I dont think you need a lot of math but thinking about it takes me a while ( getting the vector offet from the left ( to add so we can move the last row to centre )

when you have that though it should look like this:

local last_row_offset = right_vector * space_between_pets * offset_vector

then u can just add that to pet position

thats probably a little tricky ( if you want to try it for yourself go ahead! Let me know if you get it ( I dont mind trying to make it )

yeah vectors and stuff are pretty hard to learn ( I bet you can do it though )
1 Like

tried that, didn’t work, maybe im multiplying the wrong one?

multiplied it here

local offsetV = Vector3.new(5,0,0)
local right_vector = char.PrimaryPart.CFrame.RightVector
local new = right_vector * space_between_pets * offsetV

local Complete_right = (-right_vector * objects_per_row / 2 * space_between_pets) + base_petlocation + new

gonna play around with it a bit

yeah okay it changes position when i rotate

update: managed to get the mid point:

if workspace:FindFirstChild("1") and workspace:FindFirstChild("2") then
		else return
	end
		local offsetV = (workspace:FindFirstChild("1").Position + workspace:FindFirstChild("2").Position)/2
		local right_vector = char.PrimaryPart.CFrame.RightVector
		local new = -right_vector * space_between_pets * offsetV

works the first time then i rotate and gets messed up

1 Like

Yeah there are a couple things that didnt work there.
I think this is supposed to be complete left, but you removed the row offset and we still need that to place our pets

also you want the offset vector to change based on the number of items in the last row

Im going to do a little weird thing It should help you get the solution im thinking of, but I think you can figure it out.

-- basically we need 3 things to make our last row centered

-- first thing we need is to know if we are at the last row
-- we then also need to know the number of missing items in that row
-- then we just need to add it to pet_position

Okay I am going to add spoilers if you want to try it for yourself.

first goal:
find how many pets we still need to move ( update )
I found this with: ( object_number, #list_of_tests, i )

second goal:
using pets left how do we know if we are the last row?
I used: ( pets_left and objects_per_row )

third goal:
add it to pets position

to add it to the pets position i just did: pet_position +=

I used: ( right_vector space_between_pets objects_per_row pets_left and ( /2 ) )

1 Like

Oof i forgot the spoilers

goal one spoiler:

local pets_left = object_number + (#list_of_tests - i) 
-- we are going to get the item we are in the row ( 2 for example )
		
-- 2 + the remaining items in the pet system = items_left

goal two spoiler:

if pets_left <= objects_per_row then
	-- this is the last row
end

goal three spoiler:

if pets_left <= objects_per_row then
	-- this is the last row
			
	-- the number of objects in the last row is pets_left
			
	pet_position += right_vector * space_between_pets * (objects_per_row - pets_left) / 2
			
	-- we divide by 2 because it would just move to the right instead of shifting to the middle
			
end
		
		
obj.CFrame = obj.CFrame:Lerp( CFrame.new(pet_position,pet_position+lookvector), 0.9*Delta*5 )

1 Like

Oh btw if you were wondering you can place this right after we setup pet_position but right before the final lerp with cframes

so right before:

obj.CFrame = obj.CFrame:Lerp( CFrame.new(pet_position,pet_position+lookvector), 0.9*Delta*5 )

also I didnt think about this until now … it might have fixed our odd little one pet XD

image

yep its all fine now lol

3 Likes

Hey there, i love how u were able to create such system on your own, i wish i was that advanced. But there is a little problem for me. For some reason my pets are off center, do you know how to fix this?
image