Hi Creators!
We’re announcing the Studio Beta for the Input Action Manager (IAM) – a powerful visual interface built directly into Studio to help you manage all your actions, contexts, and bindings seamlessly across your entire experience.
As you may have seen recently, the Input Action System (IAS) is now fully released, giving you a modular, scalable framework where control schemes automatically adapt to players using different hardware. If you’re not familiar with IAS, we encourage you to check out the post above, read this guide, or watch our recent Youtube video. IAS provides a robust foundation under the hood, but managing these instances via code or the standard Explorer tree can get complex.
The Input Action Manager solves this by giving you a unified, table-style interface to design, audit, and scale your input architecture with data-driven configurations.

 Getting Started
Ready to simplify your control mapping configuration? Getting set up takes just a few clicks.
- Enroll in the Beta: Open Roblox Studio and navigate to File > Beta Features. Enable the “Input Action Manager” option by checking the corresponding checkbox. Press Save and restart Roblox Studio when prompted.

-
Open the Editor: Once restarted, head to the top menu and select Window > Input > Input Action Manager to open the new editor panel. We recommend keeping IAM undocked or docked at a large size for the best experience!
-
Use in new or live experiences: Even though the IAM interface itself is a Studio Beta feature, any IAS instances created through IAM can be safely published and used in your live production experiences today, since the underlying IAS system is fully released!
-
See your existing work immediately: If your experience already has IAS instances, IAM will automatically scan your DataModel, extract those existing instances, and populate them instantly into the editor grid. Any actions that have been created but don’t yet have an assigned context will automatically gather under a dedicated Default Context folder so nothing gets lost in the shuffle. Changes in Explorer or in IAM automatically stay in sync with each other, so editing in either location works seamlessly!
 Note: InputContexts in starter folders will not be shown in Input Action Manager. We encourage the use of ReplicatedStorage for your contexts and actions.
 -
Get started! You can build your entire control hierarchy from scratch directly inside IAM. Any new contexts, actions, or bindings you create will automatically populate in the Inputs folder under ReplicatedStorage.
 Key Workflow Features
Here’s a sample placefile that you can follow along as you read through the key workflow features: Action Manager Test Place.rbxl. It shows what a complete IAM configuration can look like – note that it is not meant to be a playable game.
 Add and Update IAS Instances
-
To add a new action, use the left-hand hierarchy tree to create an
InputContext. From there, click the plus button to drop in anInputAction(such as a Bool or a directional vector). You can set your per-platform bindings using the dropdowns, or bind a UIButton by clicking on a touch cell and selecting your desired button in the explorer.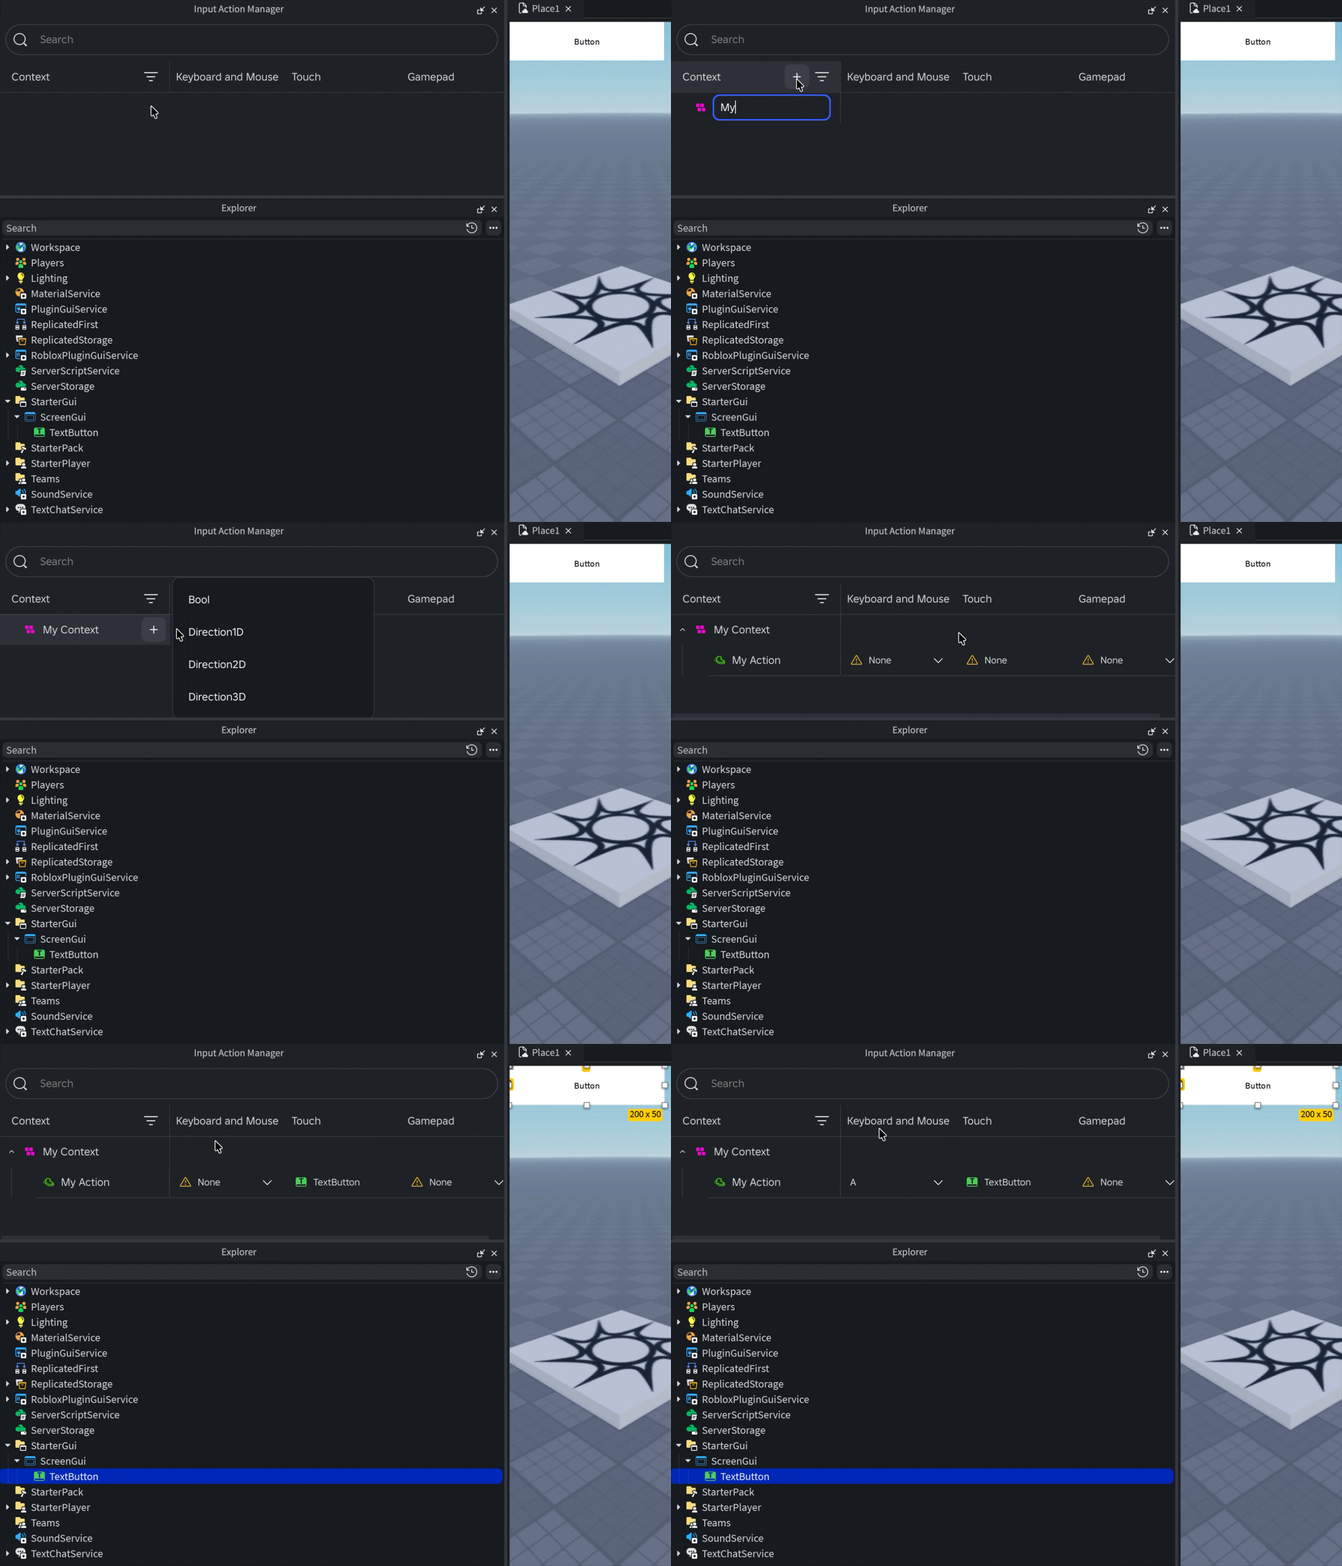
-
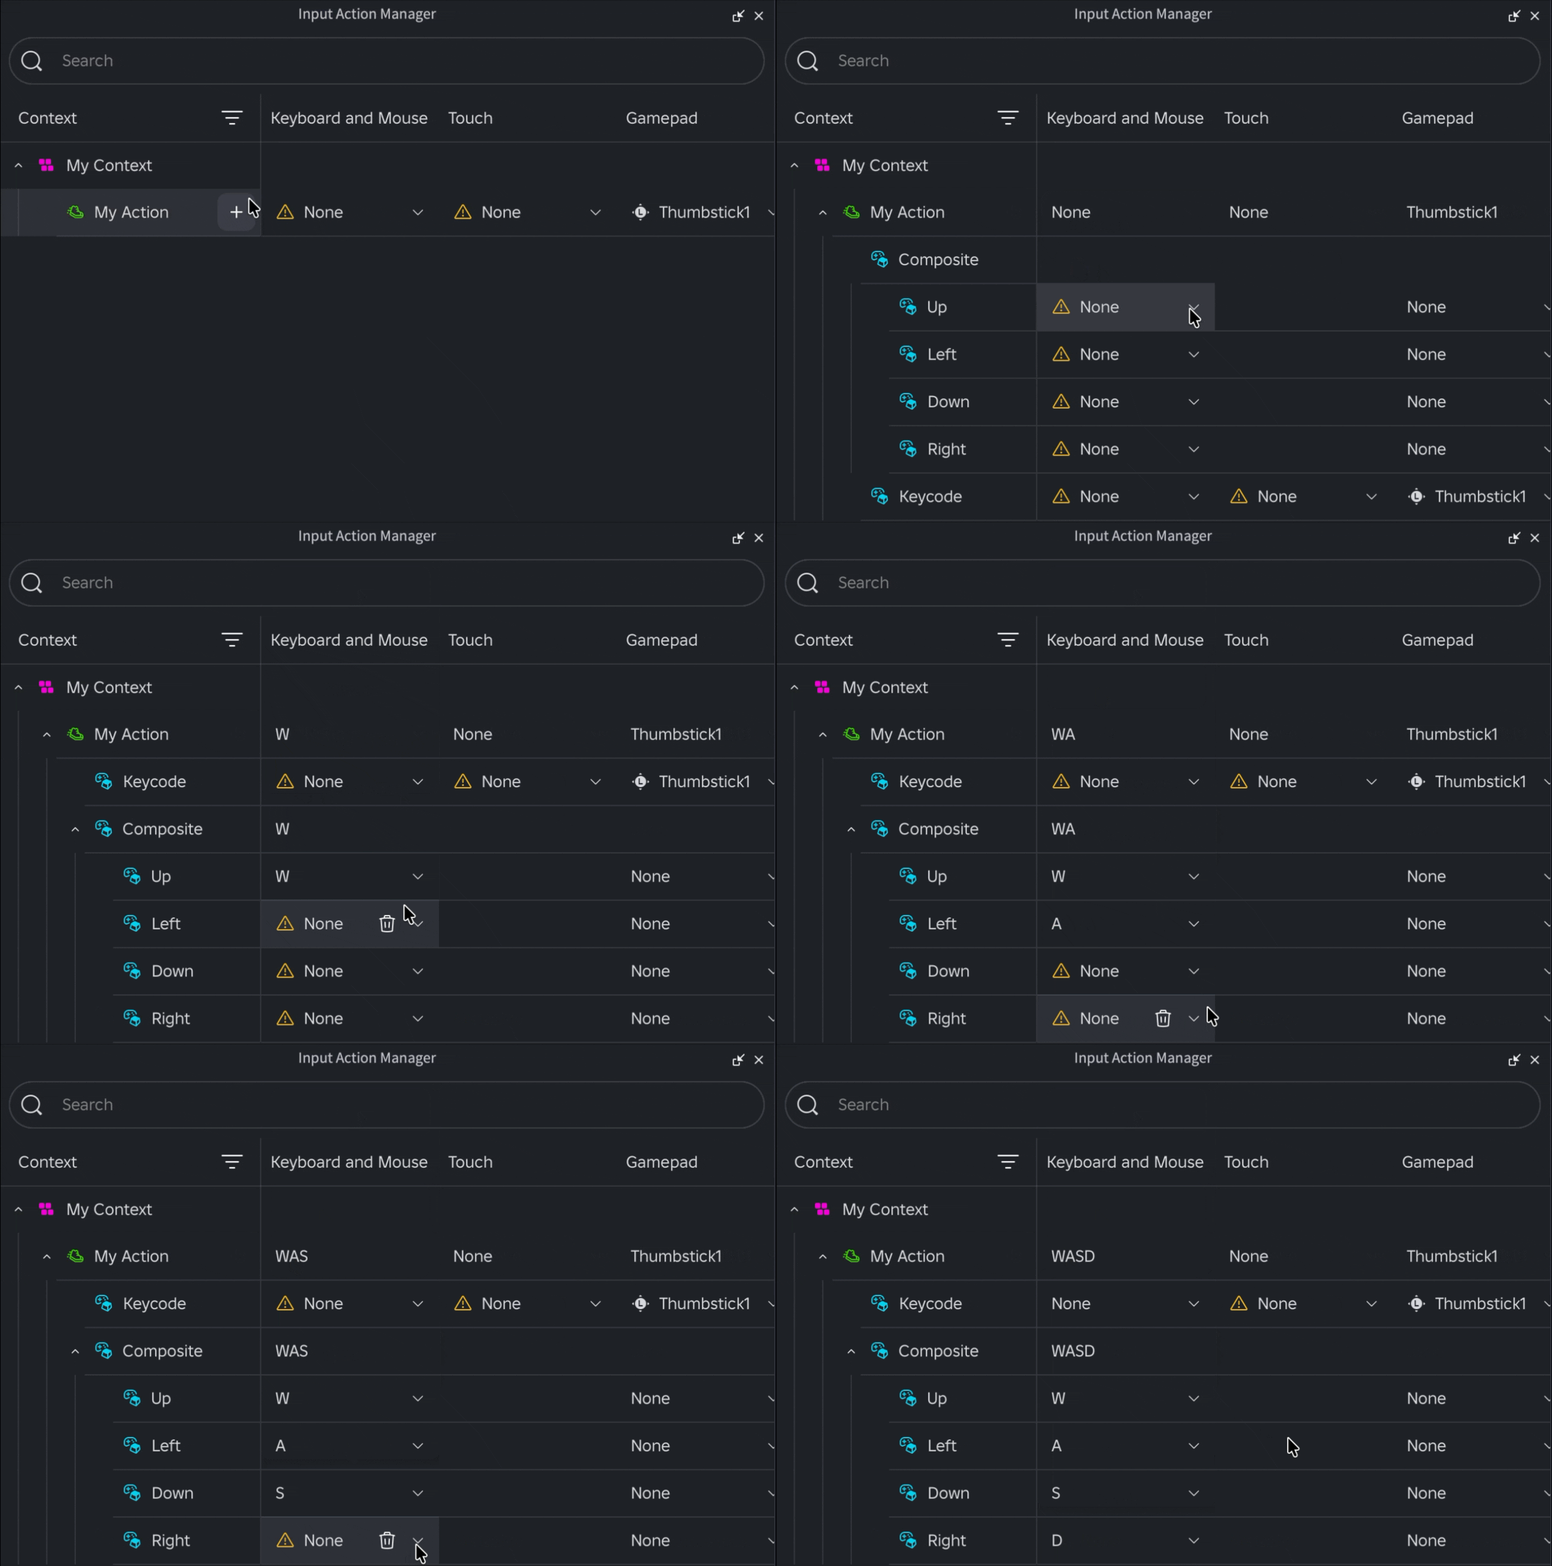
If you want to have multiple bindings on the same platform for a singular action, you can use the action’s plus button to add another set of bindings. Depending on the type of action, you can also use composite keycodes to define your inputs.
 Build Games that Play Seamlessly on Cross-Platform Input Devices
-
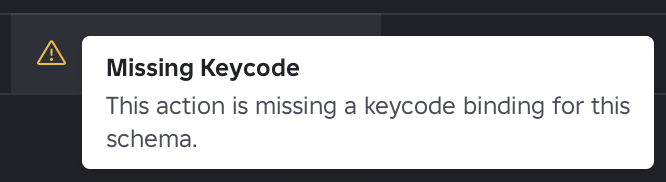
Missing Binding Alerts: If you create an action but forget to assign a binding for a specific platform schema, IAM will display a helpful visual indicator to remind you to fill the gap.
-
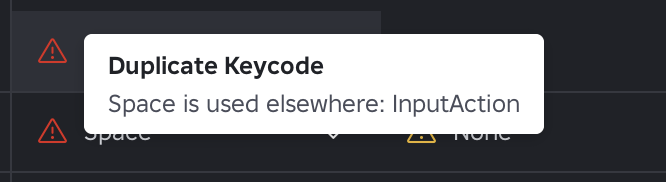
Conflict Warnings: If you accidentally map the same keycode to two or more actions in the same context, IAM will warn you about the conflict before it impacts your players during live gameplay.
 Customize Your IAM Workspace
-
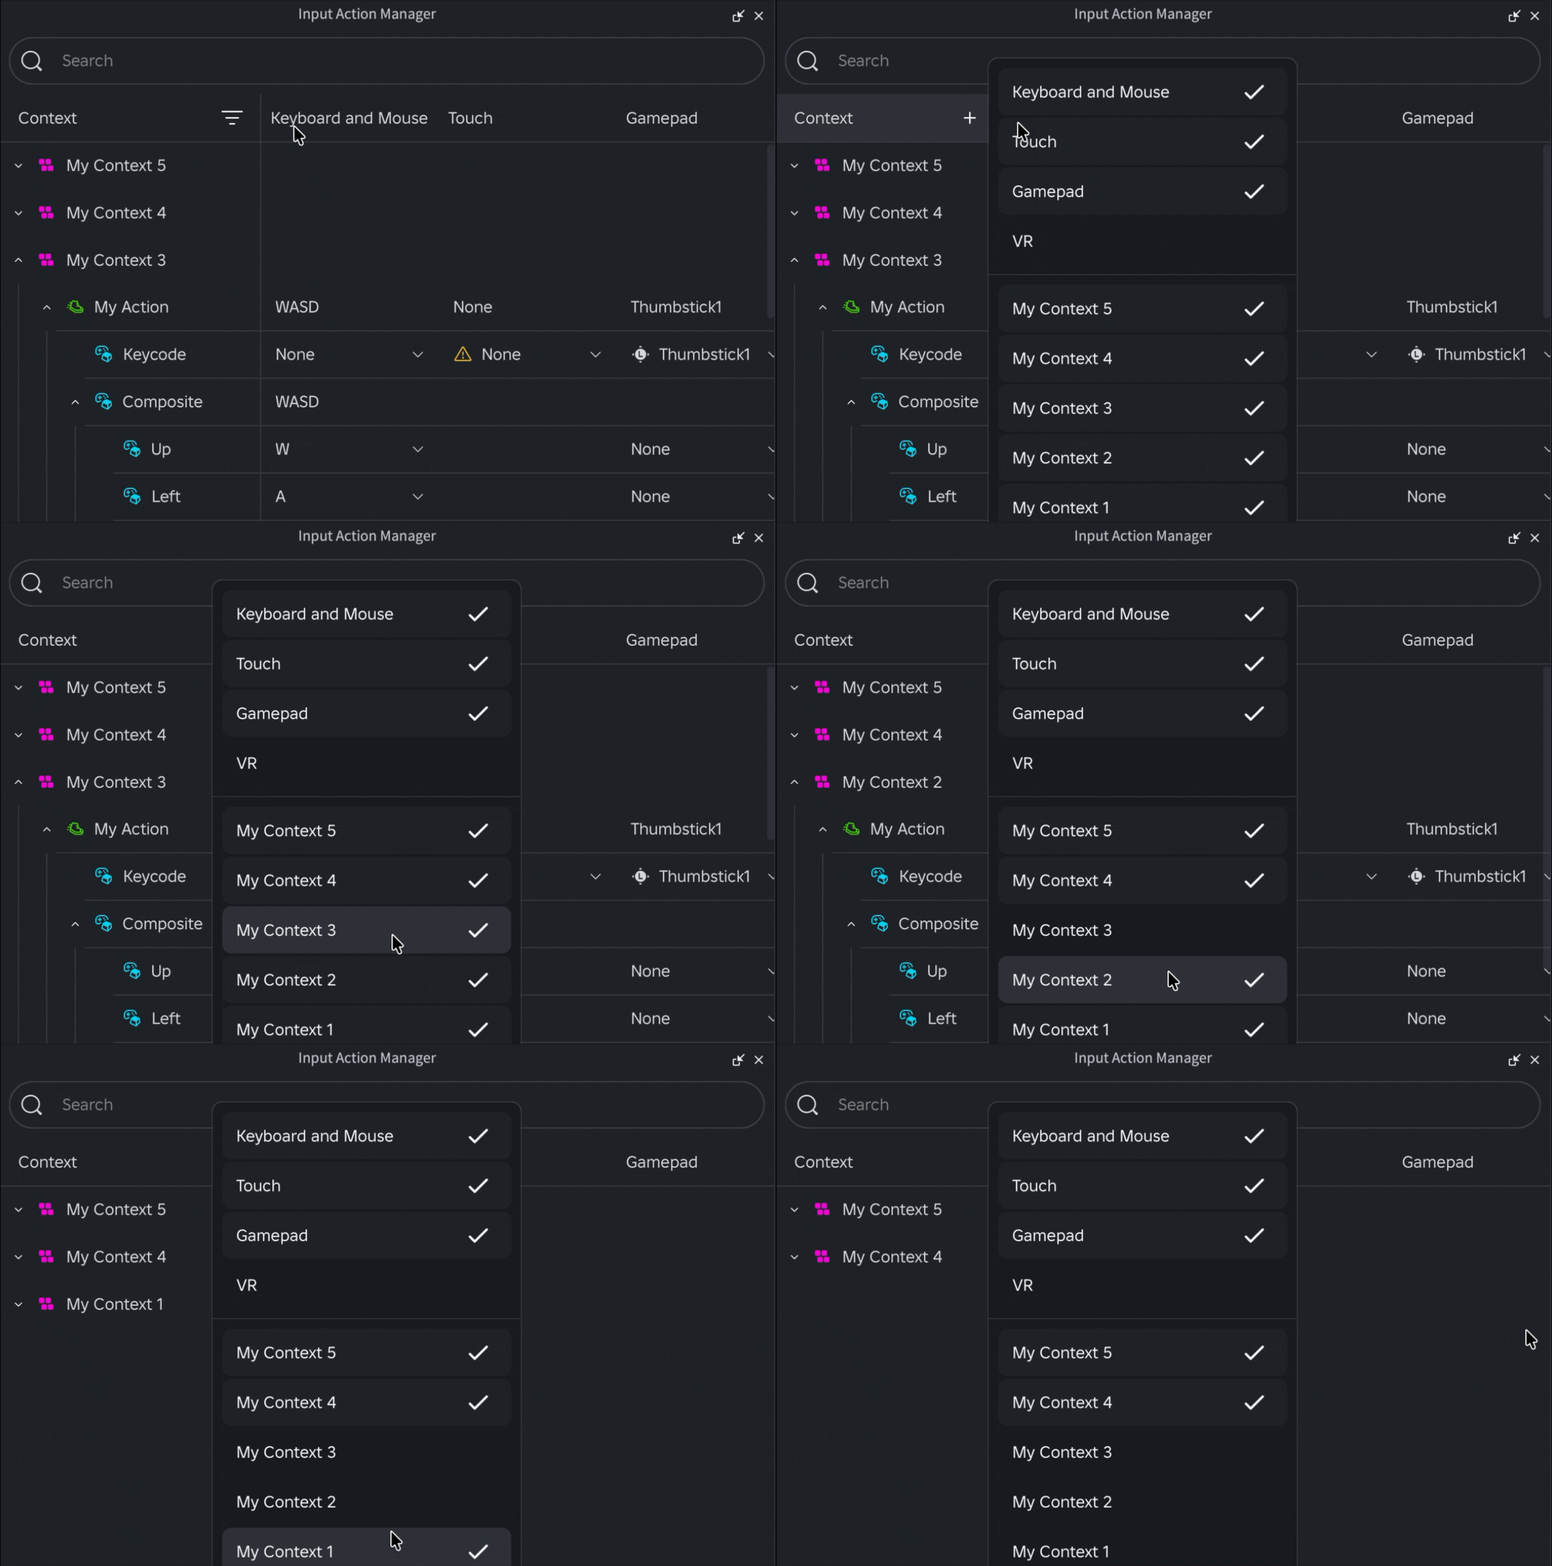
Context Filtering: Focus on a single gameplay state at a time (e.g., filtering down to just your “Driving” or “Inventory” context).
-
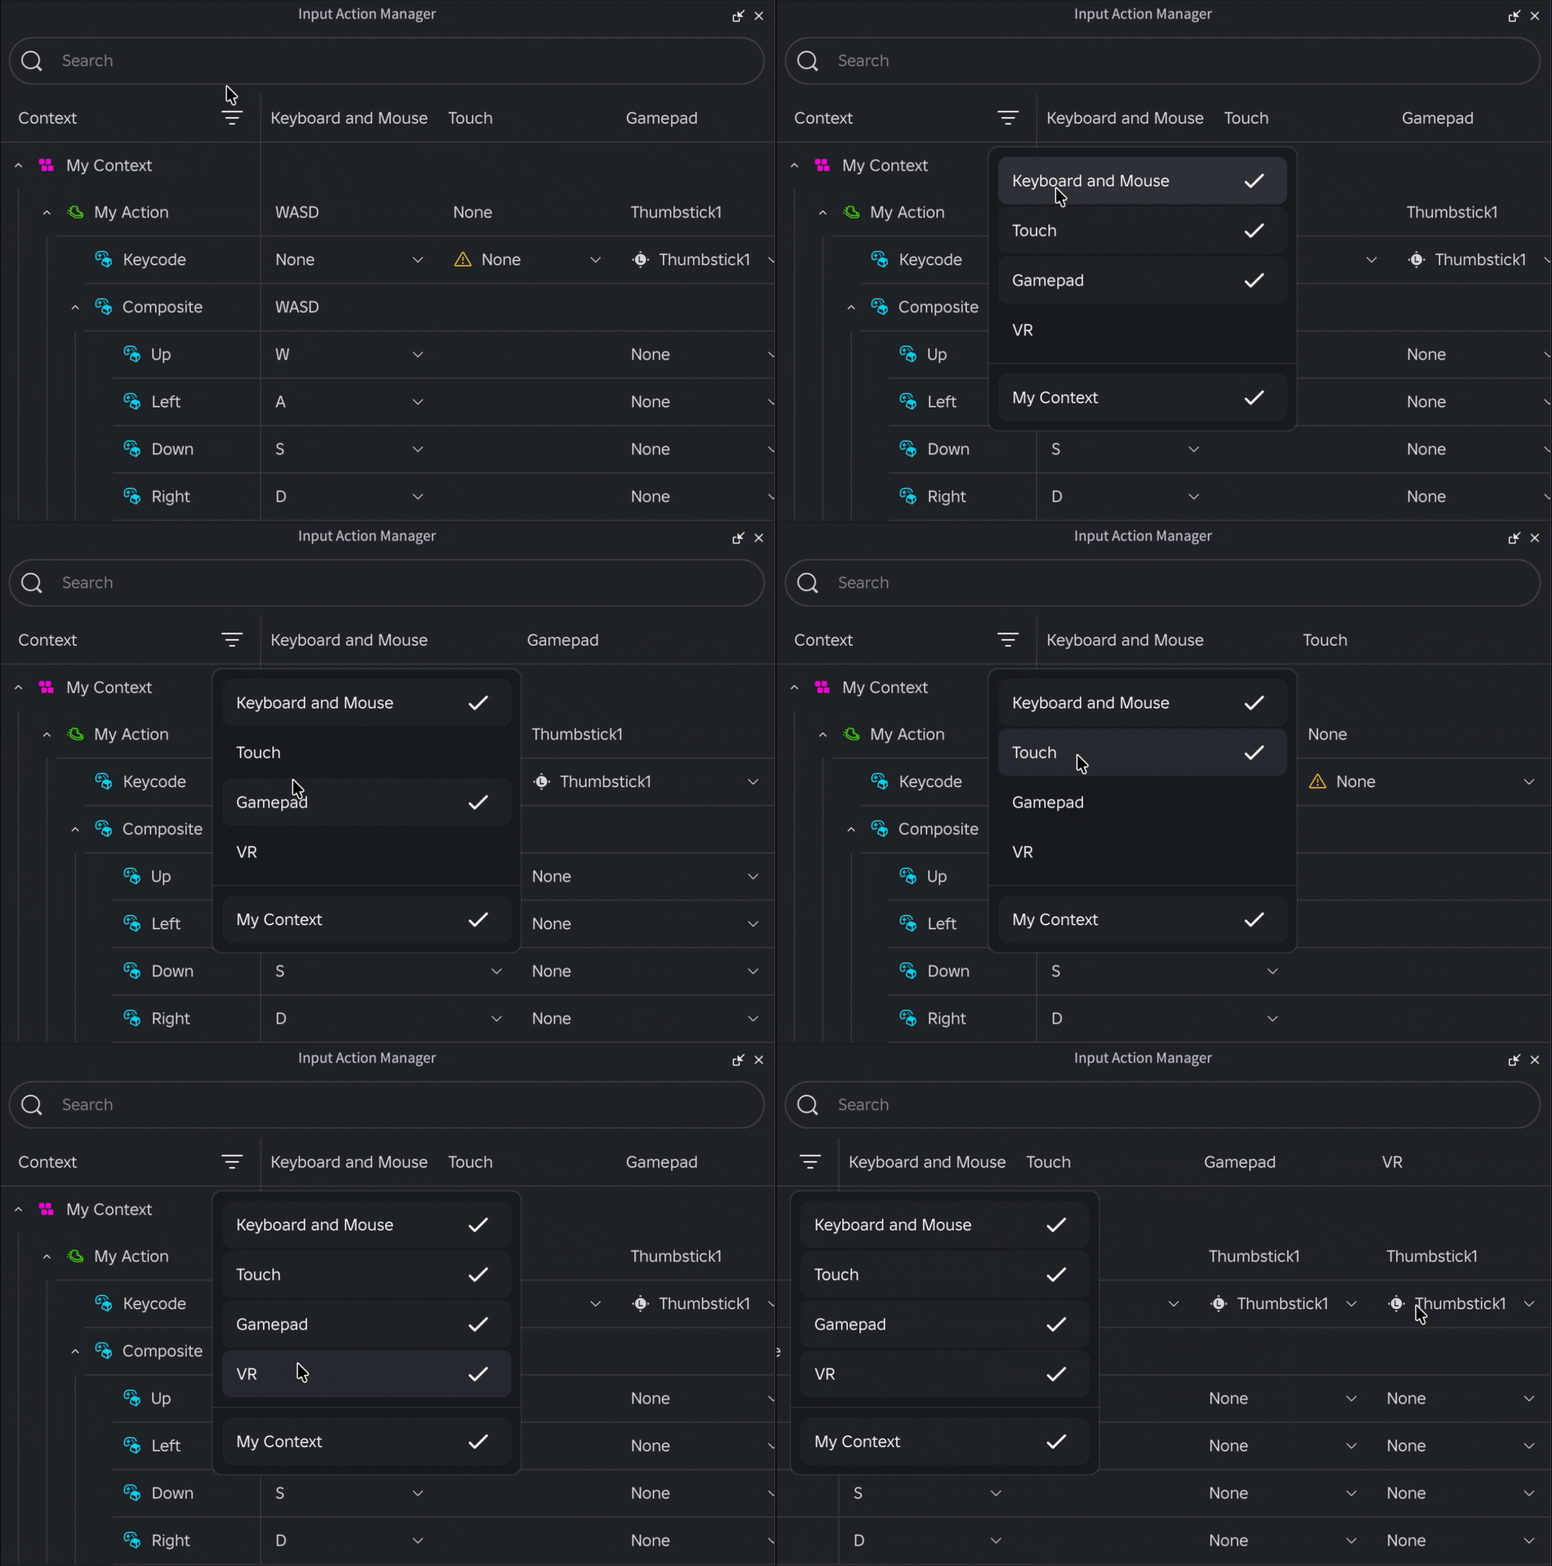
Device Filtering: Hide the platforms you aren’t currently working on to keep your focus strictly on the hardware schemas you are actively configuring.
 Known Issues
- Contexts in the filters menu may show outdated names. The workaround is to toggle a filter in order to update all names.
- When filtering for keycodes, the scrolling frame does not automatically adjust its height.
- IAM’s contents are not yet viewable at runtime.
 Coming Soon
We’re just getting started with making input configuration as frictionless as possible! Here’s a look at what we are working on next for IAM:
- Player Script Integration: Default input actions created in Roblox-provided player scripts (e.g., Move, Jump) will soon display directly inside IAM, allowing you to see exactly how your custom gameplay controls interplay and stack with Roblox’s default movement actions. We eventually want these to be directly editable inside IAM as well.
- Enhanced Touch Binding Support: An upgraded workflow to make assigning UI button bindings and touch-platform inputs more visual and intuitive.
- Advanced Capabilities: Native visual configuration for UIModifier, ViewportPosition, and other instance properties.
 Made with love
IAM was made possible thanks to hard work from @ProtoValence, @SharpenedbyWater, @uiuxartist, @Dogekidd2012, @Astonish1656, @jimjamjomj, and @MetaVars.
We’re excited for IAM to improve your IAS workflows and bring your cross-platform binding management to the next level! Please let us know if you have any feedback or questions. We can’t wait to see what you build 