Hey Roblox Creators. Today, we’re going to learn how to make textures that make our creations look super awesome using Substance Painter. Substance Painter is an industry standard tool for painting directly onto 3D models with advanced material and texture capabilities. While we’ll create more articles on generating PBR textures with other software, this guide is specific for Substance Painter.
Get Substance Painter
First, you need the tool itself, which is called Substance Painter. If you don’t have it, grab it right here from their website.
Model Preparation
Before texturing, ensure your Roblox model is UV unwrapped correctly. This means each polygon of the model has its place on a 2D texture map. You can download the sample mesh we are using for this quick guide, right here:
Plane_001.zip (4.2 KB)

Sample Mesh with unwrapped UV’s
Another important point: Before you export your mesh, please make sure you export with correct smoothed normals. The setup depends now on your 3D Tool. In our case, we are using Blender. And with Blender you can switch to “Shade Auto Smooth”. To do so, select your Mesh in Object Mode → Right Mouse Click, and set the Auto Smooth Angle to 30 Degrees.

Now, we are good to go and we can export the mesh. You can see my export options below. I change the Scale value to 0.01, check to export only the selected geometry, and keep everything else by the default settings.

Export Options for the mesh exported from Blender
How To Setup Substance Painter for Roblox PBR Materials
Now let’s open Substance Painter and start a new project, which we do need to set up for Roblox Studio. What’s awesome, is that Substance Painter provides already a Template for Roblox.
So let’s click on the drop-down arrow from the Template Selection, and select Roblox (MaterialVariant) (starter_assets).

Normal Map Format has to be set to OpenGL to render correctly within your Roblox Game
This template is super cool because it already takes care of the most important settings: The Document Resolution and the Normal Map format.
How To Setup Substance Painter for Roblox Texture Resolution
Document Resolution:
Currently (as of March 2024), Roblox supports PBR Texture maps with a resolution of 1024x1024 pixels. So there is no need to select a larger Document Resolution. You may want to consider creating all your texture maps with for a larger resolution in order to future proof your work. Feel free to go ahead and select the Resolution size of your choice. But also keep in mind, that you will need a more powerful computer to do all your texture maps. A higher Document resolution requires more RAM.
How To Setup Substance Painter with Roblox Normal Maps
Normal Map Format:
Roblox Studio requires OpenGL to render Normal Maps correctly. This setup is why this setup is crucial before creating and exporting your Normal Maps correctly. If you would like to have a deeper technical explanation about Normal Maps and Roblox Studio, then check out our technical documentation: ![]() SurfaceAppearance | Documentation - Roblox Creator Hub
SurfaceAppearance | Documentation - Roblox Creator Hub
How To Import Your Roblox Model to Substance Painter
Import Model:
Import your Roblox model into Substance Painter. As pointed out before, click the Select Button, browse to your exported .fbx model click Import, and smash the OK Button.

Click Select to Import your Model
Once our mesh is imported, our Viewport just shows the imported mesh with a default gray-colored material.

The left view is the 3D View | Right View shows the UVs
On the left side we can find our Assets. The Library contains Materials, Smart Materials, Smart Masks, Filters, Brushes, Alphas, Textures and Environments. See the screenshot below.

For this demo, I am going to use a Smart Material within the Material Library. So I check the Icon Smart Material, and then I enter in the search bar: Steel Painted

Steel Painted Smart Material from the Library
Next, I am going to assign that material to my mesh. This is easy. All you need to do is drag and drop the Smart Material onto your mesh within your 3D View.
Once this is done, you should have a result as shown in the screenshot below.

The Smart Material is now assigned to our mesh, but we have an important step missing
Smart Materials contain different Layers, different masks, Generators, Filters, etc. It’s a pre-made material template that lets you quickly assign cool-looking materials super fast to your meshes.
You can also check the LAYERS Tab, in which you can open the folder of that specific smart material. When you do that, you unfold various layers, and you can see how that Smart Materia was built.

Smart Material Folder that contains various Layers
Those Smart Materials contain very important procedural features, like Generators or Filters that will allow us to quickly generate texture maps with edge wear. This is for example a very typical effect for metal.
As I already pointed out, we are missing one important step. The so-called Baked Mesh Maps are missing. The Smart Materials only work with Baked Mesh Maps.
This is crucial and a major milestone to make our material look correct. Alright, so let’s dive into this process and let’s see how to Bake Mesh Maps.
How To Bake Mesh Maps using Substance Painter
By default, you should already see the Texture Set Settings Tab within Substance Painter. In case you can’t see that tab, you can go to Window–> Views–>Texture Set Settings. See the screenshot below.

Texture Set Settings within Substance Painter
Once we have the window open, you can navigate to the Mesh Maps section. Here, and within that tab, we can find the magic button called Bake Mesh Maps.

The Magic Button called Bake Mesh Maps
Now press the Bake Mesh Maps button, and let’s see our results. A New User Interface pops up. This is the interface we will use to perform the so-called baking process.

The User Interface to Bake the Mesh Maps
For this mini-guide, we will not dive any deeper into details and specifics. As lucky as we are, we can use all the default settings and just hit the Button: Bake Selected Textures
This will take a few seconds. Substance Painter is now Baking the Mesh Maps. Once this process is done, just click the Button: Return to Painting Mode.
The screenshot below shows all the baked mesh maps. As you can see, there is a Normal Map, an AO Map, a Curvature Map, etc. These maps are needed for our Smart Materials.

Mesh Maps have been created
Remember that smart material we picked earlier? Well, now it’s got all the stuff it needs to really show off. That means it can make our textures look exactly how we want them to.
Check the screenshot below and see the difference - it’s magic, right?

Remember: A Smart Material can’t be smart without the baked Mesh Maps
Let’s Do Some Texture Painting with Substance Painter
A quick note: Substance Painter follows a PBR workflow, meaning you’ll be creating textures for the base color, roughness, metallic, and normal map that we will use for the Surface Appearance object inside of Roblox Studio.
The first thing we create is a new Paint Layer. As the name already mentioned, we need to use the Layer Tab. Within that, we can click the Brush Icon and give our Layer a sweet name. In my case, I baptized my layer “Your New Paint Layer”.

Within the Properties Panel, we can see what maps we are using when we start painiting. As I pointed out before, we are using a PBR Texture Map Workfklow that contains four essential texture maps. Base Color, Roughness, Metallic and Normal Map.

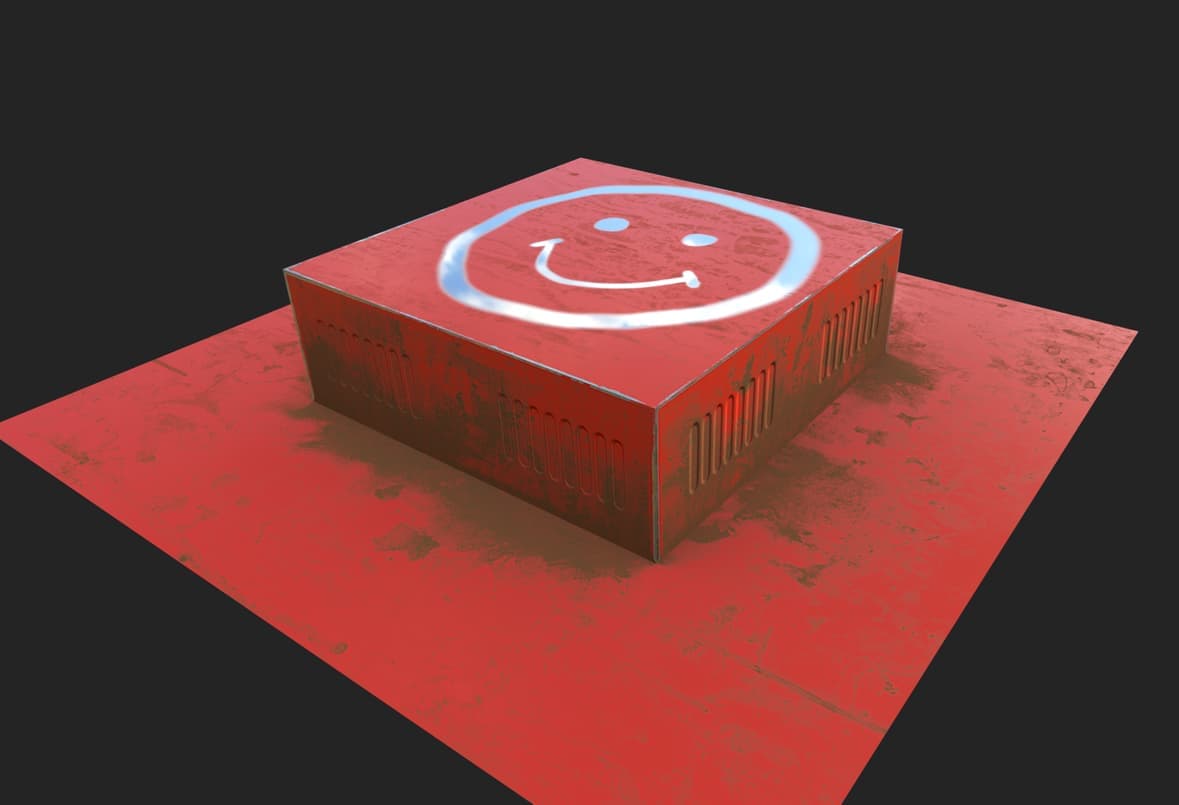
Let’s start painting, and let’s create our first smiley. For this demonstration, I change the Roughness Value to 0, which means my paint will be fully sharp and reflective. And I also change the Metallic value to 1. This means I want to paint a smiley, that appears to be a polished chrome material.
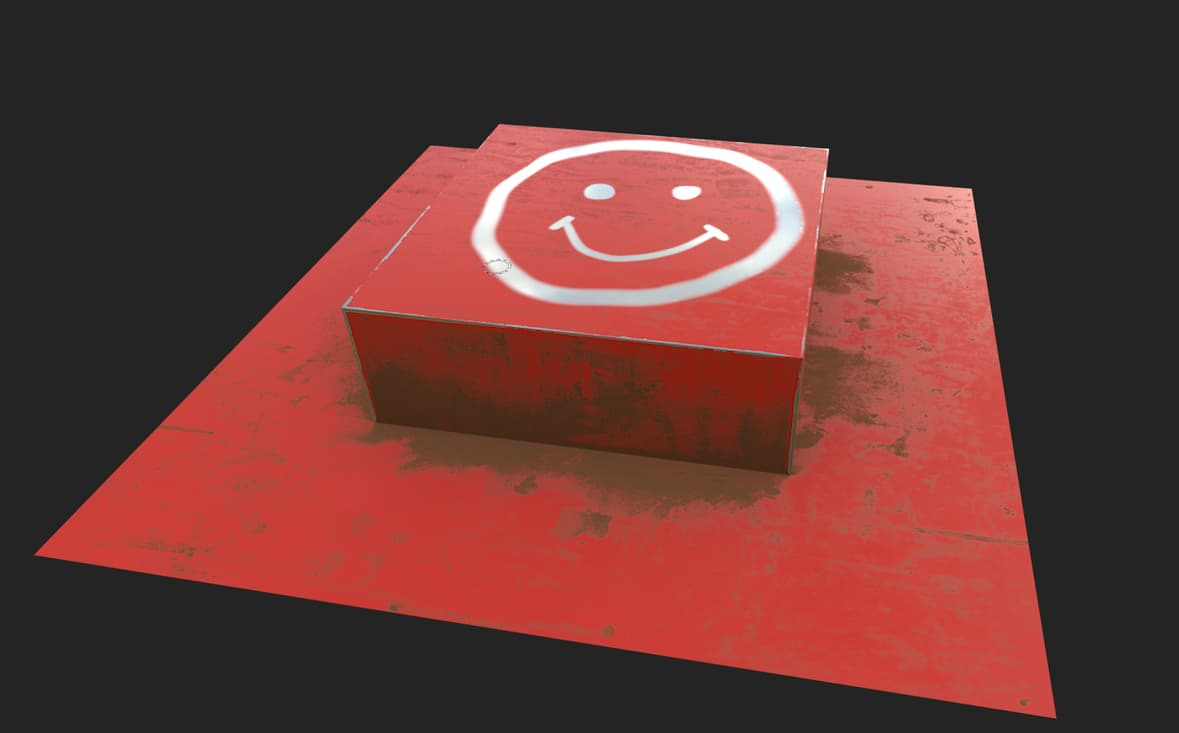
Great job. the first masterpiece is in the box!
So what’s next? How about we try to add some details to the sides of the cube? Something that looks like Vent Caps? For that, we can use the power of Normal Maps.
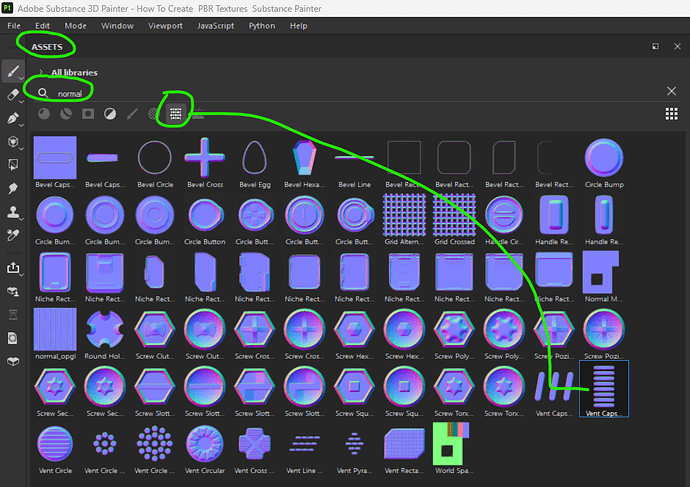
In order to find some interesting normal maps, that are already shipped with Substance Painter, you can use the Library Assets. Search for Normal and see what we’ve got. For our demo, I picked the Vent Caps Normal Map.
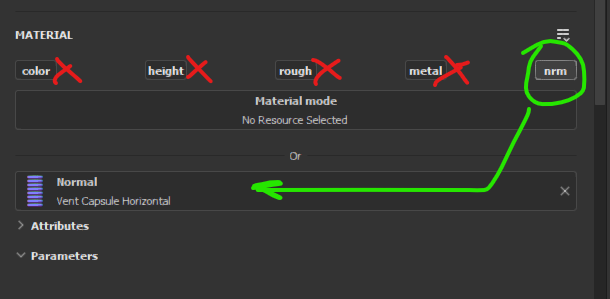
What are we going to do with that Vent Cap Normal Map? It’s fairly simple. Let’s drag and drop that Normal Map into our Normal Map Slot. Then, let’s deactivate Color, Height, Roughness and Metal.
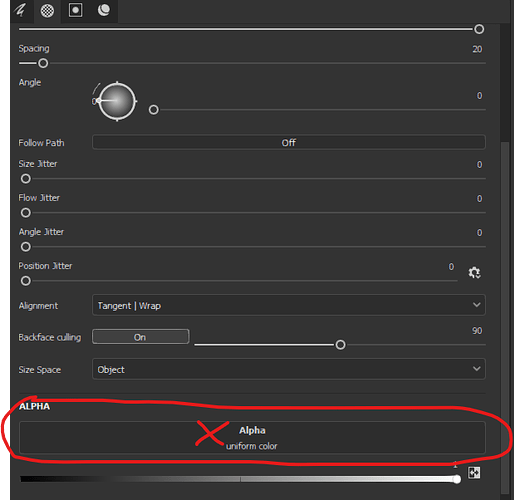
We loaded the Vent Cap Normal Map, ready to use now with our Brush. But before we start painting with our Normal Map, let’s remove the Smooth Alpha Map from our Brush Settings.
Now, open up the 2D View by pressing the F1 Button. That makes it easier to paint the vents straight to the sides of the box. But no matter what, if you prefer to paint in the 3D View, go ahead follow your preference.
So, here’s a quick recap of what we’ve done:
- Base Color: We started by painting the base colors of our model, setting the foundation without any fancy lighting effects.
- Roughness & Metallic: Next up, we tweaked the roughness and metallic properties to control how light interacts with our surfaces. Roughness determines smoothness, while metallic defines the metal-like behavior.
- Normal Maps: Finally, we created and applied normal maps to add details like the Cent Caps, giving our model depth without adding extra geometry.
Now this mini-guide is of course just a starter help, that does not go deeper into all available features within Substance Painter. But it’s a great starting point for you to get familiar with the tool and to have a quick overview.
How To Export PBR Texture Maps for Roblox Studio Surface Appearance
The last step is to export our PBR Texture maps, so we can use them inside Roblox Studio. This is fairly easy. Go to File → Export Textures. The following window will pop-up:
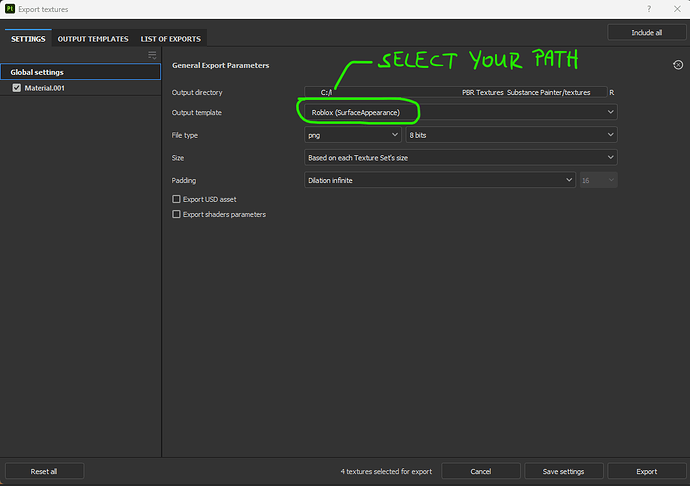
Substance Painter provides an Output Template. It’s called Roblox Surface Appearance. Let’s specify an output directory to save your files, make sure you have the Roblox Template selected and smash the Export Button.
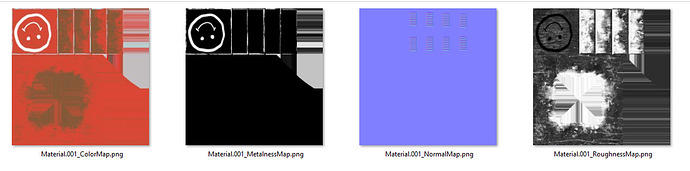
Open your directory, and check out your precious PBR Texture maps. Here they are. Color Map, Metalness, Normal Map and Roughness Map. Bravo.
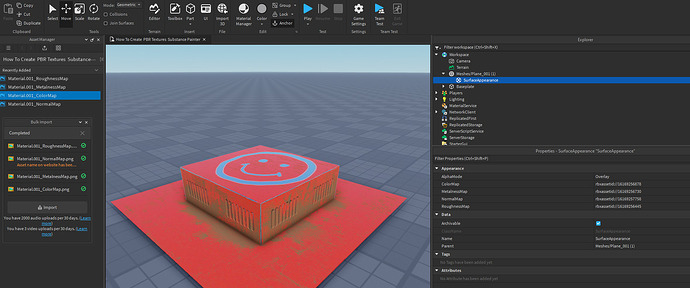
Import to Roblox Studio
Next, let’s fire up Roblox Studio. Let’s import the provided .fbx mesh, and right after let’s import the four PBR Texture maps.
Any other questions? Please feel free to ask and to post. Happy pixeling!
Download a .zip of the following resources used in this article:
- Blender File
- Mesh.fbx
- Roblox Place File
- Substance Painter file