Hey Roblox creators! We’re diving into the world of PBR textures using Substance Sampler.
Substance Sampler is an industry standard tool for generating models and textures from real-world samples and images. There are many programs and workflows to create PBR textures, but today we’ll be focusing on the general workflow for Substance Sampler.
Get Substance Sampler
The first step is to download and install Substance Sampler. You can grab it here.
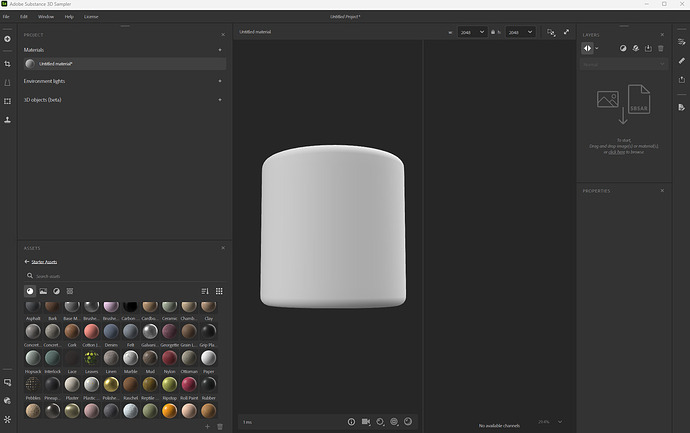
Once installed and launched you will see the following user interface.
How To Set Up Substance Sampler for Roblox Studio
It’s important to set up Substance Sampler with the correct Project Settings. The most important is to make sure that the Substance Sampler is set up with OpenGL. As we know, Roblox Studio requires Normal Maps generated for OpenGL.
So let’s make sure, we have this checked.
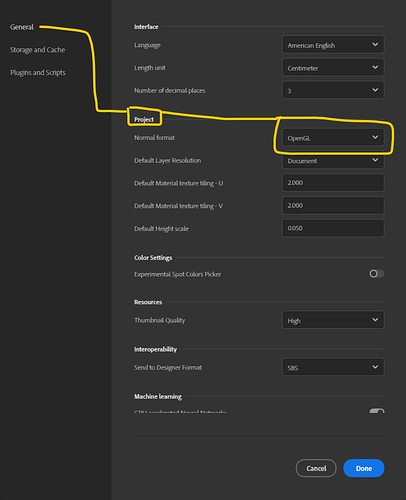
Edit–> Project Settings → General → Project → Normal Format → OpenGL
Create PBR Textures from an Image
Substance Sampler boasts one of its most powerful features: the ability to generate a PBR Material from any image you have. The only thing you have to do is to use import a texture map of your choice to get the ball rolling.
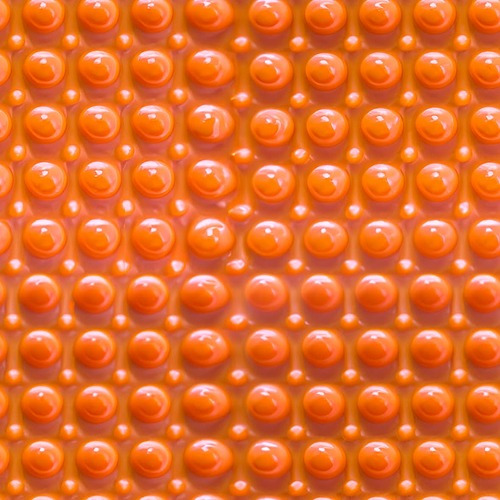
Even though Substance Sampler provides you with some super nice procedural tileable features, to move on quickly, I created this orange bumpy plastic texture map using Adobe Photoshop.
Importing the Texture Map To Substance Sampler
Once you have your desired texture map ready, it’s time to import it into Substance Sampler. Luckily, this process is very simple. Simple Drag and Drop the image of your choice onto the Canvas from Substance Sampler.
If you do that, a new window will pop up, which allows you to select from multiple options.
What we want to select is ‘Image To Material’.
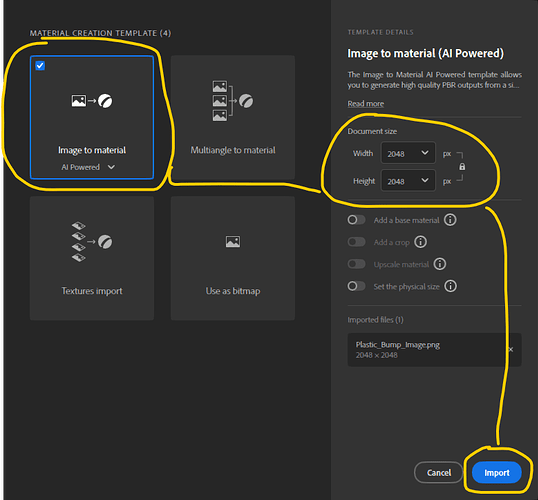
Select → Image To Material, for the example I keep the texture resolution at 2048x2048 and Click Import
Once you click Import, Substance Sampler starts generating automatically your new PBR Material. Depending on your computer’s processing power, it will take a few seconds to calculate. Once done, you can immediately check all your PBR texture maps that have been generated for Base Color, Normal, Metal, and Roughness.
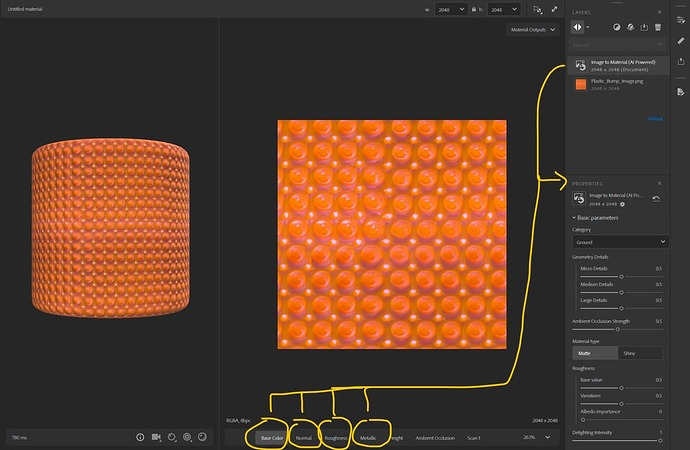
Image to Material generated automatically the PBR Texture Maps
You have various exposed parameters you can use to make changes to the selected shader. By default, Substance Sampler starts using the Ground Shader. You can switch the Category to any you like. For our example, I am going with the Leather Category, since this will give me a nice glossy finish.
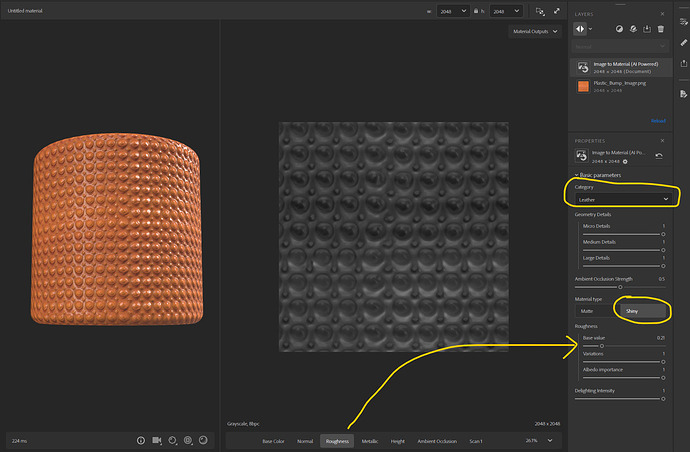
Tweak the Roughness and Normal Map parameters to your liking.
In addition to the basic Shader Parameters, you can also add different Layers. In this case, I am going to add the Layer called Normal Height Adjustment. That Layer lets you control the intensity of the Normal Map.
Switch to the Normal Map Tab to preview the changes in real-time and feel free to tweak the intensity of the Normal Map to your liking.
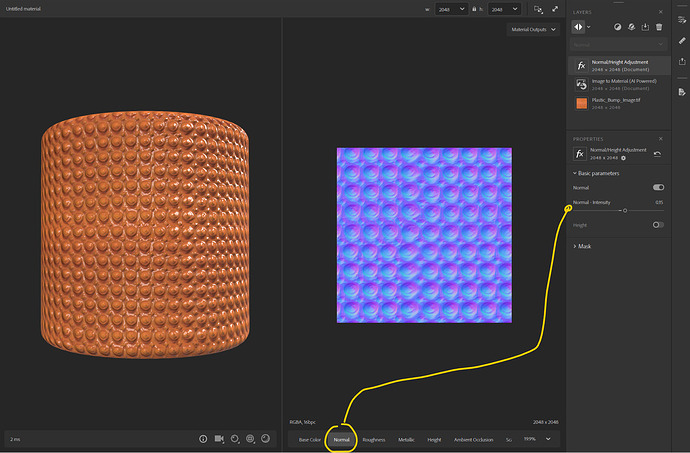
Preview your Normal Map while tweaking the settings
You can do the same when you are adjusting the Roughness values, switching to the Roughness Map Tab at the bottom of the UI - as shown in the screenshot above.
Once you are happy with the look of your material, let’s give the new material a fancy cool name. In my case, I just named the newly created material Bumpy Orange Plastic.
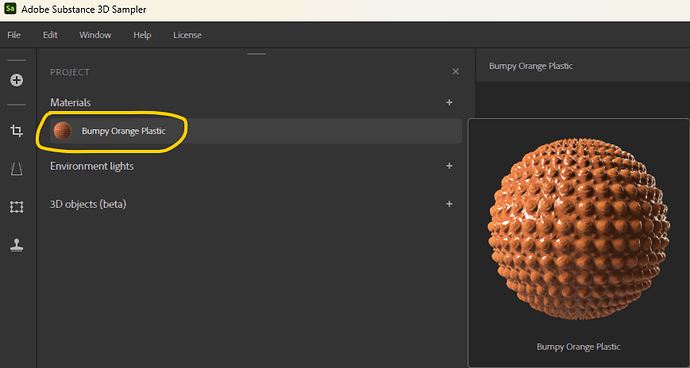
Give your newly created PBR Material a name
That’s it. We are ready to export the texture maps for our Roblox Game Model.
Export PBR Texture Maps
You can find the export options on the right side of your UI. Please see the screenshot below.
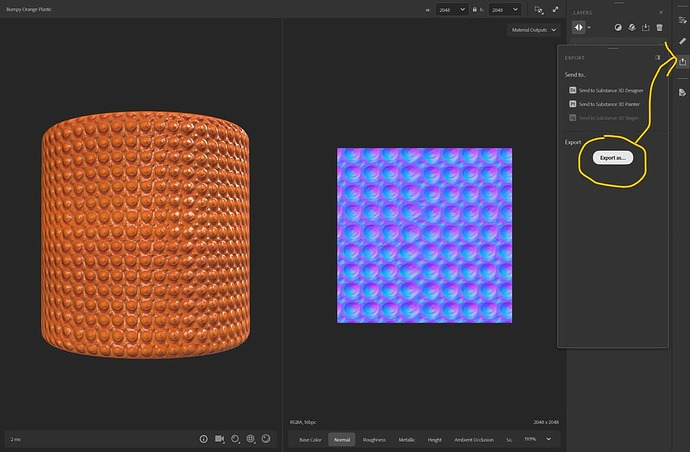
Next, press the Export Button
Once we hit the export Button, we will see the following window.
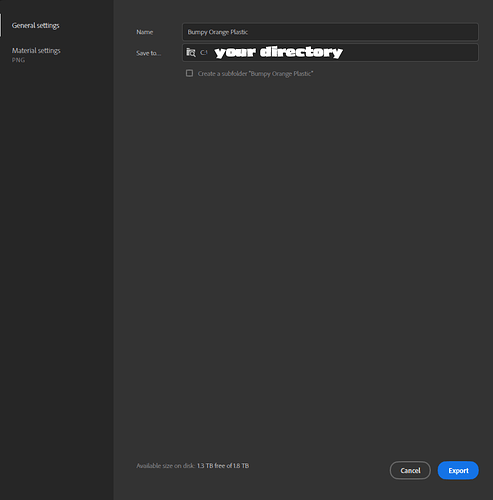
General Settings: Select the directory you would like to save your texture maps
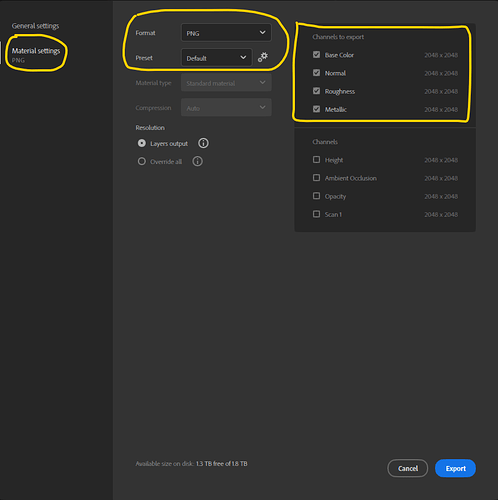
Right below the General Settings, we can find the Material Settings. The default settings are usually fine. But to check and see what I am using for this example, please see the screenshot below.
Important Note:
A quick note on that. As for now, Substance Sampler has a bug. No matter what project settings you choose, it will always export the Normal Map for DirectX. For Roblox Studio, we need to have the Normal map Map for OpenGL. So we need to quickly change this.
How To Invert Normal Maps from DirectX to OpenGL
While there are other workflows and software to invert normal maps for OpenGL, one of the quickest way to invert normal maps is to use Substance Designer.
I just use Substance Designer. For me, that’s the quickest way to do it. Just fire up Substance Designer, create a new Substance Graph and drag and drop your Normal Map onto the Canvas.
The only node we have to create is a so-called “Normal Invert” node as seen below. Then you can simply save the image into your desired directory, and we are good to go.
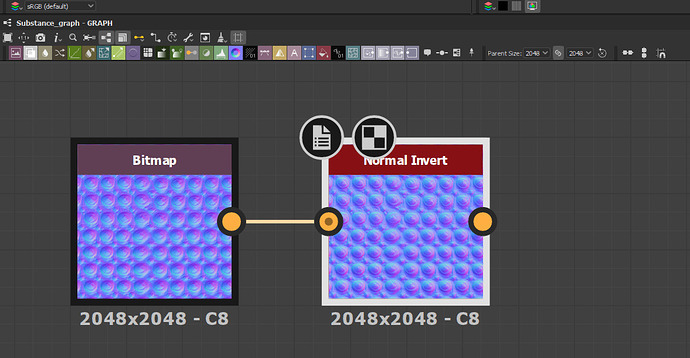
Quick Normal Map conversion from DirectX to OpenGL using Substance Designer
Uploading Texture Maps to Roblox Studio
At this point, we do have all our new PBR Texture Maps, ready to be uploaded to Roblox Studio.
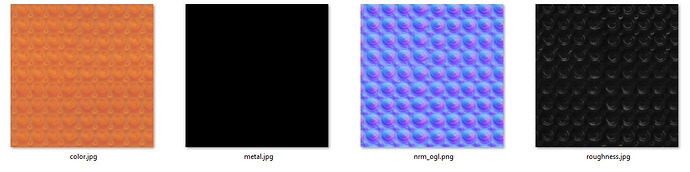
Our generated PBR Texture Maps
In Roblox Studio, I am using the Asset Manager. You can find that under View Tab → Asset Manager → Bulk Import
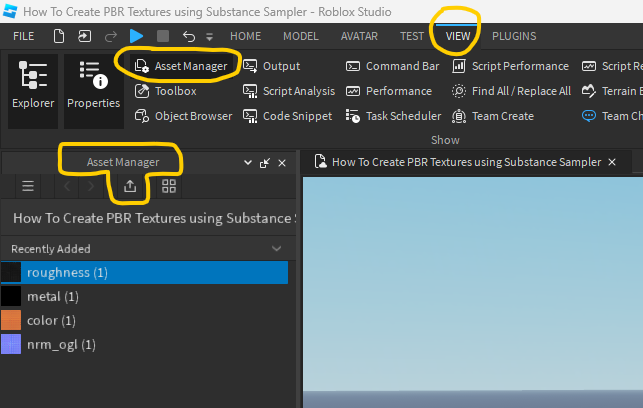
Click the Arrow Bulk Import Button
Once the PBR Textures are uploaded, we need to assign them to a Surface Appearance.
First, we need to add a Surface Appearance to the Mesh. Select your mesh → right mouse click → Add Surface Appearance.
You can use any custom mesh of your choice. For this little demo, I uploaded a sphere, a round cube, and a plane. All assets have the same Surface Appearance assigned.
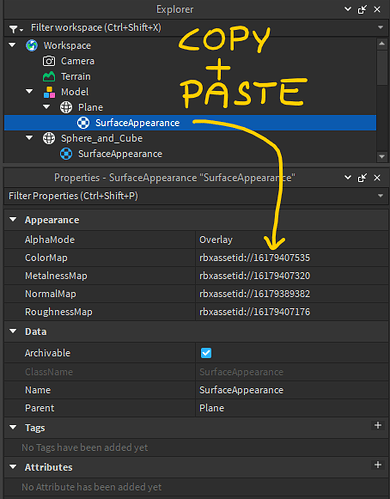
Explorer → Mesh → Surface Appearance
Finally, we need to copy and paste the uploaded texture map IDs to our specific texture map slots. To Copy the IDs, by selecting the uploaded texture map in the Asset Manager → right mouse click → and Copy the ID to the Clipboard. Please see the screenshot below.
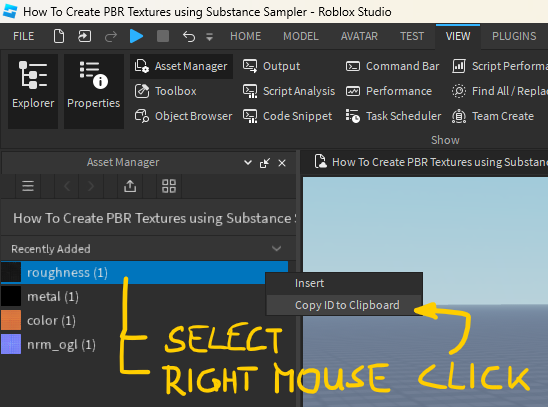
Select -->Right Mouse Click → Copy ID to Clipboard
And that is it! What do you think about about this workflow and PBR textures? We’d love to see how you use it! Share your creations, use cases, and any questions you might have right here in the comments section.

Final created PBR Textures with Substance Sampler in Roblox Studio
Resources for Download:
Download all files as a .zip file
- Roblox Studio Place File
- Substance Sampler Project File
- PBR Textures
- Photoshop Texture Fill