Voxel generation

I’ve been experimenting with voxel terrain generation for a few hours, and using multiple sources (YouTube, other program tutorials, etc.) I have ended up with this.

math.randomseed(tick())

local ReplicatedStorage = game:GetService('ReplicatedStorage')

local Blocks = ReplicatedStorage:WaitForChild('Blocks')

local Resolution = 100
local Seed = math.random(10, 50) / 100
local s = math.random(2, 8) / 100

local AllBlocks = {
	['Grass'] = Blocks.Grass,
	['Dirt'] = Blocks.Dirt,
	['Stone'] = Blocks.Stone,
}

local function setBlock(x, z)
	local Noise = math.noise(x * s, z * s, Seed)
	
	-- Noise returns -0.5, 0.5
	return AllBlocks.Grass, Noise
end

local drawTerrain = function()
	for x = 1, Resolution do
		for z = 1, Resolution do
			local Block, Noise = setBlock(x, z)
			Block = Block:Clone()
			Block.Parent = workspace
			Block.CFrame = CFrame.new(x * 4, math.floor(Noise * 10) * 4, z * 4)
		end
	end
end

drawTerrain()

Few things I want to point out tho that I’m struggeling to fix.

  1. There are holes in the land (seen in the pic) and I’m not sure why these are occuring.
  2. I want to be able to create dirt IF there is a grass block above it already, but can’t get that to work either. I can get it to work so dirt spawns at a different level to grass, but that’s not really what I want
13 Likes

For the holes, have you tried having the script print out the noise it receives? Could be getting a
-nan(ind) error because the x and y are both 0 or whatever. I don’t know much about the math.noise operation though, so don’t take my word for it.

For filling the rest with dirt and stone try looping through every grass block you make and simply go downwards from there. Fill the first 5 block spots under with dirt and the next 10 with stone.

Or get fancy and generate a stone voxelmap under the grass and fill the difference between the grass and the stone with dirt.

The reason there are holes in the ground is because there are blocks above it. This is because using noise does not guarantee that the change between two blocks will only be a block. The solution to this is basically what you requested in the 2nd question. Since you are getting the terrain height using 2d noise all you have to do is get the height at a certain point, and make all blocks below that dirt or stone.

4 Likes

Hey!

I was messing around with this too a couple of weeks ago! @wafflecow321 is right.

The secret it to generate at least two layers.

I actually did this here.

You can see a few layers generate. On the first layer you will notice how there are blocks missing.

This is also using 2D perlin noise.

I’ve since switched to 3D perlin noise (which is not used in this project), which is IMO better, if you want to learn more let me know :slight_smile:

Lowest layer (some holes)

Lowest 2 layers (no holes)

All layers

2 Likes

Are you willing to show us a bit of code to how it is done?

Depends exactly what you want to see.

Code is pretty messy since it was just a proof of concept.

Would love to learn more about 3D perlin noise but I can’t find any tutorials (Roblox based) on it. Not really sure how it’s different?

As for the layers thing, I’m still not sure how it works exactly. If I generate the first layer that’s fine, but then what do I need to change for the second layer?

3D Perlin noise works (usually with voxel terrain) by going through a 3d grid of points and inputting those into the noise function. So the x,y and z. Then you use a threshold to determine if the number that you got can place a block. I usually use 0. Also if you want to make it so that the land is determined by gravity, you decrease the threshold the closer you get to the ground. The reason you use 3d noise is because it makes more unique terrain such as overhangs and caves. This is what Minecraft does.

1 Like

It’d have to be combined tho? 2d for creating like the basic land, and then 3d for hills/etc??

Not necessarily, though possible I don’t think I’ve ever seen anyone do it.

Biomes, such as hilly areas, deserts, etc, are typically made by taking the x and z, determining what biome in the world grid you are, and using that in a noise function.

Then just using if statements to determine what each biome is per noise.

Sample code
local biomesize = 1000
local biomex,biomez = math.floor(x/biomesize),math.floor(z/biomesize)
local biomenoise = .5+math.noise((biomex)/100,(biomez)/100,seed) -- i like to add .5 because it gives values between 0,1 (most of the time)
if biomenoise <= .1 then
   print("biome is sandy, only make sand blocks")
elseif biomenoise < .5 then
   print("regular terriain")
elseif biomnoise >= .5 then
   print("biome is hills")
end

This is how I would do it. Some people do it different by introducing different levels in the original Y calculation of math.noise.

What minecraft does(for general generation, not just for biomes) is use Octave Perlin noise.
This is a great video on it, but this uses 2D octave perlin noise.

I use flat 3D generation here for planet like structures, https://www.roblox.com/games/3698012389/Spacecraft-Pre-Alpha

Welp, you got me started down a really deep rabbit hole… Here’s what I found :stuck_out_tongue:

There’s no reason that you can’t use both 2D noise for a heightmap and use 3D noise to determine which cells are solid and which are air. The height map can influence the 3D “density map”. This is probably the best way of making sure you have no floating islands that aren’t connected to the rest of the terrain while still allowing overhangs. At least that’s my preferred method. To get the overhangs you need to somehow offset the input coordinates to your heightmap function. I like to “twirl” them with coherent noise. Yes, this means you’ll use coherent noise to generate the coordinates that you sample coherent noise at. Weird.

Here's a Module for generating fractal (or Perlin?) noise. It's great for making more interesting terrain, with details at different scales.
local r = Random.new(os.time())

function fractalNoiseGenerator(seed, amplitude, frequency, octaves, lacunarity, persistence)
	--Generates a noise generator using cohrent noise (math.noise)
	--Uses "sensible" default values. 
	--Check out this glossary: http://libnoise.sourceforge.net/glossary/index.html
	
	local noise = math.noise
	local seed = seed or (r:NextInteger(-10e3, 10e3) * math.pi) -- * pi because math.noise is weird at integer coordinates, and pi is irrational
	local amplitude = amplitude or 1
	local frequency = frequency or 4
	local period = 1/frequency
	local octaves = octaves or 3
	local lacunarity = lacunarity or 1.75
	local persistence = persistence or 0.8
	
	return function(x, y, z)
		local v = 0
		local a = amplitude
		local f = frequency
		
		for o = 1, octaves do
			v = v + noise(seed + x*f, seed + y*f, seed + z*f) * a
			a = a * persistence
			f = f * lacunarity	
		end
		
		return v
	end
end

return fractalNoiseGenerator
Here's a script for actually generating the terrain (requires the Fractal noise thing)
local FractalNoise = require(game.ServerStorage.FractalNoise)
local heightmapNoise = FractalNoise(nil, 0.6, 2, 2, nil, nil) --These are just magic numbers
local swirlNoise = FractalNoise(nil, .3, 5, 2) --These are just magic numbers

function mapSet(map, x, y, z, value)
	map[x] = map[x] or {}
	map[x][y] = map[x][y] or {}
	map[x][y][z] = value
end

function mapGet(map, x, y, z)
	if map[x] then
		if map[x][y] then
			return map[x][y][z]
		end
	end
end

function twirlCoordinates(x, y, z, power)
	local power = power or 1
	local tX, tY, tZ = 	
		swirlNoise(x, y, z),
		swirlNoise(x+1000, y, z), --Don't want the *same* twirl on each axis
		swirlNoise(x, y+1000, z)
		
	return x + tX * power, y + tY * power, z + tZ * power
end

function heightMap(x, z)
	return heightmapNoise(x, 0, z)
end

function density(x, y, z)
	--If you twirl with power 0, you'll just get a plain heightmap
	local tX, tY, tZ = twirlCoordinates(x, y, z, 1)
	tZ = tZ / (1 + y)
	tX = tX / (1 + y)
	local densityOffset = 0.5 + heightMap(tX, tZ) - y --Add 0.5 density so that there's a guaranteed bottom layer
	return densityOffset
end

function generateTerrain(mapSize)
	local densityMap = {}
	for x = 1, mapSize do
		for y = 1, mapSize/2 do
			for z = 1, mapSize do
				mapSet(densityMap, x, y, z, density(x/mapSize, y/(mapSize/2), z/mapSize))
			end
		end
	end
	
	for x = 1, mapSize do
		for y = 1, mapSize/2 do
			for z = 1, mapSize do
				local d = mapGet(densityMap, x, y, z)
				if d >= 0 then
					local block = script.Block:Clone()
					block.CFrame = CFrame.new(x, y, z)
					block.Color = Color3.fromHSV(((y/mapSize)%1), .75, 1 - (y/mapSize))
					block.Parent = game.Workspace
				end
			end
		end
	end
end

generateTerrain(64)
Here's a simplified terrain generation script, to see how 3D noise can be used to make a "height map".
local FractalNoise = require(game.ServerStorage.FractalNoise)
local heightmapNoise = FractalNoise(nil, 0.6, 2, 2, nil, nil) --These are just magic numbers

function mapSet(map, x, y, z, value)
	map[x] = map[x] or {}
	map[x][y] = map[x][y] or {}
	map[x][y][z] = value
end

function mapGet(map, x, y, z)
	if map[x] then
		if map[x][y] then
			return map[x][y][z]
		end
	end
end

function heightMap(x, z)
	return heightmapNoise(x, 0, z)
end

function density(x, y, z)
	local densityOffset = 0.5 + heightMap(x, z) - y --Add 0.5 density so that there's a guaranteed bottom layer
	return densityOffset
end

function generateTerrain(mapSize)
	local densityMap = {}
	for x = 1, mapSize do
		for y = 1, mapSize/2 do
			for z = 1, mapSize do
				mapSet(densityMap, x, y, z, density(x/mapSize, y/(mapSize/2), z/mapSize))
			end
		end
	end
	
	for x = 1, mapSize do
		for y = 1, mapSize/2 do
			for z = 1, mapSize do
				local d = mapGet(densityMap, x, y, z)
				if d >= 0 then
					local block = script.Block:Clone()
					block.CFrame = CFrame.new(x, y, z)
					block.Color = Color3.fromHSV(((y/mapSize)%1), .75, 1 - (y/mapSize))
					block.Parent = game.Workspace
				end
			end
		end
	end
end

generateTerrain(64)
Here is a (huge) picture gallery of stuff I found out when playing around :P

Toothpaste series

:tooth:
Basic examples of combining height maps and twirled coordinates. Nice overhangs, no floaties.
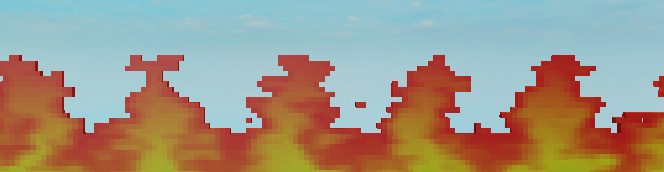
“Fire” series

Because I picked some cool colors and the shapes look like licking flames \m/. Examples of extreme amounts of twirl (the “bases” of the “mountains” are horizontally far away from their “peaks”).

Rainbow series

:rainbow: :rainbow: :rainbow: :rainbow: :rainbow:

Experiment with twirling more at the top, and less and less towards the bottom. Extreme twirl can generate really nice caves, but reducing twirl near the bottom of the world prevents them from going too deep.

Various

This one colors blocks depending on the “density” at their position, instead of their height. I don’t have anything clever to say about this :

Here’s a 2D version of many of the same concepts. Instead of using coherent noise for the height, a simple sine curve is used. The X coordinate is still twirled, giving it overhangs. Using a sine curve instead of a noisy heightmap gives a better understanding of what exactly “twirling” the coordinates does (there are regular peaks and valleys, with consistent heights and depths. The noise is only used for “surface level” features). Also it looks like fire :fire: :fire: :fire:

Annotation%202019-08-28%20021740

Here’s a cartoony version of the same thing. The sine of the y coordinate is used for twirling the input to math.noise(), which is kind of the opposite of the other flames. Any coherent function can be used to “twirl” the coordinates. I’m really interested in what other examples of smoothly varying functions I can find.

Just a heads up you can still totally get floaties, but only if you twirl too hard. You’ll have to tune your specific parameters to your needs.
Hope this rambly post is some help, and let me know if you have questions :slight_smile:

40 Likes

My word! :scream: I’m incredibly excited to get home and try all this out! :smiley::smiley: Should def make a post in #development-resources:community-tutorials about this tho :+1:

3 Likes

I might, but I feel like there’s so much more to explore on the topic. Perhaps when I’ve seen a few more techniques to make sure it’s not just a buch of pretty pictures :stuck_out_tongue:

So just doing some tests with it.

Few questions:

  • You had two separate scripts (the second two) that did different things. I’m not entirely sure what was the difference exactly in what it was actually generating.
  • Secondly, I’m guessing you used a part 1x1x1? Is there a line where I can change it to be any size block? (preferably 4x4x4, as that’s what I’m using, but would love to test with all kinds of sizes)
  • And finally, the colours. Can you show me how you got the different colors for the generation? And how to be able to actually set it so like grass would appear on top, dirt underneath, stones, etc.?

Also, just come across this, but changing the map size causes errors, [Game script timeout] (changed from 64 to 256)

1 Like

This is because the script takes too long to run, so Roblox stops the script because it thinks you might have made an infinite loop (it’s better than crashing Studio I guess). You’ll have to make the script yield in between different layers (i.e. inside the for loops) to prevent this from happening.

Color3 has a few different constructors, here I used Color3.fromHSV(hue, saturation, value) instead of the default which makes a Color3 from rgb values. Read more about HSV color space here. HSV is super nice when you want smoothly varying colors. Lerping RGB colors tends to move from e.g. yellow to gray to blue (because ((255, 255, 0) + (0, 0, 255))/2=(127, 127, 127)). If you lerp the hue of a color, it will lerp from e.g. red to yellow to orange to green to blue (IIRC), which feels much more natural. You can also play with the saturation (how POWERFUL the color is) and the value (how light [i.e. NOT BLACK] it is)

Here’s one example of choosing a hue for the blocks:

    block.Color = Color3.fromHSV(((y/mapSize)%1), .75, 1 - (y/mapSize)) 

Since y varies from 1 to mapSize , the value (lightness) varies from 1 to 0. This makes the map lighter near the top and darker towards the bottom. Same thing with the hue, it starts at ~0 (red) and moves around the color circle until it eventually reaches 1 (red again) after having moved through all the hues. This gives a rainbow effect.

Here’s another effect:

    block.Color = Color3.fromHSV( 
        ( (y*0.1) / mapSize ) %1, .75, 1
    ) 

Once again the hue changes with the y coordinate, but this times the coordinate is scaled by 0.1, meaning the hue changes less fast. Overall, it’ll move 1/10th around the color circle, which is probably in the orange or yellow region. So it should have a “firey” look to it. In the flames examples I believe I used the density to determine the hue, giving the terrain a reddish color at the edges and a more yellowish color deeper into the terrain where it’s even denser. All of the arguments to fromHSV should be between 0 and 1, so if you see (something)%1 that’s just to make sure that something loops around.

Sure, change the relevant part of the script to this:

local block = script.Block:Clone() 
block.Size = Vector3.new(1, 1, 1) * blockSize
block.CFrame = CFrame.new(x * blockSize, y * blockSize, z * blockSize) 
block.Color = Color3.fromHSV(((y/mapSize)%1), .75, 1 - (y/mapSize)) 
block.Parent = game.Workspace

And also add a blockSize constant somewhere near the top of the script. Notice that the coordinates aren’t scaled when sampling the density function, which is handy.

The first one is full- on 2D coherent-noise height map + 3D coherent-noise swirling. The second one is just a 2D coherent-noise height map. In both cases, the 2D height map doesn’t directly say “this is the height of the terrain at any given point”, it’s merely a suggestion. The density function uses the 2D height map to figure out "at which height the density should be > 0", so in the second case where this isn’t modified at all, we just get a simple height map. The second script is equivalent to just generating a 2D height map and creating blocks from the height that the heightmap tells to the bottom of the world. The whole point of the second script is to show how you can use a 2D height map alongside a fully 3D density function.

1 Like

I’m off the PC atm, but just to follow up. The yield in the for loops, that can just be a wait() ye?

And one thing I just thought about, is this is generating the entire area, while my original code from the question only generated the height map. Problem with this is it’s generating blocks that the player can’t see, so they aren’t necessary. So is there a way to incorporate my original code of creating the height map into this? Or a way to just not generate blocks if they are out of sight?

ye

For any cell that is above the density threshold, you can check if it has one or more neighbors who are below the threshold. If that is the case, then it’s a surface cell.

Here’s a 2D image showing what I mean. Each number is the number of empty neighbors a cell has. Blue cells are empty, dark orange are solid, and yellow cells are solid but shouldn’t be built (with parts), because they’re not visible from any empty blocks.

image

One optimization with this is only ever checking cells that are below a certain threshold. E.g. if the surface threshold is density >= 0, then you can also choose to only generate blocks in cells where density <= 0.25. (0.25 is magic number that would need to be tuned for your specific case)

Here’s a side- view illustration of what I mean. Blue is empty cells, brown is solid cells. Yellow is cells that are solid but shouldn’t be built because they’re not visible from any empty cells.

Generating everything where `density > 0´

Generating everything where lower_threshold > density > 0

You’ll have to tune your thresholds so that there’s never any gaps. This means the “band” of blocks will end up being between 1 and a few blocks thick everywhere. This is where the “check if neighbors are empty” method comes in, allowing you to make sure the terrain “skin” is always only 1 block thick. By only counting neighbors for cells in the orange band, you avoid doing a lot of checks.

As an aside, this is also why I decided to first calculate the density for the whole map and then constructing blocks where the density is > 0. It’s often useful to be able to get the density at a given point without having to calculate it. Looking it up in a density map is faster than calculating it every time. I didn’t actually do that with the scripts in my first reply, but that’s the explanation for why I did it the way I did.

The neighbor checking thing means doing a lot more calculations, which means terrain generation will be slower up front. But you’ll probably save some frames-per-second when the terrain is done generating and players are just running around doing whatever.

1 Like

When I set ‘d’ (guessing that’s density?) to > 0 instead of >= 0, it still generated the blocks below other blocks

function generateTerrain(mapSize)
	local densityMap = {}
	for x = 1, mapSize do
		for y = 1, mapSize/2 do
			for z = 1, mapSize do
				mapSet(densityMap, x, y, z, density(x/mapSize, y/(mapSize/2), z/mapSize))
			end
		end
	end
	
	for x = 1, mapSize do
		for y = 1, mapSize/2 do
			for z = 1, mapSize do
				local d = mapGet(densityMap, x, y, z)
				if d > 0 then
					local block = script.Block:Clone()
					block.CFrame = CFrame.new(x * 4, y * 4, z * 4)
					block.BrickColor = BrickColor.Green()
					block.Parent = game.Workspace
				end
			end
		end
		wait()
	end
end

Not sure what ‘lower_threshold’ actually equals? And another question that’s popped up. Increasing sizes. Atm it seems like a constant ‘size’ in terms of height. Is there a way I can add a variable or something to make it so some areas are really flat, while others are quite hilly/high

I meant something along these lines:

local d = mapGet(densityMap, x, y, z)
if d  0 and d <= lower_threshold then
	--generate block
end

Yes, you can scale/multiply the “height” that the heightmap function outputs at a given coordinate by some factor that you get by sampling a noise function at the same coordinates. This noise function would then describe the “hillyness” at any coordinate, meaning high values of the noise function are more hilly while values near 0 are more flat.

A code example might look like

function heightMap(x, z)
	return heightmapNoise(x, 0, z) * hillynessNoise(x, 0, z)
end

What is lower_threshold tho???