Update October 9, 2025
Hello Creators,
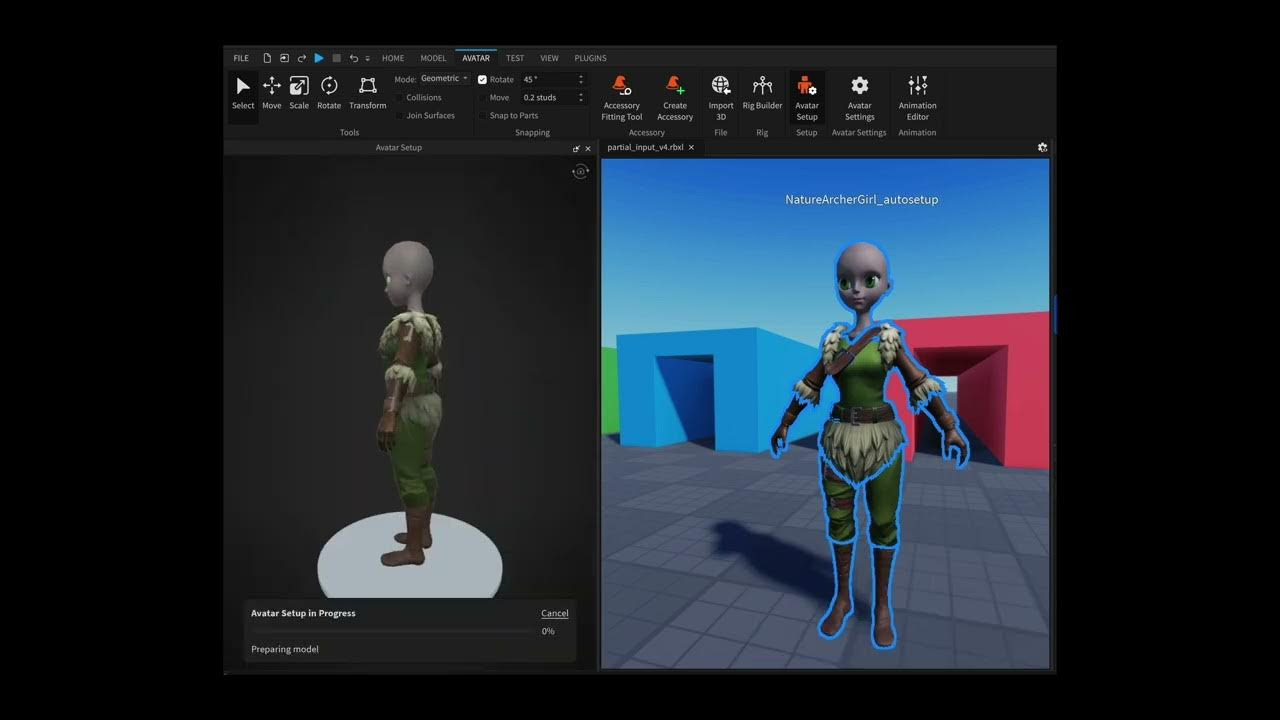
We are excited to announce a new update to Avatar Auto-Setup that allows you to override the generated avatar components with your own. Creators can now guide Auto-Setup by providing partially built avatars that are reused during the generation process to produce an avatar that matches exactly what you specified.
We are supporting the following combinations of partial inputs.
Body & Head user-guided options
| You Provide | Auto-Setup Generates |
|---|---|
| Body rigged and skinned | Head rig + cage + partition + attachment points |
| Head rigged | Body rigged and skinned + cage + partition + attachment points |
| Body rigged and skinned + Head rigged | Cage + partition + attachment points |
| All of the above + partitioned bodies (15 mesh parts named according to the character naming convention) | Cage + attachment points Note: This option will be available in the next release. |
Clothing user-guided options
Auto-Setup needs the body for which the clothing was modeled in order to properly build the clothing cages. For the use cases where the reference body is not available, such as when producing clothing models using generative AI applications, Auto-Setup makes a best effort to generate a body for your clothing setup process (the results are not as good as when you provide the reference body used to create the clothing).
We have added a few options to reuse the input body information when available (as opposed to always setting up the body and then the clothing – even when you don’t need the body to be set up).
| You Provide | Auto-Setup Generates |
|---|---|
| Fully setup avatar (body + head) + clothing | Clothing asset Note: This option skips the body setup and reuses the body cage as the clothing inner cage. |
| Body cage + clothing | Clothing asset Note: This option reuses the body cage as the clothing inner cage. This option will be available in the next release. |
| Clothing | Clothing asset Note: Auto-Setup generates a body cage for you. |
Rigid Accessory user-guided options
Auto-Setup needs the body used to position the rigid accessory relative to it. We cannot set up rigid accessories without a body.
| You Provide | Auto-Setup Generates |
|---|---|
| Fully setup avatar (body + head) + rigid accessory | Rigid accessory asset Note: This option skips the body setup and uses the closest body attachment point to position the rigid accessory relative to the body. |
Here is a demo video showing two of the most common user-guided options we expect our creators will rely on.
Additional Settings
Platform vs. Development Avatars
Creators can configure their setups to generate avatar assets for either Platform or Development usage. Platform avatars are meant to be published to the Marketplace and are generated with a more restrictive setup needed to pass UGC validation and moderation. Development avatars are meant to be used as Non-Player Characters (NPCs) or Starter Player Characters in experiences and are generated with a less strict setup.
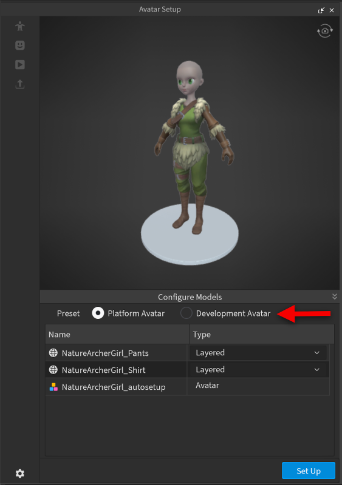
You can customize the preset options as needed. Auto-Setup remembers your previous preset configuration and reuses on all follow up setups.

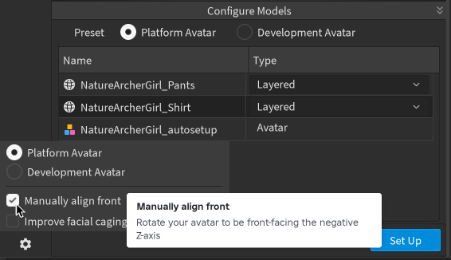
Manually Align Front
Auto-Setup uses a ML model to determine the front direction of your input avatar and aligns it with the negative Z-axis in world space. You can skip this pre-processing step and do the alignment yourself.
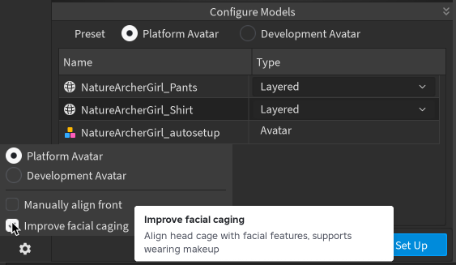
Improve Facial Caging
You have the option to enable an additional post-processing step that significantly improves the alignment of the head cage with the head facial features. Currently this step takes ~30 sec and we are working on performance improvements to reduce the impact on runtimes.
Reduce Triangle Count
This option is available only for Development setups to skip the auto-decimation of input meshes with resolution above the triangle budgets required for the Marketplace. The default value is OFF, meaning, Development setups retain the input models resolution.

Known Issues
- Auto-setup of clothing only doesn’t work for shoes. We will fix this in the next release.
Additional Resources
We released a video tutorial on how to turn any character model into a Roblox avatar in minutes. Check it out if you haven’t seen it yet!
What’s Next
The avatar team is working hard to improve the quality and robustness of auto-setup generated avatars. Expect the following improvements in upcoming releases.
- Improved body partition using “clean” cut planes for more accurate segmentation
- Improved setup of clothing without an accompanying body
- We are developing a new AI to generate a better body cage
- glTF export of auto-setup generated characters (body + clothing + accessories)
- Auto-generation of eyeballs and mouth if they are missing from the head geometry
- Validate and fix issues (when applicable) with option to visualize in the Preview
- Generate rigs with more than 15 bones connected to a control rig for easy animation authoring
Your feedback is very important for us to continue developing Auto-Setup in a direction that aligns with your needs, so please share your thoughts and suggestions below.
Thank you!


