Help needed in brainstorming a good pathfinding system

I’m working on making a zombie pathfinding system that makes zombies chase players around the map, but every implementation I create is littered with bugs and issues that make the zombie stutter, chaotically jump around or even just refuse to move at all. I’ve alternated between using the default pathfinding service and the SimplePath Module, but neither have worked all that well in my case. I currently plan to keep pathfinding operations situated on the client, and I’m after the following things:

  • Efficiency - I’m trying to use this with possibly hundreds of zombies at the same time. If it’s not as efficient as can be, it will cause massive strain on the client.
  • Responsiveness - I want the pathfinding system to respond to a change in position as soon as it occurs. If it’s too sluggish, it will be too easy to evade zombies.
  • Low maintenance costs - I don’t want to have to lay down specific waypoints and pathfinding links when I know they can be generated on the fly (Roblox’s pathfinding allows zombies to climb trusses without having to place them down). This may conflict with efficiency, but it’s important for my workflow that the system remains as flexible as possible.
  • Relentlessness - I want zombies to be able to go almost wherever the player can go. There are certain jumps and platforming tricks that pathfinding service on its own doesn’t pick up on, and I want to remove as many of those safeguards as I can to make the zombies a near constant threat.

This is the logic I’ve already brainstormed:

  • Raycast (zombie → player)
    – If there’s nothing in the way, run straight for the player, while raycasting down from the feet to avoid any pitfalls by jumping
    – Otherwise pathfind to the player
  • If the player is within a certain distance of the zombie, consider the following options
    – If the player is physically higher up than the zombie (but not too high up), run straight for the player and jump repeatedly to reach them
    – If the player is at around the same height as the zombie, run straight for the player, while raycasting down from the feet to avoid any pitfalls by jumping
    – If the player is lower than the zombie, run straight for the player and don’t bother jumping
    – Otherwise (if the player is too high up) pathfind to the player

Let me know if I should add anything else. I think the goal is to use actual pathfinding as little as possible, since that’s the most resource-intensive part of the pathfinding system. I’m thinking of adding a zombie FoV as well, but I need to read up on how that works.

14 Likes

I think it’s interesting that you mentioned this:

I think the goal is to use actual pathfinding as little as possible, since that’s the most resource-intensive part of the pathfinding system.

But Roblox’s pathfinder, and, consequently, SimplePath (since it’s just a wrapper for Roblox’s pathfinder) all run in a worker thread, which should have little to no impact on the main game thread.

The Problem:

The biggest issue that I have with Roblox’s pathfinder is that it’s honestly just very slow. It frequently takes 150-300ms to actually come up with a path and in that time, at standard WalkSpeed a humanoid character can move anywhere from 2.4 and 3.2 studs which means that, most likely, the first two waypoints or so are useless, or you end up waiting 150 to 300ms for the path and you’re behind 2.4 to 3.2 studs from where you should be. I do think you can work around these issues by just moving towards the target between path generations, which also has its own set of issues.

Obviously there are some other issues, like with :MoveToFinished firing at different distances from the goal for various reasons. That inconsistency leads to miss-timing jumps and other issues along the path. There’s also issues of navigation mesh accuracy, I’ve seen a navigation mesh dip 60 studs into terrain, door ways are inaccessible because the door way is just not quite aligned enough with the grid used to generate the nav mesh, etc. Then there’s issues where you just can’t get very possible path, which is something the dev has no control over.

All that said, to your point, the issue is compounded at scale, since there’s only one worker thread for all Path objects you end up causing a really bad problem where the pathfinder get further and further behind since there’s no way to cancel a call to ComputeAsync you’ll end up calculating old, unnecessary paths before you do the most recent, higher priority ones.

Just thought all of that was worth noting to help drive the conversation a bit.


My Experience:

This problem is interesting because I’ve been thinking about it a lot lately. I’ve been working on a zombie survival game for over a year now and with the scale of the game, as well as the number of zombies I’m dealing with the built in pathfinding solution simply doesn’t cut it.

I will say, I have not solved this problem yet, but I have some interesting ideas, that I think are worth some discussion.

I’m dealing with a map that’s about (16000, 800, 16000) stud map consisting of rough terrain, buildings, and trees and I operate about 6,000 zombies across the map currently.

My system is designed around overwhelming numbers versus “smart” zombies. So at the moment I do no pathfinding at all, but I’ll give some more details on future plans a bit further down in this book that I’m writing.

I’ll briefly outline some of the basic systems I’m using, which eventually I’d like to incorporate with some kind of pathfinding.

Breadcrumbs:

I employed a “breadcrumb” system where the zombies would keep incremental “waypoints” of their target’s position, upon losing line of sight they begin to rely on these waypoints and continue to track breadcrumbs for a few seconds. My implementation of this is fairly buggy but sometimes the results are shockingly cool to see. Depending on your situation this may not be a good option, also there’s no guarantee that the zombie can actual reach the breadcrumb. But, when it works it gives a really neat sort of pathfinding to a last known position.


Vaulting:

Since there are a lot of obstacles that the zombies would get stuck on I gave the zombies the ability to vault over objects that are around 8 studs tall. In my game this works pretty well and allows the zombies to maintain that “relentlessness” you mentioned.


Hordes:

Zombies work off of a sort of “hive mind” concept where they move together. This allows for an aggregate approach to pathfinding, where it’s feasible to create a single path for a whole horde of zombies, as well as a lot of other aggregation optimizations. There are a few complexities with pathfinding in this manner, which I’ll discuss later in the pathfinding section.


Pathfinding:

My first attempt at pathfinding with the horde technique was intentionally naive to expose what I knew would be an issue with this simple solution

Using Roblox’s Pathfinder with Hordes:

With the simple, naive solution of a single path for a horde there’s an issue that pops up pretty quickly that I like to call “The Train” or “The Conga Line”.

The Conga Line:

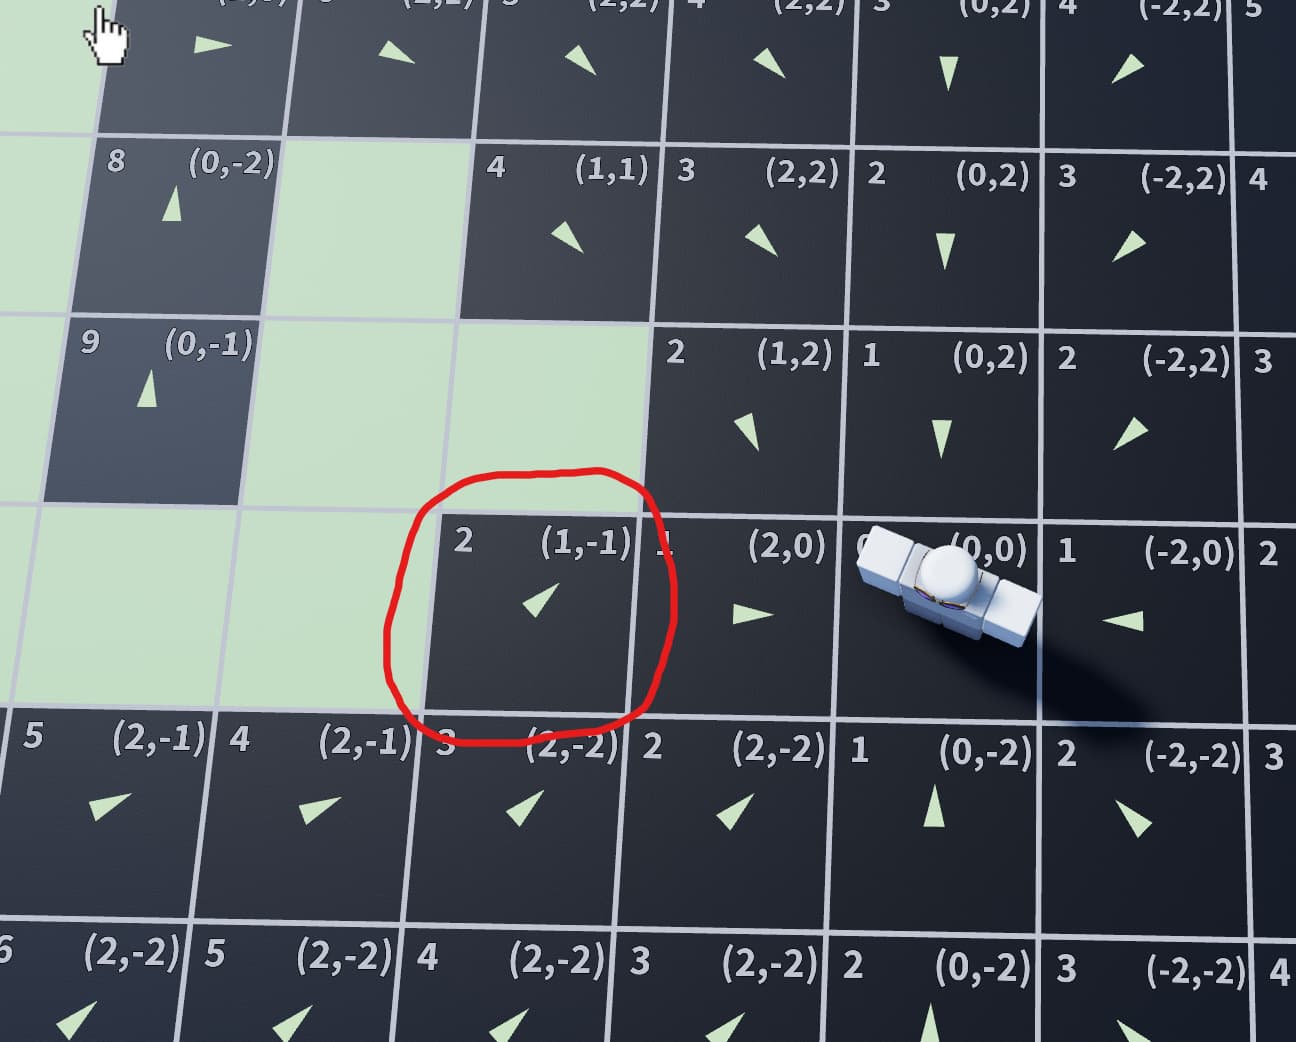
Naive single pathfinding for a horde results in a zombie train, which is not only unappealing to look at, it also means that the zombies aren’t going to go to what is technically the nearest waypoint. Consider the following example:


With a horde arranged in a pattern similar to this one, which is a frequent problem for me, you can quickly see the problem. With the “gimp” with the green lines shown in the picture the naive approach is to send it to the waypoint in the middle of the horde, but that means it needs to walk away from its goal before it moves towards the goal, and it also means you’ll end up with a ball of zombies that might be getting stuck on each other when they should really just continue in the path they’re already taking.

In this same picture, I was experimenting with a possible solution to the problem of picking the best waypoint for the zombie to start with.

Here’s a picture of what the naive approach looked like:

Line of Sight Waypoint Selection:

I attempted to come up with a good solution to the best first waypoint problem by checking line of sight to each way point, but in many scenarios I would be faced with maybe 50 zombies and 200 waypoints and if you needed to check every waypoint you’d need 50 x 200 raycasts (10,000) per path. Obviously this is a non-starter. I figured another less intense approach might be to use a sort of “binary sort” approach where I look at the last waypoint first, if I didn’t have line of sight then I’d go to the middle waypoint, and I’d continue to split the waypoint list in half and pick the middle waypoint closer to the start until I did have line of sight, then I would split the list of waypoints in half and pick the middle waypoint nearer to my last failed line of sight waypoint. This could work, but also suffers from a similar problem of not being very scalable. On average I’d find a solution in O(n * log(m)) (I think haha), about 115 raycasts which is good, but not good enough for my needs.

I moved away from this relatively quickly, so there may be more to it.

Back to the Drawing Board on Pathfinding:

I started to look around at other philosophies around pathfinding. I saw a video on Ultimate Epic Battle Simulator 2 showing a battle with 10,000,000 units, all of which are pathfinding, have nearest target selection, and have collision avoidance with each other. I was pretty blown away by this and I really couldn’t understand how something like this is possible.

To be totally honest, I’m still not sure how they pulled some of this off. But, for the pathfinding, I believe they’re using some form of Goal-Based Vector Field Pathfinding. This is a technique that has been used in RTS games for many years now. The idea is that instead of pathfinding from each unit to the goal, you create a vector flow field on a grid, where each cell in the grid points in the direction the unit needs to move in to reach a goal. This, when done correctly, gives a far more efficient pathfinder for large sets of units. This is the solution I’m currently exploring for my zombies, there are some unique challenges involved and a lot of things I still need to do to pull this off.


The Solution!

*I think :slight_smile:

Goal-Based Vector Field Pathfinding with Hordes:

*(In case you missed it, here’s a nice basic explanation of the Goal-Based Vector Field Pathfinding algorithm.)

The immediate issue that comes to mind with this solution is the requirement of a grid, as I mentioned previously my map is (16000, 800, 16000) with the addition of buildings and potential for caves and things like that, and if I want my zombies to be able to go anywhere then this grid also needs to be everywhere as well. Since my zombies don’t fly, I can ignore grid cells that are empty. This is all theoretical for my map, and whether I can keep a grid with a decent level of fidelity at this size in memory remains to be seen.

Since Roblox provides no tooling, that I’m aware of, to find surfaces (walkable or otherwise) then it’s necessary to create a tool to do this.

Spatial Mapping:

One of the biggest challenges with this technique, and really any pathfinding is spatial mapping.

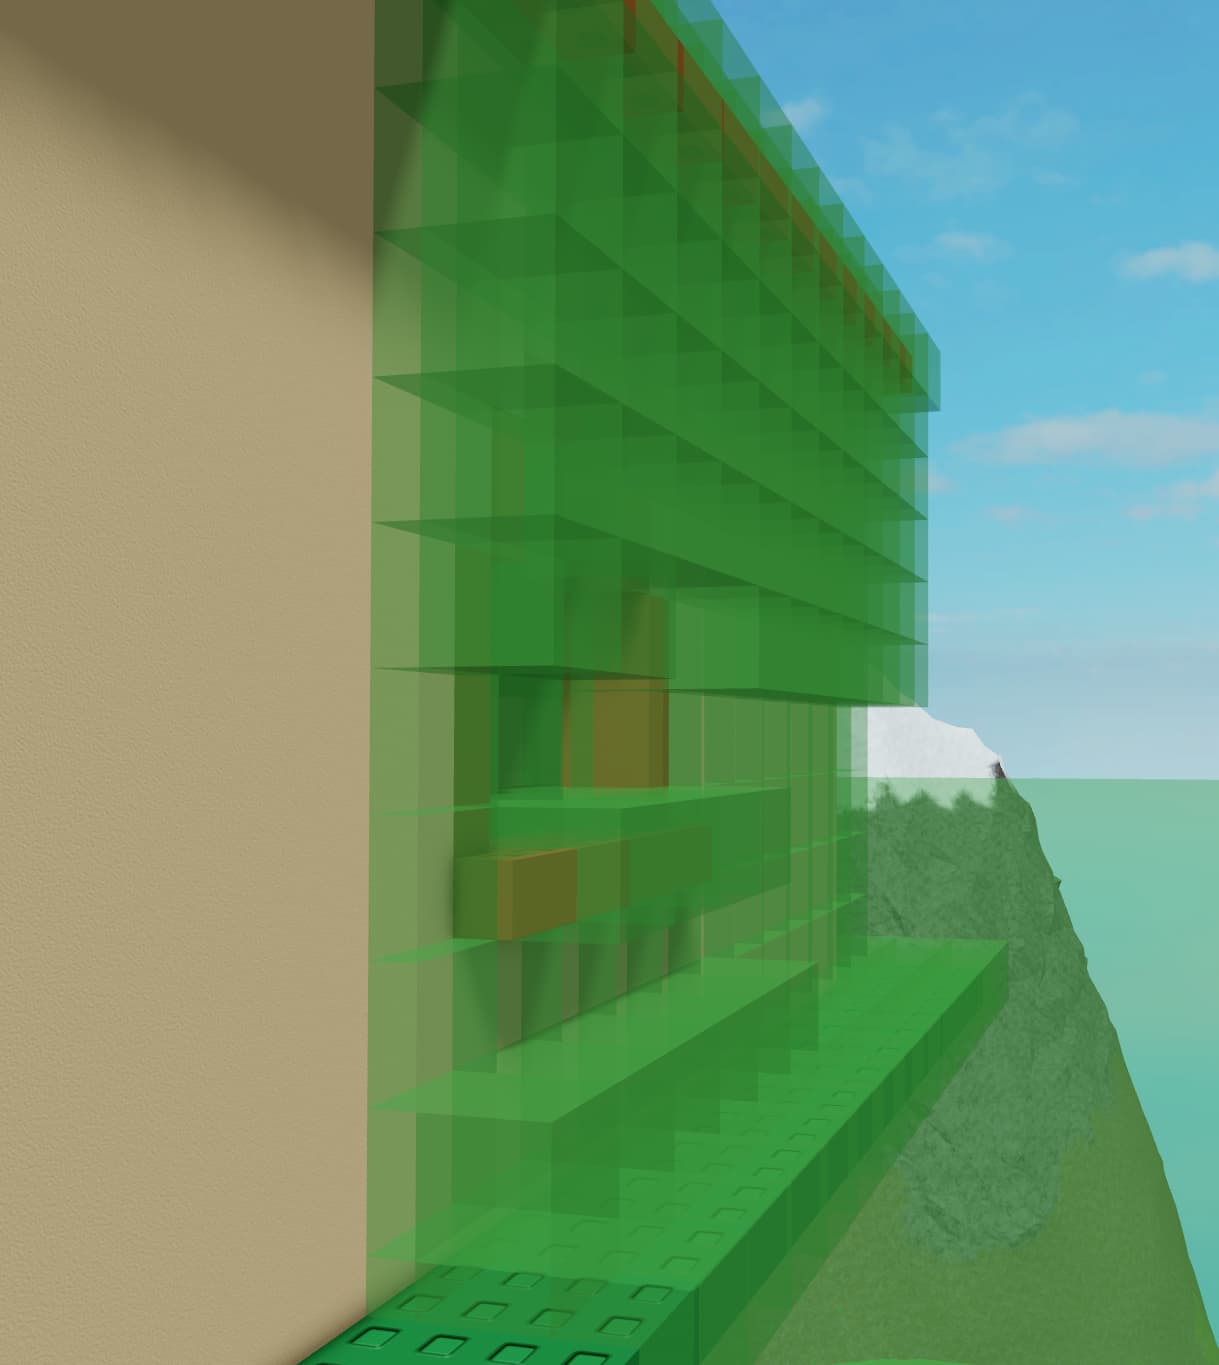
One technique that comes to mind for spatial mapping is to employ the use of an Octree where with each section of the octree we scan for parts and terrain, if we hit a part or terrain then we subdivide the octree and repeat the test until we reach the smallest child octree size (1 stud perhaps) or the space is empty. We can ignore any empty sections since those should be air, and our zombies only really need to know about surfaces. This will leave us with a cubical representation of the space occupied by parts and terrain. See:

This is a nice first step, but we don’t really care about area inside of parts and terrain, we only care about the surfaces. So the next step is to remove any cells that lie within some Y threshold beneath another cell. See:


*This scene is a 512x512x512 volume with cells 2x2x2 and takes < 2 seconds to generate (parts included).

The next step would be to find connections between these cells, I haven’t given this part a ton of thought yet, if I’m being honest. But my initial thought here is that looking at adjacent cells and comparing their height differences is a good place to start. For example, if one cell is on top of a wall and an adjacent cell is on the ground then we might want a connection going in one direction.

After that the next step would be to find connections between adjacent grids in the top level octree, this will be useful later for optimizing the pathfinder. Additionally we should record a link between the adjacent cells in the connected grids.

Additionally, we can make this spatial map dynamic thanks, again, to the octree data structure. It’s really easy to determine what parts of the spatial map need to be reevaluated given the position and volume of any change that might occur, although this isn’t something we want to do in constant time, it should be fairly quick to update.

Pathfinding:

The Goal-Based Vector Field Pathfinding algorithm requires that we evaluate a whole grid each time we want to find a path to a point, and that there exists a version of the flow field grid for each goal. Obviously we don’t want to evaluate every grid cell on the surface of a 16,000x16,000 stud map, so we need a solution to cut down on the number of grids we need to evaluate.

So the next step is to do some lower fidelity pathfinding. One of the really great things about the octree spatial map is that now we have a really big grid, perhaps 512x512x512 studs per cell, that we can do some pathfinding on. We can employ the classic A* technique on these top-level octrees to find the sections we actually want to evaluate the grids for. Consider worst case on a 16k x 16k map with 512x512 grid the number of possible grids that need to be updated would be ~50. I’m never going to pathfind that far, maybe 1000 studs at most so that would narrow the evaluation grid down to ~2 (more in some cases where there exists no connection between “adjacent” grids).

This is a huge optimization taking us from needing to update ~980 grids to ~2 grids.

Finally, the last step that comes to mind is to actually perform the Goal-Based Vector Field Pathfinding algorithm, the only difference is that your implementation would need to traverse multiple grids, thanks to the step we performed earlier where we recorded links between the adjacent cells between grids this should be somewhat trivial.

22 Likes

Have you considered boids? Using seperation and cohesion, you can perform a minimal amount of pathfinding, because large amounts of boids that are close to each other can be “grouped”, and begin pathfinding as a unit instead of individual boids. The repulsion of other boids within the group provides dynamic movement of individuals. Zombies closer to the origin follow the alignment and cohesion stricter than those further away, who separate more. The boid which is closest to the goal becomes the leader, and is used for pathfinding. That way, if the leader goes into a tight space, the horde will thin out due to the separation rules (which you should dynamically adjust)

2 Likes

I have actually done something like this before.
This was using a single path to calculate. There are some theoretical improvements i can make such as making the path wider to allow agents to be more lenient in following the path and also getting rid of some artifacts in the corners where an agent doesn’t actually know if it is on the correct path.

This is using the regular pathfinding but all the agents are using a single path to follow.

I recommend using a combination of Steering Behaviours (Boids) and Flow Fields

A* is super quick. Once you make the map (which you can do at development time) A* takes milliseconds to compute.
This was my implementation of A* and (hopefully) I can combine the two very soon.

So in other words you just have to learn how to use Boids and combine that with multiple agents and you have a path.

5 Likes

So far, it seems like the common thread is that the solution to this problem is to use a vector field system working off of the A* algorithm, both of which I’ve read about in the past and which I understand the basic idea behind (although I may need to refresh myself on the specifics of the A* logic). Right now, the issue for me is that I have no practical experience with any of this and would need a more in-depth and step-by-step explanation of what needs to be done. For instance, I wouldn’t know where to start regarding how to do this:

Are you generating an infinite 3D grid of parts and then raycasting up, down, left, right, and in front and back to determine which are colliding with other objects, saving those, and then deleting the rest? I would imagine there’s a way to weigh the adjacent grid spaces differently depending on the height relative to one another. You could probably have spaces that are higher than the humanoid’s hip height or higher than the peak of its jump (there must be some way to reliably calculate this using jump power and hip height) be regarded as walls and discarded. I can’t think about that until I get to the point in this photo, though.

Judging from all the showcases just in this thread, it seems to be exactly what I’m looking for, I just don’t know where to start. @koziahss I don’t know what Boids are but from the showcases I’ve seen on YouTube they look more like they’re meant for controlling stuff like schools of fish or flocks of birds. It might be useful in future but none of my zombies fly at the moment.

1 Like

So I’m attempting to make an A* test (visual showcase) for Roblox and I have very little idea what I’m doing. Here’s where I’m at right now.


The plan is to have a grid module generate the grid from a “node” part in server storage that has several things:

  • A surface GUI to display G cost, H cost, and F cost
  • A ton of attributes that describe if it’s walkable, what the G cost, H cost, and F cost are, whether it’s the starting point or the end point, or whether it’s in a variety of lists
  • A click detector to have a node switch between being blocked or open during runtime
  • A proximity prompt to cycle a node between being the starting point, the end point, or neither
  • color coding to indicate what is part of what category

Right now, here is all my code. It’s very messy:

MAIN: runs the main functions at runtime to get everything going

local grid = require(script.Grid)
local node = require(script.Node)

grid.new(Vector2.new(30, 30))

NODE: module that controls all class behavior of individual nodes

local SS = game:GetService("ServerStorage")
local nodePart = SS:WaitForChild("Node")

local node = {}

local function findTarget()
	local target
	for _, point in workspace.Grid:GetChildren() do
		if point:GetAttribute("Target") == true then
			target = point
			return target
		end
	end
	return
end

local function findStart()
	local start
	for _, point in workspace.Grid:GetChildren() do
		if point:GetAttribute("Start") == true then
			start = point
			return start
		end
	end
	return
end

local function cyclePrompt(player : Player, point : Part)
	local prompt = point:FindFirstChild("ProximityPrompt")
	if not prompt then return end
	if prompt.ObjectText == "Target" and point ~= findTarget() then
		local target = findTarget()
		if target then
			local targetPrompt = target:FindFirstChild("ProximityPrompt")
			if not targetPrompt then return end
			targetPrompt.ObjectText = "Target"
			target:SetAttribute("Start", false)
			target:SetAttribute("Target", false)
		end
		point:SetAttribute("Start", false)
		point:SetAttribute("Target", true)
		prompt.ObjectText = "Start"
	elseif prompt.ObjectText == "Start" and point ~= findStart() then
		local start = findStart()
		if start then
			local startPrompt = start:FindFirstChild("ProximityPrompt")
			if not startPrompt then return end
			startPrompt.ObjectText = "Target"
			start:SetAttribute("Start", false)
			start:SetAttribute("Target", false)
		end
		point:SetAttribute("Start", true)
		point:SetAttribute("Target", false)
		prompt.ObjectText = "Node"
	else
		point:SetAttribute("Target", false)
		point:SetAttribute("Start", false)
		prompt.ObjectText = "Target"
	end
end

local function toggleClick(player : Player, point : Part)
	local prompt = point:FindFirstChild("ProximityPrompt")
	if not prompt then return end
	if point:GetAttribute("Walkable") == true then
		point:SetAttribute("Walkable", false)
		point:SetAttribute("Start", false)
		point:SetAttribute("Target", false)
		prompt.Enabled = false
		prompt.ObjectText = "Start"
	else
		point:SetAttribute("Walkable", true)
		prompt.Enabled = true
		prompt.ObjectText = "Start"
	end
end
	
function node.new(x : int, y : int)
	local point = nodePart:Clone()
	if x < 10 and y < 10 then point.Name = "0" .. x .. " 0" .. y elseif x < 10 then point.Name = "0" .. x .. " " .. y elseif y < 10 then point.Name = x .. " 0" .. y else point.Name = x .. " " .. y end
	point.Position = Vector3.new((x - 1) * point.Size.X, point.Size.Y * 0.5, (y - 1) * point.Size.Z)
	point.Parent = workspace.Grid
	point:SetAttribute("Walkable", true)
	point:SetAttribute("Start", false)
	point:SetAttribute("Target", false)
	point.ProximityPrompt.Triggered:Connect(function(player) cyclePrompt(player, point) end)
	point.ClickDetector.MouseClick:Connect(function(player) toggleClick(player, point) end)
	point.AttributeChanged:Connect(function(attribute)
		if attribute == "Costs" then
			point.SurfaceGui.Frame.GCost.Text = point:GetAttribute("Costs").X
			point.SurfaceGui.Frame.HCost.Text = point:GetAttribute("Costs").Y
			point.SurfaceGui.Frame.FCost.Text = point:GetAttribute("Costs").Z
		elseif attribute == "Start" then
			if point:GetAttribute("Start") == true then
				point.BrickColor = BrickColor.new("Medium red")
				point.SurfaceGui.Frame.PointText.Text = "A"
				point.SurfaceGui.Frame.GCost.Visible = false
				point.SurfaceGui.Frame.HCost.Visible = false
				point.SurfaceGui.Frame.FCost.Visible = false
				point.SurfaceGui.Frame.PointText.Visible = true
			else
				point.BrickColor = BrickColor.new("Medium stone grey")
				point.SurfaceGui.Frame.PointText.Text = "-"
				point.SurfaceGui.Frame.GCost.Visible = false
				point.SurfaceGui.Frame.HCost.Visible = false
				point.SurfaceGui.Frame.FCost.Visible = false
				point.SurfaceGui.Frame.PointText.Visible = false
			end
		elseif attribute == "Target" then
			if point:GetAttribute("Target") == true then
				point.BrickColor = BrickColor.new("Medium red")
				point.SurfaceGui.Frame.PointText.Text = "B"
				point.SurfaceGui.Frame.GCost.Visible = false
				point.SurfaceGui.Frame.HCost.Visible = false
				point.SurfaceGui.Frame.FCost.Visible = false
				point.SurfaceGui.Frame.PointText.Visible = true
			elseif point:GetAttribute("Start") == false then
				point.BrickColor = BrickColor.new("Medium stone grey")
				point.SurfaceGui.Frame.PointText.Text = "-"
				point.SurfaceGui.Frame.GCost.Visible = false
				point.SurfaceGui.Frame.HCost.Visible = false
				point.SurfaceGui.Frame.FCost.Visible = false
				point.SurfaceGui.Frame.PointText.Visible = false
			end
		elseif attribute == "Walkable" then
			if point:GetAttribute("Walkable") == false then
				point.BrickColor = BrickColor.new("Black")
				point.SurfaceGui.Frame.GCost.Visible = false
				point.SurfaceGui.Frame.HCost.Visible = false
				point.SurfaceGui.Frame.FCost.Visible = false
				point.SurfaceGui.Frame.PointText.Visible = false
			else
				point.BrickColor = BrickColor.new("Medium stone grey")
				point.SurfaceGui.Frame.GCost.Visible = false
				point.SurfaceGui.Frame.HCost.Visible = false
				point.SurfaceGui.Frame.FCost.Visible = false
				point.SurfaceGui.Frame.PointText.Visible = false
			end
		elseif attribute == "Processed" then
			if point:GetAttribute("Processed") == true then
				point.BrickColor = BrickColor.new("Medium blue")
				point.SurfaceGui.Frame.GCost.Visible = true
				point.SurfaceGui.Frame.HCost.Visible = true
				point.SurfaceGui.Frame.FCost.Visible = true
				point.SurfaceGui.Frame.PointText.Visible = false
			end
		elseif attribute == "ToSearch" then
			if point:GetAttribute("ToSearch") == true then
				point.BrickColor = BrickColor.new("Medium green")
				point.SurfaceGui.Frame.GCost.Visible = true
				point.SurfaceGui.Frame.HCost.Visible = true
				point.SurfaceGui.Frame.FCost.Visible = true
				point.SurfaceGui.Frame.PointText.Visible = false
			end
		end
	end)
	return point
end

function node.SetG(point : Part, value : int)
	point:SetAttribute("Costs", Vector3.new(value, point:GetAttribute("Costs").Y, value + point:GetAttribute("Costs").Y))
end

function node.SetH(point : Part, value : int)
	point:SetAttribute("Costs", Vector3.new(point:GetAttribute("Costs").X, value, point:GetAttribute("Costs").X + value))
end

return node

GRID: controls the grid, pathfinding, and most interactions between nodes

local SS = game:GetService("ServerStorage")
local nodePart = SS:WaitForChild("Node")

local node = require(script.Parent.Node)

local grid = {}

function grid.getNeighbors(point : Part)
	local neighbors = {}
	local x = tonumber(string.sub(point.Name, 1, 2))
	local y = tonumber(string.sub(point.Name, 4, 5))
	local directions = {
		["North"] = {x, y + 1},
		["Northeast"] = {x + 1, y + 1},
		["East"] = {x + 1, y},
		["Southeast"] = {x + 1, y - 1},
		["South"] = {x, y - 1},
		["Southwest"] = {x - 1, y - 1},
		["West"] =  {x - 1, y},
		["Northwest"] = {x - 1, y + 1}
	}
	for _, coords in directions do
		if coords[1] < 10 then coords[1] = tostring("0" .. coords[1]) else coords[1] = tostring(coords[1]) end
		if coords[2] < 10 then coords[2] = tostring("0" .. coords[2]) else coords[2] = tostring(coords[2]) end
		local neighbor = workspace.Grid:FindFirstChild(coords[1] .. " " .. coords[2])
		if not neighbor then continue end
		table.insert(neighbors, neighbor)
	end
	return neighbors
end

function grid.new(size : Vector2)
	if size.X >= 100 or size.Y >= 100 then warn("Grid is too big") return end
	for i = 1, size.X do
		for j = 1, size.Y do
			local point = node.new(i, j)
		end
	end
end

function grid.Pathfind(start : Part, target : Part)
	local toSearch = {start}
	local processed = {}
	
	start:SetAttribute("ToSearch", true)
	
	while #toSearch > 0 do
		local current = toSearch[1]
		for _, searching in toSearch do
			if searching:GetAttribute("Costs").Z < current:GetAttribute("Costs").Z or (searching:GetAttribute("Costs").Z == current:GetAttribute("Costs").Z and searching:GetAttribute("Costs").Y < current:GetAttribute("Costs").Y) then
				current = searching
			end
		end
		
		table.insert(processed, current)
		current:SetAttribute("Processed", true)
		table.remove(toSearch, current)
		current:SetAttribute("ToSearch", false)
		
		for _, neighbor in grid.getNeighbors(current) do
			if neighbor:GetAttribute("Walkable") == false then continue end
			if table.find(processed, neighbor) then continue end
			local inSearch = table.find(toSearch, neighbor) and true or false
			local costToNeighbor = current:GetAttribute("Costs").X --+ current.GetDistance(neighbor)
			if inSearch == false or costToNeighbor < neighbor:GetAttribute("Costs").X then
				node.SetG(neighbor, costToNeighbor)
				--node.SetConnection()
				if inSearch == false then
					--node.SetH(neighbor, neighbor.GetDistance(neighbor))
					table.insert(toSearch, neighbor)
					neighbor:SetAttribute("ToSearch", true)
				end
			end
		end
	end
	
	return
end

return grid

What I’m stuck on is how to calculate the G and H costs. I know that the G cost is the distance between a node and the start, and the H cost is the distance between that node and the target, and that neighbors in the cardinal directions have a “distance” of 10 while neighbors on the diagonals have a “distance” of 14. What I don’t understand is how the G cost and H cost are calculated over long distances, where there are multiple routes to each node. Every tutorial I’ve seen has neglected to explain how to make the initial distance calculations. I also don’t know how I’m going to be able to locate the completed path to the goal when pathfinding is done. One tutorial I watched mentioned “connections,” but I don’t know how to implement that within Roblox.

Any pointers at all are appreciated. Again, this stuff is entirely new to me.

3 Likes

I believe you should take a look at this other project which is complete and uses a orderly datastructure.

For the cost you can take a look at the heuristics function they used which was manhattan distance

1 Like

When the Zombie detects the player, it’s possible that at the same time the player goes to hide behind a wall, so if the Zombie goes straight to the player, he’ll inevitably facing the wall and be blocked. To counter this, you could insert the player’s CFrames into a table, coupled with RayCast. So if the Raycast hits the player, the zombie goes directly to the player and the table is cleared, but if the RayCast doesn’t hit the player then you use the player’s saved CFrames to go around the wall like the player.

Here’s a short example I created for one of my NPCs, “tableCFramePlayerDetectedRig1” being the table in which I put the CFrames of the player detected by the Zombie.

if ChangeNumber > 0 then
	tableCFramePlayerDetectedRig1 = {}
	NextPathPlayer = PlrInFolder.Position
	Rig.Humanoid:MoveTo(NextPathPlayer)
else
	if (PlrInFolder.Position - lastPosition).magnitude > 2 then
		table.insert(tableCFramePlayerDetectedRig1, PlrInFolder.Position)
		lastposition = PlrInFolder.Position
	end
	local NPCtoChar = (Rig.HumanoidRootPart.Position - PlrInFolder.Position).Unit
	local DotProduct = NPCtoChar:Dot(NPCLookTo)			

	if (Rig.HumanoidRootPart.Position - PlrInFolder.Position).magnitude < 60 and DotProduct < -0.10 or (Rig.HumanoidRootPart.Position - PlrInFolder.Position).magnitude < 25 then
		local ray = Ray.new(Rig.Head.Position, (PlrInFolder.Position - Rig.Head.Position).Unit * maximumDistance)				
		local hit = workspace:FindPartOnRayWithIgnoreList(ray,{Rig})
		if hit.Parent.Name == PlrInFolder.Name then
			NextPathPlayer = PlrInFolder.Position
			Rig.Humanoid:MoveTo(NextPathPlayer)
			tableCFramePlayerDetectedRig1 = {}
		elseif (Rig.HumanoidRootPart.Position - NextPathPlayer).magnitude < 3 then
			NextPathPlayer = tableCFramePlayerDetectedRig1[1]
			table.remove(tableCFramePlayerDetectedRig1,1)
			Rig.Humanoid:MoveTo(NextPathPlayer)
		end
	else
		ReturnToWalk(Rig)
	end
end

1 Like

@CompilerError @koziahss I just finished the A* showcase. Works perfectly, but definitely was tiring to try to figure out. What’s the next step from here? I haven’t read the vector field tutorials all the way through yet, but I imagine the distances that are presented in the showcase video are taken from the F cost calculations of A*. Is that what I should try to figure out next, or should I further optimize my A* algorithm first?

@dthecoolest The project you linked was definitely helpful, though I did end up going with a distance formula that allowed diagonal movement.

2 Likes

I haven’t read the vector field tutorials all the way through yet, but I imagine the distances that are presented in the showcase video are taken from the F cost calculations of A*

I want to say they’re typically using Dijkstra’s algorithm to determine path costs. A* and Dijkstra’s are very similar in that A* is an extension of Dijkstra’s algorithm (I believe) where the primary difference is that Dijkstra’s is basically A* with a non informative heuristic function (i.e. h(v) = 0). I believe in the case of Vector Field Pathfinding, you’ll see reasonably significant performance improvements with Dijkstra’s over A* because you can simply choose which cell in the vector field to pick next by the heuristic value alone, then add up all of the heuristic costs for the path and that’s the path cost from that start cell to your goal, then you repeat that process for every cell in your grid. You could definitely use A* here as well though.

What’s the next step from here?

So you know how to path find along a grid, congratulations! Now, going back to the assumption that you have a large map, and a known array of grids connected by a graph as well as links between individual cells between grids. Think back to the idea of using the Octree data structure to build a spatial grid of each section of your map, lets assume again that each largest octree section is 512x512x512 studs in size.
image
From your image above you can think of each of the cells in the image as one of those octree sections. You can get an idea of how you can path find along massive distances efficiently, this path becomes a list of grids to consider in the vector field path calculation. This step significantly simplifies the number of grids to consider in the calculation, additionally you can repeat this process for subsections of the octree to further reduce the number of cells in the number of grids that need to be considered.

Once you’ve found the grids which need to be considered in the vector field calculation you can simply employ the vector field algorithm on each grid.


Back to spatial mapping, since you asked about this in an earlier post.

I might be getting a bit ahead of where you are. It seems like you’ve likely jumped straight into the pathfinding portion and probably not done the spatial mapping work yet. The spatial mapping portion is pretty essential to making this a viable solution for you.


Are you generating an infinite 3D grid of parts and then raycasting up, down, left, right, and in front and back to determine which are colliding with other objects, saving those, and then deleting the rest? I would imagine there’s a way to weigh the adjacent grid spaces differently depending on the height relative to one another. You could probably have spaces that are higher than the humanoid’s hip height or higher than the peak of its jump (there must be some way to reliably calculate this using jump power and hip height) be regarded as walls and discarded. I can’t think about that until I get to the point in this photo, though.

A couple of things to mention here, this is an example of what spatial mapping kind of looks like. This is actually using an octree, as I mentioned earlier, and I would really encourage you to learn about octrees, they can be an incredibly powerful tool in your data structure arsenal. Essentially the idea is to take a large section, say, again 512x512x512, check if that section is empty via something like workspace:GetPartsInPart() (note: This does not check for terrain), if the section is empty then you’re done, nothing further to consider in this section. If it is not empty, then subdivide the section into 8 subsections that are each 256x256x256, half of the parent section, in size, repeat this process. You do this until you reach your smallest desired size, say 1x1x1, although, the smaller you go the more memory this structure will consume, so balance it accordingly. You could then repeat this process across your entire map, then you end up with blocks of data which contain spatial data about your map.

The second thing to mention is that this is not an infinite 3D grid. In my example image I used a 512x512x512 section and found all of the space which contained a part. No raycasting involved, I simply used the algorithm mentioned above to find the occupied space. If you look back to my original post I also mentioned how you could find the navigable surfaces in this space, although that is a very naive and simplistic way of doing it, and I’m unsure of how effective it is in some cases.

The subdivision of space allows us to ignore most of the empty space very quickly, as we’re able to cut out large chunks of space with each step, so that’s a desirable optimization, if you maintain the octree data structure then you can also use that to dynamically update the space whenever an object moves or enters it.

4 Likes

This is a good point, and I remember seeing in all of the flow field demonstrations that there was only one cost value that was going up by perfect increments of 1. I decided to copy my A* file and reconfigure it for Dijkstra’s, since it would probably be the best option to search all of the cells in the grid if I want to create a gradient map for it. Didn’t take much effort on my part since, like you said, it’s just A* without the H and F costs. When I starting testing, though, I decided that in order for the entire grid to be searched, I would just not stop the loop when the path between A and B was found. Then I realized: is there even a “B” point in flow field pathfinding? From what I gathered from the demonstrations, every point that isn’t the target point is technically a “B” point.

EDIT: This is what I managed to come up with when I completely disregard a “point B” in path calculations.

Also, would you recommend I do as the tutorial you posted recommends and split up the target point into 4 equal parts to avoid problems with equal pathfinding distances? the author admits it’s a simple solution but that it drastically increases computation time.

image

3 Likes

Yeah, think of a Vector Field Pathfinding as pathfinding from every cell in the grid to the goal rather than from point A to B, it’s more “for any given position within the grid, there exists a velocity vector which points me in the direction I need to go to reach the goal.”

Also, would you recommend I do as the tutorial you posted recommends and split up the target point into 4 equal parts to avoid problems with equal pathfinding distances? the author admits it’s a simple solution but that it drastically increases computation time.

I would do this if you find that you’re having an issue without having it. I would imagine that you will end up needing something like it, but better solutions might exist for it today.

2 Likes

What I could do, instead of having the player’s node be just one node, is grab the 4 closest nodes and have that be indicative of the player’s position, rather than dividing every node by 4. If the area of the 4 nodes ends up being rather large, then I can just use :MoveTo() to make up the rest of that distance.

I have reconfigured the Dijkstra’s showcase to now be a vector field showcase. I’ve noticed there’s more than a handful of issues with the formula they give for solving for the vectors, though:


If I set the pathfinding solution to be “move in the direction of the vector” then the top case would run into the wall and have no way of correcting, while the bottom case would not be taking the most optimal path. The vector calculations in the tutorial state:

Vector.x = left_tile.distance - right_tile.distance
Vector.y = up_tile.distance - down_tile.distance

Note: Each tile’s distance variable stores the path distance to the goal as calculated by the wavefront algorithm above.

If any of the tiles referenced (left/right/up/down) are non-traversable and thus have no usable distance stored, the distance associated with the current tile is used in place of the missing value. Once the path vector has been roughly calculated, it is normalized to avoid inconsistencies later.

I followed this in my implementation and double-checking the results shows that they are indeed correct. I would imagine that these problems would be solved with four target nodes rather than one?

1 Like

Long-awaited update: After a lot of real-life stuff that needed my attention, I’ve finally been able to explore quadtrees and take a crack at octrees. I even used the same example provided here:

It’s extremely buggy. I don’t know what could be wrong except that I made it needlessly complicated by creating my own Bounds class a la Unity, and then working off of that. It’s very good at getting about half the collisions right, and then half the nodes it either thinks are colliding with something when they aren’t or not colliding with something when they are. One difference I made in my implementation, apart from the wire cubes and probably the node size, is that I purposefully excluded the baseplate to cut down on as much z-fighting as I could.

The reason I went to such complicated lengths as to follow another Unity tutorial and create my own Bounds class is because I wanted to follow the same concept @CompilerError seems to have done in their showcase where the collisions are based on axis-aligned bounding boxes (AABB, aka the bounding box is in line with the XYZ axes as opposed to the part’s orientation). From what I’ve seen, Roblox doesn’t seem to have an easy way of checking for the AABB of a part. What I ended up making was a jerry-rigged system that was extremely resource-intensive and not ideal:

function Bounds.getPartAABB(part)
	local model = Instance.new("Model")
	local pp = Instance.new("Part")
	pp.Anchored = true
	pp.Position = part.position
	pp.Size = Vector3.new(0.01, 0.01, 0.01)
	model.PrimaryPart = pp
	model.Parent = workspace

	local partParent = part.Parent
	part.Parent = model
	local _, bounds = model:GetBoundingBox()
	part.Parent = partParent
	pp:Destroy()
	model:Destroy()

	return bounds
end

When you do this for about 1200 parts, it takes a couple of seconds for the game to load, naturally. There must be a better way.

1 Like

Could you explain a bit of your thought process around your use of octrees here? I’m curious to understand how you’re using them here. Also have you see the GetPartsInPart API? I’m also happy to share my example with you if that would be helpful. It’s actually pretty simple and I think to do a dull 512x512 scene with 2x2 cells was taking like 1.3 seconds total on my machine.

Because I based it off a Unity tutorial, I have a ton of things that I’m pretty sure aren’t necessary. The main reason I did it in the way that I did was to be able to follow the tutorial.

In particular, I tried to get the axis-aligned bounding box (AABB) of each part. For reference:

image

The center example is what I was aiming to look for with regard to each part, as it appeared to be what you did in your demonstration with the cells being in line with the XYZ axes on the slanted house. I messed around with the Model:GetBoundingBox() method in order to retrieve the AABB; because the orientation of a model’s bounding box is based on the orientation of its PrimaryPart, I created a tiny BasePart with a neutral orientation for each part, placed it in the center of each part, and then added the part to the model in order to get the bounding box with respect to the temporary primary part. This bounding box would ideally have a center positioned where the part was and a size that encapsulated the entire part, regardless of its orientation.

After retrieving the size and position of the bounding box, the model and the PrimaryPart would both be destroyed. This is easily what ate up most of the run time. I posted the code for this in my prior post.

The next part was to code an entire custom Bounds class (link to the API in the prior post), which I could find no analog for in Roblox’s API, so I could keep following the tutorial. I was aware of the GetPartsInPart API, but I wanted to follow the tutorial, and creating a whole custom Bounds class seemed easier at the time, for whatever reason. If anything it was a good mental workout. The class functions as similarly to the Unity version as possible and was done through using a ModuleScript and metatables, much like the “OctreeNode” and “Octree” classes I ended up making.

The Octree class describes the behavior of all OctreeNodes (what you refer to as cells) and consists only of a constructor and a function called “AddObjects.” In the constructor, the bounding size is not a parameter; rather, there are two parameters: a table of parts, and a minimum cell size. You enter a table of the parts that you want to look at, and the “RootNode” (the cell that all subdivided cells ultimately come from) expands to encompass the area that the collective AABBs take up. The bounding area then squares itself off so that the area it subdivides in is square.

The OctreeNode class is where all the subdivision actually happens. Each node, upon creation, has the bounds of its eight children already figured out when it’s created, and it will eventually create these children if it finds the need to (if the bounds of the child intersect with the AABB of the part), at which point it begins recursively dividing. The function in which all this happens is called “DivideAndAdd” and here’s its code:

function OctreeNode:DivideAndAdd(object : Instance)
	if self.NodeBounds.Size.Y <= self.MinSize then return end
	if self.Children == nil then
		self.Children = {}
	end
	local dividing = false
	for i = 0, 7 do
		if self.Children[i] == nil then self.Children[i] = OctreeNode.new(self.ChildBounds[i], self.MinSize) end
		if self.ChildBounds[i]:Intersects(Bounds.new(object.Position, Bounds.getPartAABB(object))) then
			self.Part:Destroy()
			self.Children[i]:Draw()
			self.Children[i].Part.SelectionBox.Color3 = Color3.new(0, 1, 0)
			dividing = true
			self.Children[i]:DivideAndAdd(object)
		end
	end
	if dividing == false then
		self.Children = nil
	end
end

The :Draw() function refers to a function that creates a wire cube to illustrate where the node is and its size, much like DrawGizmos in Unity.

I can’t think of much else to add without posting the entire code, which I think will be overwhelming and I don’t want to do if I don’t have to.

That all makes sense. The only concern I’d have with AABB testing (versus :GetPartsInPart) is that it doesn’t take actual collision boxes into account, while also having the same problem as :GetPartsInPart does with terrain collisions.

I think it’s a great exercise to learn how to create your own Octree data-structure for sure though! Nice job there. That hopefully helps you to have a better understanding of what it is and why it’s helpful.

From the example that I gave above, I simply created a single part for each cube test in the octree, 512, 256, 128, 64, 32, 16, 8, 4, 2 and for each step in the “octree” I simply moved the part corresponding to the step size into position and called :GetPartsInPart() on it to determine if the space was occupied. So for the purposes of finding “walkable” surfaces, the octree data-structure isn’t strictly necessary, but it is very helpful for highly efficient updates to your navigation grid later on, if/when changes occur in the world.

I never attempted to come up with a solution to terrain, I always envisioned using :ReadVoxels() on the terrain and checking if any weren’t air, if there was, just subdivide and repeat, once at the smallest size some raycasting may be necessary.

I pared down the code a lot and relied on :GetPartsInPart() and now I’m getting something much closer to what you had:

I think you were right about the AABB; it doesn’t really make sense to refer to that when what we’re looking for is what’s walkable and what isn’t. Plus, all that extra code trying to find it must introduce another 1200+ points of failure.

Even then, my new implementation here did take much longer than a second to generate (from a volume of 512^3). If I had included the baseplate in the calculations, I would have had to put a task.wait() in the recursive function, or else the script would time out about ten seconds in. At least the code is small enough now that I can post it all and don’t have to try to explain what’s going on:

local octree = Instance.new("Model")
octree.Name = "Octree"
octree.Parent = workspace

local rootNode = game.ServerStorage.OctreeCell:Clone()
rootNode.Parent = octree
octree.PrimaryPart = rootNode

rootNode.Position = Vector3.new(0, 0, 0)
rootNode.Size = Vector3.new(512, 512, 512)

local function checkAndDivide(node)
	local overlaps = workspace:GetPartsInPart(node)
	local colliding = false
	for _, part in overlaps do
		if part.Parent ~= octree and part.Name ~= "Baseplate" then colliding = true end
	end
	if colliding and node.Size.Y > 2 then
		local quarter = node.Size.Y * 0.25
		local childPos = {
			node.Position + Vector3.new(quarter, quarter, quarter),
			node.Position + Vector3.new(quarter, quarter, -quarter),
			node.Position + Vector3.new(quarter, -quarter, quarter),
			node.Position + Vector3.new(quarter, -quarter, -quarter),
			node.Position + Vector3.new(-quarter, quarter, quarter),
			node.Position + Vector3.new(-quarter, quarter, -quarter),
			node.Position + Vector3.new(-quarter, -quarter, quarter),
			node.Position + Vector3.new(-quarter, -quarter, -quarter)
		}
		for i = 1, 8 do
			local childNode = game.ServerStorage.OctreeCell:Clone()
			childNode.Parent = octree
			childNode.Size = Vector3.new(node.Size.Y * 0.5, node.Size.Y * 0.5, node.Size.Y * 0.5)
			childNode.Position = childPos[i]
			checkAndDivide(childNode)
		end
		node:Destroy()
	elseif colliding == false and node.Size.Y >= 2 then	
		node:Destroy()
	end
end

checkAndDivide(rootNode)

Do you think having a part for each stage of the octree in server storage like you appear to have done would optimize things? And for the issue of terrain, while looking over the WorldRoot library I found a method called :Blockcast(). It could be that you could “blockcast” a cube the size of the cell and if it hits anything, it could function like :GetPartsInPart() but would also work for terrain. I don’t know much about it, though, so :ReadVoxels() might be more accurate.

It’s important to note that the green blocks are simply debug information, they are not necessary for anything other than to show that what you’re doing works. The octree and surface grids can exist purely in data, so no need to make the blocks at all. The scan will still take some time, but ideally you can pre-scan your maps and store that information in a module script or something like that. I think doing the scan at runtime is doable, assuming your map isn’t too complex. The nice thing about the octree is that you can really quickly narrow down the space that actually needs to be updated when the world is modified.

Blockcast could definitely work for terrain, however, raycast, blockcast, and spherecast do not collide with an object that is within their origin, so you have to be careful that the blockcast doesn’t start inside of the terrain voxel where there is terrain occupancy, otherwise it won’t hit it or any terrain beneath it.

1 Like

Just implemented :ReadVoxels() and it works quite well for cells 4^3 or larger. Otherwise, it leaves gaps, which seems to have been expected.

I attempted to implement :Blockcast() too, but ran into issues; 90% of the time it should detect the terrain, it doesn’t, and sometimes it will detect collisions that aren’t there, like off the side of the non-tilted house.


I think the reason for this is a mixture of what you mentioned in the previous post and just my lack of understanding on how a Blockcast works. If I had a visualization of how it works, I could probably tune it to work properly, but here’s how things stand as of now:

if node.Size.Y < 4 and colliding == false then
	local cframe = CFrame.new(node.Position + Vector3.new(0, node.Size.Y * 0.5, 0))
	local size = Vector3.new(node.Size.X, node.Size.Y * 0.1, node.Size.Z)
	local direction = Vector3.new(0, 10, 0)
	local params = RaycastParams.new()
	params.FilterDescendantsInstances = {octree}
	params.FilterType = Enum.RaycastFilterType.Exclude
	local result = workspace:Blockcast(cframe, size, direction, params)
	if result ~= nil then colliding = true end
end

Another option would be to just raycast up and down from the bottom and top of each node under a certain size and check if there’s a result like the above code. I don’t know how optimized a couple of raycasts is compared to a single blockcast, though.