Hi! This is a very basic tutorial for tool animation in Roblox Studio. I will try to make this tutorial as detailed as possible so that it is easy to follow. Feel free to skip ahead at any time. I hope you find this tutorial helpful and I wish you the best of luck with your animating!
Disclaimer: This tutorial is specifically designed for beginners looking to learn some basic animation. This method will not work if you intend to add moving parts to your tool or create animations that involve the tool leaving the hand of the character. If you do want to learn how to create more complex animations using Motor 6Ds, I would recommend checking out this tutorial by Headstackk.
Please keep in mind that this is my first tutorial so it may not be perfect. Let me know if you have any suggestions.
Plugins
Here are the plugins that I used during this tutorial.
Weld Plugin
Tool Grip Editor
Step 1: Creating the tool
Note: If you already made your tool, you can skip this part.
Making the tool
I am going to be animating a very simple lemonade tool for the purpose of this tutorial, however you can animate whatever object you want.
My simple lemonade model.

Before you do anything else, make sure that all of the parts in the tool are unanchored before continuing.
In order to control where the player holds the model from, create a part, scale it down to a small cube, and place it where you want the player to hold the tool.
The blue cube in this screenshot.

Once you have it positioned correctly, you can set the transparency property in the Properties window to 1 so that it is invisible.
Drag this part into your model and rename it to “Handle.”

It is very important that this part is named Handle so that Roblox knows which part to use as the handle of the tool!
Now that you have your model, insert a “Tool” instance into the workspace. Rename it to whatever you want, and dump the contents of the model into the tool instance. Once this is done, you can delete the empty model.
Your tool should now look like this:

Alright! Using the welding plugin (linked above), head to the plugins menu at the top of your screen, select everything in the tool, then press “Weld All.”

If you play your game right now, if you walk over the tool you should be able to pick it up.
Oh no! The tool isn’t in the right place. Thankfully, we can use the other plugin (linked above) to fix this. Select your tool in the workspace, then (in the plugins tab) press “Tool Grip Editor.”
You will now be able to position the tool correctly. Once you are done, press the “Tool Grip Editor” button again and test your game.
If you have done everything correctly, you will be able to walk over your tool, pick it up, walk around with it, and have it in the correct position!
Whew, that was a lot of steps! Let’s get to animating.
Step 2: Creating the animation
Now that you have your tool (in my case, lemonade), we can finally start animating.
Head to the plugins tab and select “Build Rig,” then select “Block Rig.” If your game uses R6, make sure to switch from R15 to R6, then import a R6 block rig. If you don’t know what I’m talking about, just use R15 as that is the default setting.

Now, you’ll need to position your tool so that the dummy is holding it. Keep in mind that the arm will swing up to hold your tool outwards when you actually pick it up in game.
The dummy appears to be holding the lemonade. Nothing is actually attached, it is just positioned that way.

Now, let’s actually attach it! You’ll need to weld the handle of the tool to the dummy’s hand. Expand the dummy object in the workspace and the tool object in the workspace. Select both your tool’s handle part and the dummy’s “RightHand” object. Now, head to the plugins tab and press “Weld All” using the welding plugin. (linked above)

We can finally start animating! Once again, in the plugins tab, press “Animation Editor.” Then, select your dummy. You can now begin to animate.
For anyone who needs it, here is an explanation on how to use the animation editor.
How the animation editor works
The animation editor may look a bit intimidating at first glance, but it is not too bad!
Start by selecting the “RightUpperArm” (that top part of the shoulder/arm) and rotate it so that the dummy is holding the tool upwards. The entire arm and your tool should all rotate with the RightUpperArm.
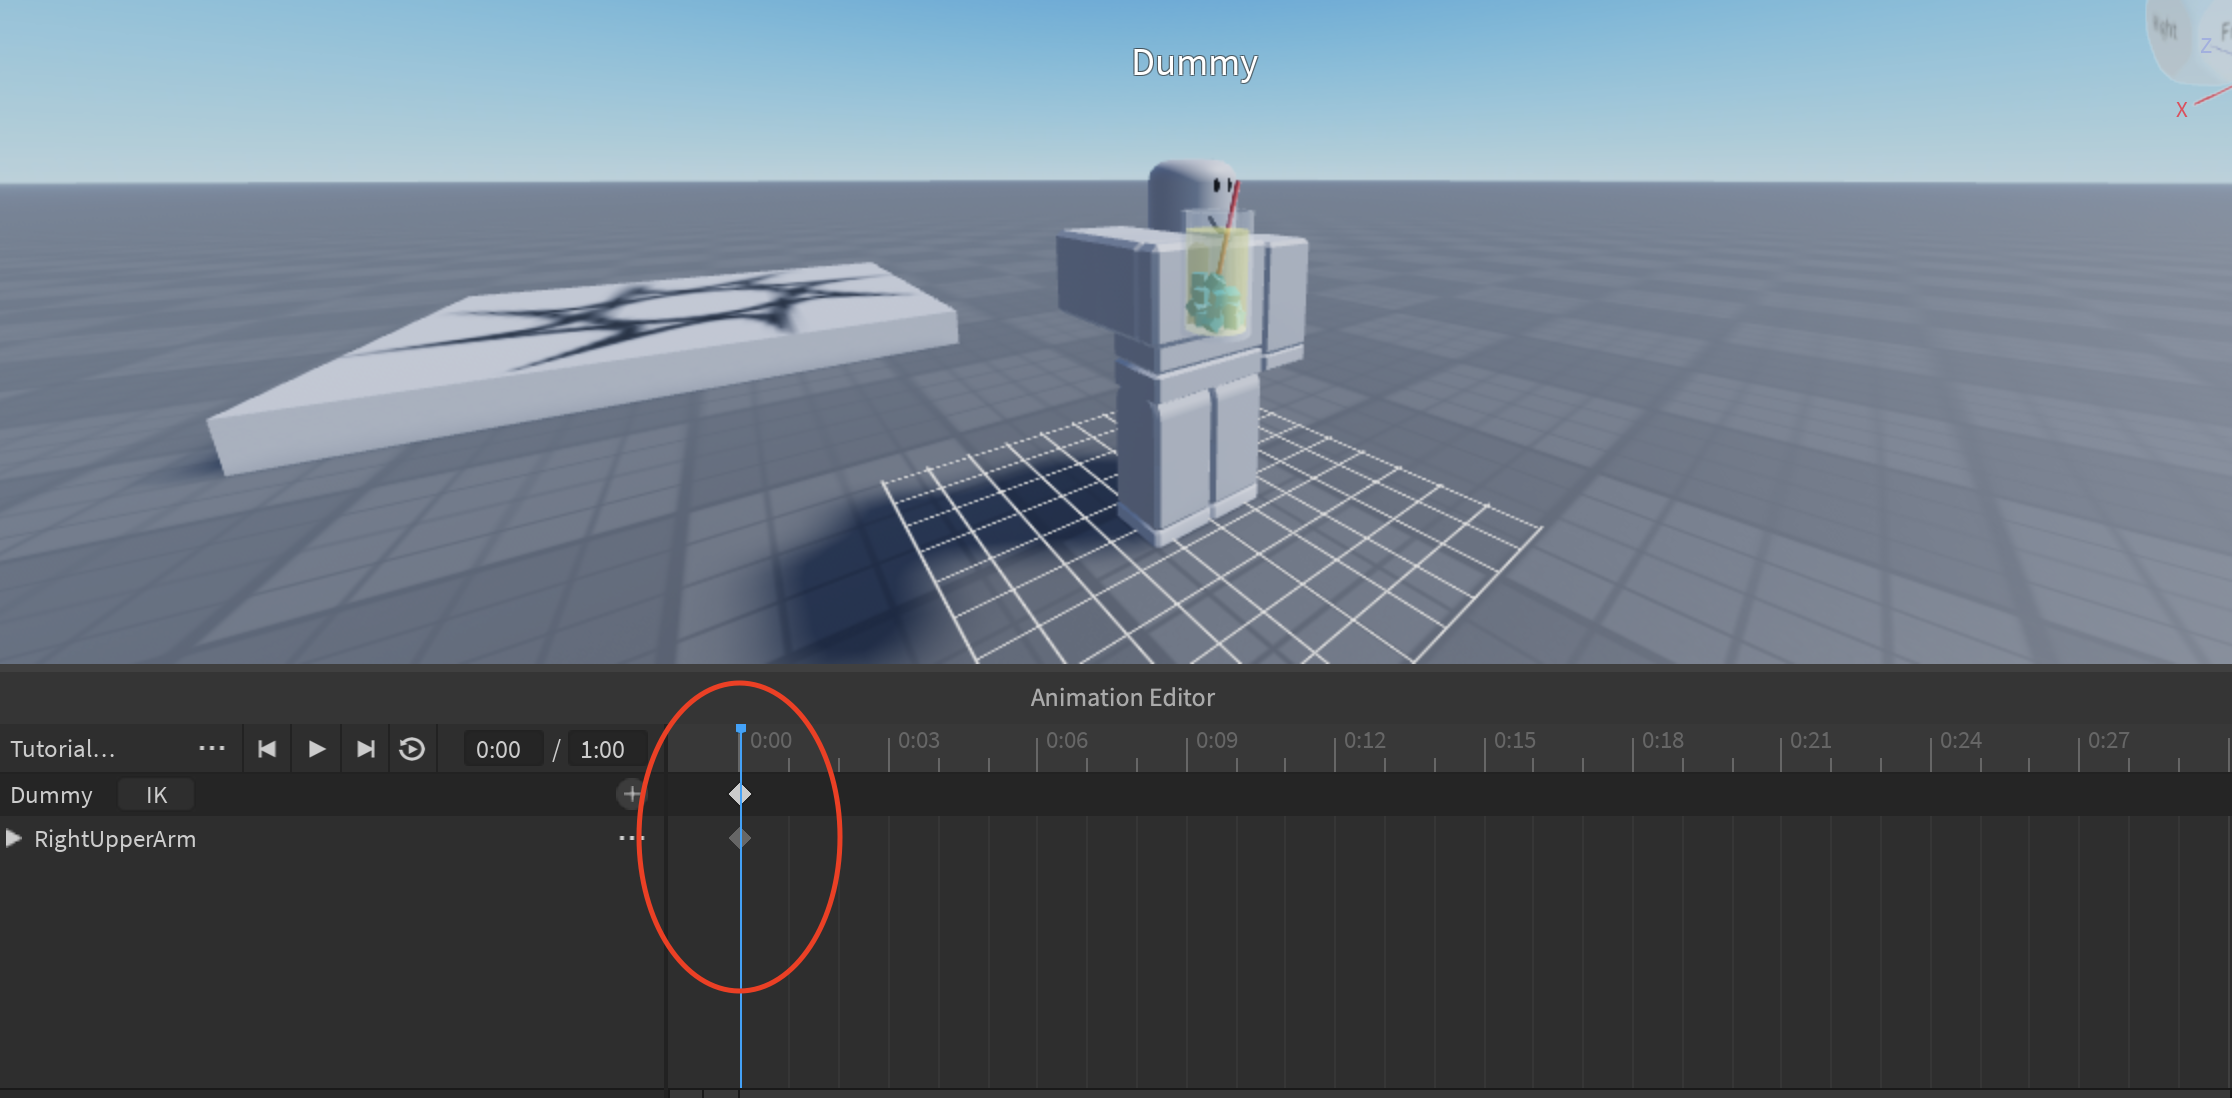
When you do this, you’ll notice some diamonds appear inside of the animation editor. (circled in red) This is called a keyframe, and it marks movement on the animation timeline.
If you’re confused, one way of thinking about it is like a checkpoint for the animation. Every column of diamonds is a location that the animation will reach. Roblox will automatically fill in the gaps between these “checkpoints” to create smooth animations.
Drag the blue line on the timeline forward a bit. Once you’ve moved it, create the next keyframe (checkpoint) for your animation. (See picture for example) Start moving, rotating, scaling, etc. limbs around. It will automatically create another keyframe. You can move as many limbs as you want for each keyframe!
Getting ready to drink…

Sip…

After a few tweaks, here is the finished animation!
One final thing! If you want to extend/shorten the length of your animation, replace the 1:00 here with a different number.

I hope you had good luck with your animating! Now, it’s time to export the animation so you can use it.

Select “Export” from the menu in the animation editor. You can either overwrite/update an old animation that you no longer want, or create a new one! This part is quite self-explanatory.
If everything went well, you should see this pop up on your screen! Press the link (blue text) to open the animation asset on the Roblox website. We will need this link momentarily.

Step 3: Scripting the animation
If you have been following along to this tutorial, great job!  You’ve made it past the hardest part! Let’s get this thing finished up.
You can completely delete the dummy from the workspace. Don’t worry about the “AnimSaves” model inside of your dummy. You have already saved the animation, so you will not lose your progress!
Head back to your tool. Insert an “Animation” and a “LocalScript” into your tool.
Head to the tab at the Roblox that you opened earlier when you submitted the animation. Copy the entire link, then head back to studio. Make sure the properties window is open, then select the animation object. At the top of the properties window, you should see a category called “AnimationId.” Paste your link into this category.

I accidentally did something wrong at this point of making the tutorial (I was following along in Studio) and ended up having to redo the entire animation…OOF. Don’t worry, the tutorial is correct. 
Now, open your LocalScript (feel free to rename it) and delete the “Hello World” statement. Copy/Paste the following code into your script. I will explain it below!
local character = game:GetService("Players").LocalPlayer.Character
local tool = script.Parent
local animation = tool:WaitForChild("Animation")
local animationTrack = character.Humanoid:LoadAnimation(animation)

local canRun = true
local debounceTime = 1 -- Change this for a different tool cooldown length

tool.Activated:Connect(function()
	if canRun then
		canRun = false
		animationTrack:Play()

		wait(debounceTime)
		canRun = true
	end
end)
If you are looking to improve upon this script, please check out this comment explaining a different way to create a debounce that is much more accurate and is not effected by lag. To implement the debounce into this script, replace everything below the animation track variable (line 4) with the code in the comment. Thank you to HashCollision for posting this comment!
I would highly recommend checking out the script explanation below.
Script explanation
Line 1: Gets the character model of the player with the tool.
Line 2: Defines a variable for the tool object.
Line 3: Gets the animation object inside the tool object that contains the link to the desired animation.
Line 4: Loads the correct animation into the Humanoid object inside of the character. This will allow the animation to run using Play()
Line 6/7: This are variables for a debounce. A debounce is essentially a cooldown that ensures a player cannot spam the animation. Replace the 1 next to debounceTime for a longer/shorter cooldown.
Line 9: When the tool is activated (the screen is clicked while the tool is equipped)…
-
Check if you can run the script (debounce/cooldown)
-
(If you can), make it so that you cannot run it again
-
Run the animation track, which we loaded into the humanoid previously on line 4
-
Wait for a bit (debounce again)
-
Make it so that you can run the animation again
One more thing to note about the script! If you want to connect any events to your animation, this would be the place to do it. Make sure to put it after the canRun = false, but before the wait(debounceTime)!
Troubleshooting
There isn’t much troubleshooting to put, but here are a few things to try if it isn’t working! Hope this helps.
Troubleshooting
The first thing I would check is in the animation editor. Open the editor and click the three dots to open up the menu. (the sane place where you go to export) Click on “Set Animation Priority” and select “Movement.” You’ll have to redo some stuff, but I was having some trouble with this when I was working this out before making the tutorial.
Another thing to try is heading to the view tab and enabling the output menu. If you see an error message there, click on it and it should take you to the source of the error.
If you think the script may be the error, try re-copy and pasting the script in. Maybe there was a mistake? Also look for any red underlines in your script. If you see one, something is wrong!
Here is a picture of how my tool looks in the explorer. See if your’s looks the same as mine!

You could also try re-welding your tool, although this may break the animation further. Still may be worth a shot!
If all else fails, you can always try again from the beginning.
I wish you the best of luck if you’re having trouble.
Conclusion
That’s all for this tutorial! I truly hope that you were able to find some success and that you were able to create something cool. This was my first tutorial, so if you have any feedback, please do not hesitate to let me know! I know this tutorial is very long, I wanted to provide as many details as possible for this beginner tutorial.
Cya!
