Hello there! I have been playing Roblox for a while now and I have always wanted to get into the clothing designer business but when I went to search for help or tutorials I found very little help! I had to go out of my way and start a long road of practise and dedication so that I could create some decent clothing that I maybe could sell to a potential buyer. After a long road of struggle, I have finally achieved my goal but sadly with little help. I am writing this tutorial Today so I could maybe help some fellow young clothing developers so that they could aspire to one day be a very good clothing designer that one day might make some Robux or even some change out of this category in Roblox. So now that I said the boring part, LET’S BEGIN! 
SOFTWARE
As software, I recommend using Paint.net, Gimp, Adobe Photoshop, Photopea, Pixlr and more but I mainly recommend using these. I for this tutorial will be using paint.net as I am more comfortable with this program. You should experiment with these editors and get a feel for them and see which one you like best so you can make your designs with ease.
Click on the Hyperlink to download :-
Paint.net
Gimp
Photoshop
Photopea
Pixlr
Templates:-
As templates, you can always make your own as long as you follow the Roblox Default Template proportions and design. Such as:-

You can also use the Advanced template:-

You can use this as a proportional reference:-

NB:-
When using the Advanced template you have to transfer what you have on the advanced template on the Default Template or else It cannot be published
Roblox Default Template:- Shirt

Roblox Default Template: Pants

BEFORE UPLOADING ANYTHING MAKE SURE THE RESOLUTION IS 585x559
______________________________________________
For this tutorial, I shall be using Paint.net
______________________________________________
Plugins:-
If you are using Paint.net like me you should Install the following plugins to make it easier for yourself to design your Roblox clothing.
This is not a plugin but it helps, If you are going to create super or hyper-realistic clothing I recommend you to invest in a graphic tablet or pen to keep your hand steady and make accurate and precise shading and lines.
Lesson 1 - Textures and Colour
For this tutorial, I shall be making a simple half sleeve summer shirt.
Firstly we need to find a reference photo that we can picture how to final shirt will turn out
I shall be referring to this photo:-

Firstly we have to find a suitable Texture with the right colour.
After searching on google and some fabric websites I have found this fabric that I shall be using.

You can always play with Opacity and recoloring the Texture to make it fit your needs.
Next, we need to place the texture in the template. As a rule, make sure you always keep to background ( Template layer) on top

Layers
As an important Rule of thumb always use Layers and Always name your layers to make it easier on yourself.
To add layers:-

To delete layers:-

To duplicate layers:-

To Merge layer down:-

Move layer up/Move layer down:-

Layer Properties:-

This is where you can adjust the layer Opacity/Transparency

Shirt Proportions
Firstly we shall remove part of the texture we are doing a half sleeve shirt so with reference to the reference we shall remove part of the texture as follows:-

We cut the shirts sleeve by using the rectangular select tool and selecting the parts we didn’t want and then we pressed delete.


This is why it important to use layers.
Now we shall be using the ellipse select tool to cut out the collar


Stitching and Lines
Now we shall position the lines and stitching on different layers like so:-


To make the lines use:-

Change this to make your stitching:

Shading and Highlights
On a new layer, you shall be doing shading.
With a size 30 brush with 0 hardness, you shall outline your template:-


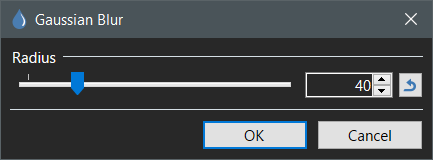
Next, go to Effect – Blurs – Gaussian Blurs

Then adjust the blur radius until you are happy with it.


Next, we can adjust the transparency of the layer until we are happy with the result like so:

Highlights
We can use lighter colours such as white and adjust the transparency and we can add blurs to make it more realistic and more pleasing to the eye, like so;


Fixing line work
Now you can adjust all the linework layers opacity to make it look like one piece.

Details
Now we can add some final details in the appropriate layers or on a new layer altogether such as buttons additional shading, highlights, or even logos leaving you with the final piece;

Wrinkles
In the virtual world, imperfections are what make a piece perfect as in life nothing is perfect therefore we make wrinkles to make it more realistic.
To make wrinkles we are going to use a plugin. the smudge tool;
Effects - Tools - Smudge

add some lines on a separate layer as so;

Now click on the smudge plugin and smudge the lines as so;

Make them as realistic as possible

After you have finished you can save it as a PNG and publish it to Roblox


If you have any questions please feel free to reply to this tutorial
If you want to learn more about me you can check my Portfolio;
I hope you learned more about clothing Designing and I hope I made you want to design something original that will make you some Robux or even some money or for your self