Hello! I use Inkscape to design my UI and Icons for my games. Yesterday someone asked me to teach them how to use it so I thought I would create a guide on how to use it!
What is inkscape?
Inkscape is a free Vector Graphics Editor, it’s main Vector Graphics Format is SVG (Scalable Vector Graphics) which means that no matter how much you resize your objects in the editor. (with the exception of images you paste in) they’ll keep the same quality.
When you export objects in the editor as something other than SVG, when you resize the image in Roblox Studio, it will lose quality as it is no longer an SVG.
Setup
I use the default settings in Inkscape apart from I enable Auto Saving.
To enable AutoSave go to: Edit > Preferences > Input/Output (Click the +) > Autosave > Enable autosave
Tools
These are the tools that I use often and I believe are most useful.
In Inkscape, the tools don’t have normal names, instead the names are what they do.
Allows you to draw straight lines or bezier curves which lets you create your own unique shapes.

Lets you select objects either by clicking on them or selecting them holding left click and dragging your mouse over the objects you want to move.
Lets you manipulate the nodes (the points) and paths (the lines) of objects.

Lets you draw a square or rectangle.

Lets you draw a circle.

Lets you draw a a star or polygon.

Lets you create and edit text.

Tips and Tricks
When you select an object these buttons will appear on the left side at the top of the screen.
The triangle buttons let you rotate / flip your objects and the other buttons let you bring forward / send backwards an object.
To group objects together, select them and then click Ctrl & G. To ungroup, select the group and click Ctrl & U.
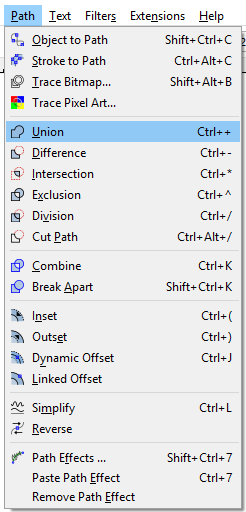
To union objects together, select them then go to: Path > Union. To split the union apart, go to: Path > Break Apart

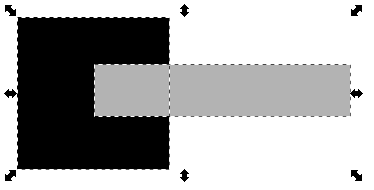
To use an object to cut a shape into another object, select both objects but make sure the object you want to cut out with is on the top then go to: Path > Difference


To be able to change the fill/stroke colour, stroke thickness and other things go to: Object > Fill and Stroke


To be able to Align objects relative to other objects go to: Object > Align and Distribute.
-
 I set “Relative to” to Last Selected (by default it’s Selection Area).
 Select objects then click both the buttons in the rectangle so centre them.

 I set “Relative to” to Last Selected (by default it’s Selection Area).
 Select objects then click both the buttons in the rectangle so centre them.
To export objects as a PNG go to: File > Export PNG Image. By default it sets it so you’ll export what you’ve got selected but you can change it to export the Page, Drawing, etc. You can change the Width / Height of your objects to be when exported; the width / height scales with each other .


Hold your Mouse Wheel to be able to navigate around the page.
Hold Ctrl and scroll your mouse wheel to zoom in / out.