OFFICIAL FULL GUIDE VIDEO

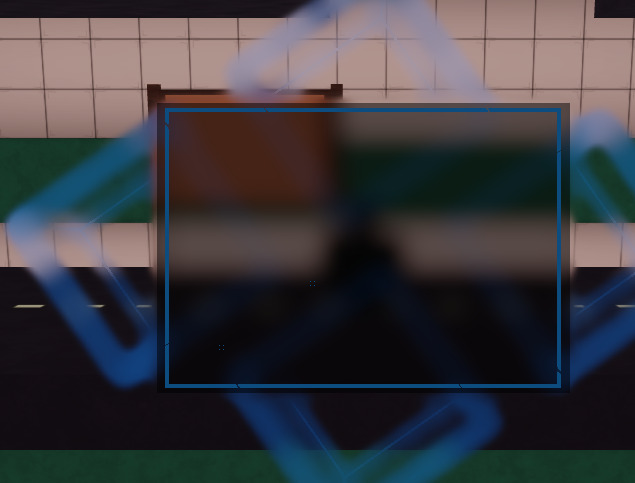
Example on how it would look like(old pics):


RECOMMENDED:
- Direct Blur
- Direct Blur + Blur Intensity Configuration
- Remastered Direct Blurring + Blur Intensity & Atrribute Value
[NEWST UPDATE INFO]
The new update includes a setting for the blur intensity.
local START_INTENSITY = 0.25
This is not supported on the module script and only for the
new direct blurring version.
[OLD UPDATE INFO]
The new update includes a setting for the blur intensity.
local BlurIntensity = 0.5
This is not supported on the module script and only for the
new direct blurring version.
Special thanks to @Scriptifi for the great idea!
So I saw this one topic and I wanted to re-make the module script basically to make everything simpler and automatic.
And well, I did that and here is how it turned out.
So first of all to actually make the blur frame all you need is one Script no local script just a script, You’ll need to place that script inside the frame that you want to be blurred.
When you did that all the code you’ll need to type in is this:
require(14724211362):ModifyFrame(script.Parent, "Blur")
OLD METHOD:
require(13699518434):BlurFrame(script.Parent)
After entering the provided code, it’s important to ensure that the background of your “main frames” are slightly transparent. This adjustment is essential to make the blur effect perceptible. By allowing some transparency in the background, you enable the blur to interact with the underlying elements, creating a noticeable visual distinction and enhancing the overall aesthetics of your design.
And I noticed that in the original post there was a bit of an outline blur, Which i also fixed by just setting the automatic generated frame’s size to Udmi2.new(0.95, 0, 0.95, 0)
The aim here is to streamline the process to the extent that you don’t need to take any additional actions. In other words, the goal is to make the entire system operate seamlessly and automatically, requiring minimal manual intervention or configuration on your part.
If you’re curious about the references DPT_3438751, DPT_51650037, and DPT_87511280, these identifiers represent specific depth of field settings for each frame. As previously mentioned, if you have three frames in your project, each frame has its dedicated and customized depth of field setting denoted by these unique identifiers. This individualization allows you to fine-tune and control the depth of field effect for each frame independently, ensuring precise and tailored visual results for your entire composition.
READ IF YOU RAN INTO ANY PROBLEMS [11/3/2024]
The script and pre-built script are fully functional unless you created an modded
version of the module script the scripts that i made should work 100% as intended.
If you still encounter problems try one of the options bellow.
-
Check if you are using a local script.
This is a HUGE mistake people make when starting.
in fact a lot of people contacted me just because of it. -
Check if you are using the minimum required graphics quality
The depth of field effect can only be seen on a certain level of quality -
Check for additional problems.
If the script worked but suddenly stopped make sure to check out this topic
again to see if the script is outdated. -
Always make your objects background a bit transparent.
Honestly this is just common sense you’ll need to make the background
transparent to actually see the blurring. -
Check for the right module id.
Sometimes i might forget to update the preview of the script so always
check the Current Module Id. -
if non of the above resolved the issue please contact me.
All of the blur effects will inherently produce reflections on various UI elements, such as frames and buttons. This is primarily because the parts responsible for these effects also influence the depth of field within the scene. Although these parts maintain transparency, comprehending the intricacies of how reflections function can be challenging. Reflections in this context occur as a result of the interplay between the blurred elements and their surrounding environment. The transparency of these elements allows light to interact with them, creating subtle visual reflections that enhance the overall aesthetic appeal and realism of the scene. Mastery of the nuances of such reflections often requires a deeper understanding of lighting, material properties, and shader programming to achieve the desired visual effects.
If you are unable to perceive the blur effect, please consider adjusting your graphics settings to a higher level. A minimum setting of 8 is typically necessary to fully experience the depth of field effect. Users with graphics settings below this threshold may encounter difficulties in discerning the blurring, as the lower settings may not adequately render the desired visual depth and realism.
In the event that none of the suggested solutions appear to resolve the issue, and you have confirmed that your graphics settings meet the minimum requirement, it is advisable to double-check whether you have utilized the correct Module ID. You can locate the precise Module ID within the provided post or documentation. Using the accurate Module ID is crucial for ensuring that the script or module functions as intended and can effectively apply the desired visual effects to your project.
Both the Old and The new version work perfectly fine.
It’s up to you which one to use.
Special thanks to TackleNevir for reaching out to me.
NEWEST MODULE/ SCRIPT
Old:
Direct Blurring + Blur Intensity Configuration
GET THE PRE-BUILT SCRIPTS HERE:
NEW VERSIONS:
Click here to get the pre-built version with all the newest available features.
Click here to get the module script
OLD VERSIONS:
Click here to get the pre-built version with all the newest available features.
Click here to get the module script
DIRECT BLUR VERSIONS:
Click here to get the pre-built direct blurring script.
If you have modified any of the scripts and want to publish it please add the origianl post inside.