Weld all the children of a model to player

hi, i’m struggling at welding lately, hopefully somebody knows how to help

  1. What do you want to achieve? I want to attach a model to a player’s back

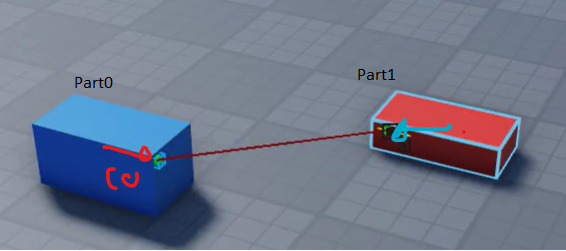
  2. What is the issue? I don’t know how to do it, i tried using instance.new and a weld to attach the model primary part to the humanoidrootpart, but even if they are welded to the primary part, the other children of the model won’t follow the primary part and will stay distant from the rest

  3. What solutions have you tried so far? i tried to look for solutions on the devforum, but i couldn’t find anything that really helps

i’ll leave you here my code, which is a localscript placed in StarterCharacterScripts. another thing that you should know is that ‘Detector’ is a model, and inside of it there are ‘position’, which is the primary part, and inside of it there are ‘button’ and ‘handle’, that are already welded to position but won’t follow it

local plr = script.Parent
local detector = game.ReplicatedStorage:WaitForChild("Detector")
local Hrp = plr:FindFirstChild("HumanoidRootPart")
local clone = detector:Clone()
clone.Parent = plr
local button = clone.position.Button

local weld = Instance.new("WeldConstraint")
weld.Parent = clone.PrimaryPart
weld.Part0 = clone.PrimaryPart
weld.Part1 = Hrp
clone.PrimaryPart.Position = Hrp.Position
clone.PrimaryPart.Orientation = Hrp.Orientation

Please be clear when explain something, i’m kinda new at scripting so i don’t know that much
1 Like

you cannot use .Position and .Orientation with weld constraints or welds.

This is explained in the documentation if you took the time to read it with the key words “none of the connected parts will move with it”. This behavior is the same with welds.

If a welded part’s Position is updated, the part will move but none of the connected parts will move with it. The weld will recalculate the offset from the other part based on the part’s new position.

I recommend using RigidConstraints like below video:

The math for rigid constraints can also be used for a weld is like this. This is to show an alternative methods with “Weld” other than rigid constraints and also to show how they are basically the same.

image

C0 is the CFrame offset from the center of the part which is represented by the attachment CFrame. Red arrow in the figure above.

C1 is the CFrame offset from the center of the other part. Blue arrow in the figure above.

That is what C0 and C1 represent in a weld for positioning and orientating two parts together.

local weld = Instance.new("Weld")

weld.C0 = attachment0.CFrame

weld.Part0 = attachment0.Parent

weld.C1 = attachment1.CFrame

weld.Part1 = attachment1.Parent

weld.Parent = attachment1.Parent --any parent under workspace to make the weld active
1 Like

so should i weld the model children to the primary part with rigid constraints and then weld the primary part to the humanoid root part by script with a normal weld?

1 Like

or what else? i didn’t fully understantd what to do with the script

1 Like

Perhaps this example will be a lot more clearer.

Create an attachment between the parts you want to weld, such as a sword and hand in the R15 I will be using the “RightGripAttachment” within.

Use this script to connect the two together in the same place

local dummy = script.Parent
local swordAttachment = workspace.ClassicSword.Handle.Attachment

local rightGrip = dummy.RightHand.RightGripAttachment

local rigidConstraint = Instance.new("RigidConstraint")

rigidConstraint.Attachment0 = rightGrip
rigidConstraint.Attachment1 = swordAttachment

rigidConstraint.Parent = workspace

Now the point I was trying to highlight, you can even use welds as well which have the same CFrame math and function basically the same:

local dummy = script.Parent
local swordAttachment = workspace.ClassicSword.Handle.Attachment

local rightGrip = dummy.RightHand.RightGripAttachment

--local rigidConstraint = Instance.new("RigidConstraint")

--rigidConstraint.Attachment0 = rightGrip
--rigidConstraint.Attachment1 = swordAttachment

--rigidConstraint.Parent = workspace

--This time use welds instead
local weld = Instance.new("Weld")
--Part 0 = the handle and the CFrame of the attachment inside the handle
weld.Part0 = workspace.ClassicSword.Handle
weld.C0 = swordAttachment.CFrame

weld.Part1 = dummy.RightHand
weld.C1 = rightGrip.CFrame

weld.Parent = workspace

Once you press run it will weld in the correct position and orientation.

This will also work if you are welding an assembly (An assembly is a model of parts welded together which acts as one part)

Sword with a brick for example

Running the script will weld the model as intended

If you want to change the position and orientation of the welding you can simply rotate and place the attachments in a different spot. You can also create these attachments via script as well if they don’t exist in the first place.

here is the place file for reference:

WeldingExamplePlace.rbxl (51.6 KB)

2 Likes

This topic was automatically closed 14 days after the last reply. New replies are no longer allowed.